Premium Only Content
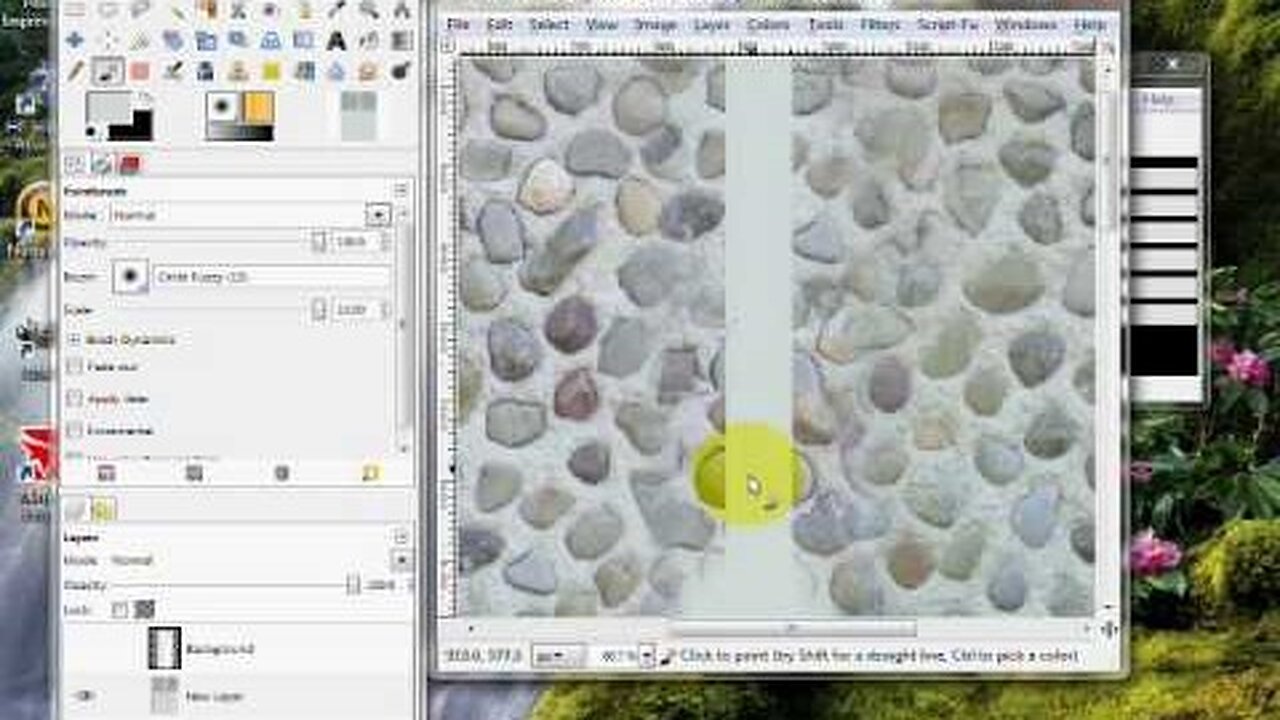
GIMP Channel Theme Creation Part 4 (Read Description)
(Update: I know these videos are quite outdated since you can no longer make backgrounds for your channel. Yet they aren't at the same time because you can apply these techniques for making channel art)
This was originally titled: "Adding Pictures in a Youtube Channel Template With GIMP". I renamed it so as not to confuse people.
-----
This is part 4 of a 4-part step-by-step tutorial on how to make YOUR own channel themes for free. Remember, You can do ANYTHING you want with your channel once you know how to make the boxes and stuff. This is just a general tutorial on how to customize things with my templates. A bonus tip is to put all of these boxes on their own layer as you go.
OK! This should be the end-all tutorial on how to add images into your channel themes. I thought it was obvious because it's JUST like when I added blood inside and outside the boxes by selection. The only thing different is that the image is the brush and you have to do things in a slightly different order for adding pics to boxes. I also show how to re-size images for any area of the theme. One thing I recommend though when re-sizing... don't make a image bigger unless you have to, it'll become blurry or pixelated. Smaller works fine though. Find a image that is huge and scale it down, it'll look better.
I forgot to also mention that if you want a "texture" like the cobblestone to not be so... "intrusive" so text can be viewed clearly... just tone the opacity down on the image layer until you can read text clearly.
My Deviantart where you can get the templates:
http://www.pkgam.deviantart.com
I apologize for the sound in the video. It's a little skippy and laggy because at this time I didn't know how to configure Camstudio properly yet. Side note: To fix the sound problem yourself if you have it, enable "MCI Recording" in the audio options.
Enjoy!
-
 1:29:31
Glenn Greenwald
13 hours agoGermany's Repressive Speech Crackdown Intensifies; U.S. & Russia Meet in Saudi Arabia and Open Cooperation; Plus: An Amazing Hate Crime in Florida is Buried | SYSTEM UPDATE #408
113K75 -
DLDAfterDark
7 hours ago $1.67 earnedDLD Live! What's Your Typical EDC/Civilian Load Out? Guns & Ammo & EDC?
28.7K3 -
 1:30:48
Redacted News
14 hours agoBREAKING! TRUMP AND PUTIN NEARING PEACE BUT EUROPEAN WARMONGERS TRYING TO STOP IT | REDACTED
207K271 -
 52:40
52:40
Candace Show Podcast
14 hours agoSaturday Night Lively: What Were They Thinking? | Candace Ep 148
182K163 -
 3:30:06
Man in America
9 hours agoDocumentary: The Money Masters 'How International Bankers Gained Control of America'
62.7K12 -
 1:10:40
PMG
1 day ago $2.86 earnedTom Hanks Plays a Racist MAGA Supporter On SNL!! UNBELIEVABLE
30.6K8 -
 2:11:29
Adam Does Movies
13 hours ago $1.70 earnedAsk Me Anything - Live!
36K1 -
 56:18
56:18
Flyover Conservatives
1 day agoFollow the Money: $4.7 Trillion in Government Fraud EXPOSED!; Flu Shots, Fear & Big Pharma Lies—What They DON’T Want You to Know - Dr. Stella Immanuel | FOC Show
40.2K1 -
 1:16:24
Anthony Rogers
1 day agoEpisode 354 - Current Events, Weather, and Other Clickbait
39.7K2 -
 25:10
25:10
Producer Michael
14 hours agoTHE HOTTEST FRAGRANCES FOR 2025!
37.6K2