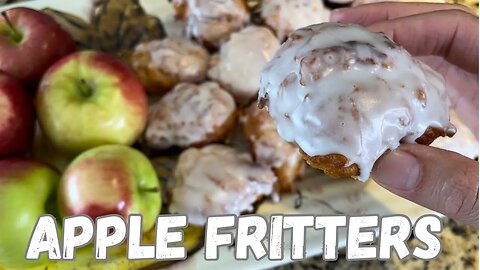
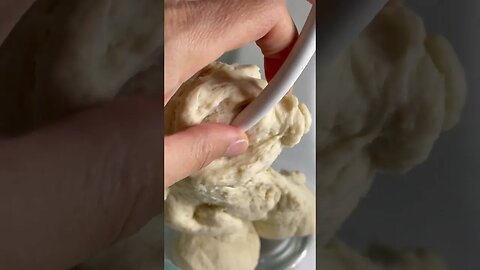
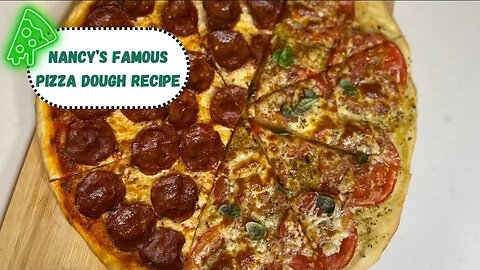
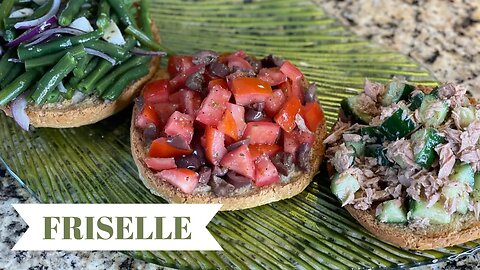
Roasted Pumpkin & Butternut Squash Soup (a simple Fall Harvest soup)
#pumpkinsoup #butternutsquashsoup #souprecipe
Roasted Pumpkin & Butternut Squash Soup (a simple Fall Harvest soup)
This is truly a flavourful fall/winter soup with the elevated flavours of the roasted veggies- it makes for a delicious and nutritious meal.
Ingredients
2 medium size butternut squash(2-3 lbs each)
1 pumpkin (about 2-3 lbs)
4 small red onions
1 whole garlic bulb
2 red peppers
3 regular size white potatoes
10% cooking cream as garnish
some olive oil
salt and pepper to taste
directions
slice open and remove the seeds from the squash and pumpkin (do not discard the seeds- you can roast them with seasoning as a snack)
once seeds are removed, lay them on a baking liner.
Cut, core and remove seeds from the peppers, quarter chop and lay on baking liner.
peel and quarter chop the onions and lay on baking liner.
slice the garlic bulb in half and place on a piece of foil, drizzle with olive oil and ball up the foil over the garlic and place on the baking liner.
once all vegetables are evenly spread out on the baking liners- drizzle them all with olive oil and season with a sprinkling of salt and pepper-
bake for about 1 hr at 400 degrees fh or 200 celsius.
pay close attention to not burn the smaller vegetables (you may have to remove or flip over some along the way).
while that roasts - dice up your 3 white potatoes and add to a pot of water, season with salt and boil until fork tender- once done (about 10 mins) let fully cool.
once the squash and pumpkin are fork tender and the veggies have a nice roast to them, remove from oven and let fully cool before either scooping out the puree or peeling the skin off the squash and pumpkin.
once all the squash and pumpkin has been scooped off or skin peeled off- start to add half of all veggies to a food processor and blend while adding water along the way to help reach the consistency you desire-
some like it more thick, others more loose.
once you reach a nice consistency, add your boiled potatoes.
once all has been blended, move to the stove top to add to a soup pot to bring everything back up to a nice boil- you can add more water if desired to adjust your consistency.
once it comes to a full boil, it is ready to serve-
you can keep it plain or add a drizzle of cooking cream over top-
OR
you can add some cooking cream to your soup as its coming to a boil for an even creamier texture- i would put 1 1/2 cups worth of 10% cooking cream if you wish to do that. it will be absolutely delicious.
serve with bread, or crackers and enjoy a warm soup packed with fall vegetables flavours that are elevated and so much more vibrant with the roasting process.
As always, Nancy & Franca thank you for watching
and continue to Love What UEAT
YOUTUBE: youtube.com/@lovewhatueat
INSTAGRAM : https://www.instagram.com/love_what_ueat/
16
views
Classic Apple Pie with Cream Cheese Crust
#applepie #applepies #applepierecipe
Classic 🍏 Apple Pie 🥧 with Cream Cheese Crust.
Ingredients for pie crust
3 cups of flour
2 sticks of unsalted room temperature cubed butter
1 block of room temperature cubed cream cheese
Directions for pie crust
to a food processor add all ingredients and blend until the dough begins to combine (you may need to stop every now and then and move things along with a spatula a few times before restarting to blend)you will know it is done when the dough starts to form along the sides.
at this point you will empty the dough on a clean working surface to gently shape the dough into a ball.
cut the dough into 2 balls- 1/3 to reserve for topping- the rest for the pie shell- wrap them both in plastic wrap and flatten them out- this will make for an easier rolling experience after the chilling process.
place in fridge to chill for 1 hr until ready to use.
🥧Ingredients /directions for pie filling
peel, core and slice 8 Granny smith apples
add the zest of 1 whole lemon
add the juice of 1 whole lemon
toss to coat to prevent browning
add 1/2 tsp of salt
add 1 tbsp of cinnamon
add 1 tsp of vanilla extract
add 1/2 cup of packed brown sugar
mix to combine and set aside to marinate while you roll out the chilled dough.
Now time to Grease your pie dish-
Next, roll our your pie dough on a clean and lightly floured surface - roll it out enough to cover the size of dish you are baking with- you will see this dough rolls out effortlessly, it is truly an amazing dough to work with! and so delicious, the perfect buttery creamy flakey texture.
once dough is rolled, be sure to lay it in your pie dish and press down all around before trimming off excess-
with a slotted spoon fill in the pie dish with the apple filling- you will see after about 20 mins of marinating there will be a lot of liquid left over- this is why we use a slotted spoon-
optional:you could take 2-3 tbsp of the juice to drizzle over the apples before covering the top of the pie - more I you wish-
once filled, it's now time to roll out the dough for the strips for the top-
lay them anyway you wish- we chose strips so you can see through the pie- you can also do a classic fully covered pie, just be sure to add some slits with a knife on the top of the pie to let the steam out to cook properly.
Baking time: 60-75 mins at 350 or until light brown and filling is bubbling- all dependingjour oven strength
for a warm apple pie(let cool a good 15 mins before slicing-) add a scoop of vanilla ice cream as a bonus treat!
keep in the fridge for up to a week (we recommend covering it with plastic wrap so it preserves best)
thank you for watching,
and as always continue to Love What UEAT
Nancy & Franca
YOUTUBE: youtube.com/@lovewhatueat
INSTAGRAM : https://www.instagram.com/love_what_ueat/f
12
views
Pumpkin Cream Cheese Pie 🎃 🥧
#pumpkinpie #thanksgivingdessert #pumpkincheesecake
Pumpkin Cream Cheese Pie 🎃 🥧
This particular recipe is a “marriage” between pumpkin pie and cheesecake.
It has a soft light texture that is creamy and delicious!
You are sure to get compliments from your family members and guests when you
serve this pie during your holiday gatherings!
———————————————————————————————————————
INGREDIENTS: PIE DOUGH
2 1/2 cups (320 grams) of sifted All Purpose flour (+ extra for dusting work surface)
1 stick = 1/2 cup (125 grams) unsalted butter 🧈 ( room temperature)
1/2 cup (64 grams) of sugar
2 large eggs 🥚 (room temperature)
—————————————————————————————————————————
PIE FILLING
1 package of cream cheese (250 gr./8 ozs.)
1 can sweetened condensed milk (300 ml./9.9 fl. ozs.)
2 cups (500 grams) pumpkin purée
2 teaspoons (1 fl ounce) vanilla extract
1 teaspoon (5.5 grams) pumpkin spice
3 large eggs 🥚 (room temperature)
—————————————————————————————————————————
TOPPING
2 cups (16 fl ounces) of cold heavy cream (35%)
1-2 cups (128 - 256 grams) of powdered sugar (your taste)
1-2 teaspoons (0.15 - 0.30 fl ounces)of vanilla extract (your taste)
OPTIONAL: 12 big Walnuts pieces and orange sprinkles
PREPARATION FOR PIE DOUGH
1) Place the sifted flour on your work surface and with the tips of your finger, make a “well” in the centre of the flour.
2) In a bowl, beat the eggs and sugar till well combined and slowly pour the mixture into the “well” a bit at a time, while incorporating the flour into the egg mixture with a fork.
3) Add the cubed butter into the egg mixture and mash the butter into the egg mixture with a fork. Now it’s time to use the best “tools” in the kitchen, which are your hands. Collect and work your dough and form it into a ball.
4) Cover the dough with plastic wrap and gently flatten out the dough. By flattening the dough makes it easier to roll it out. Place the dough in the fridge for 45-60 minutes.
5) With a sheet of paper towel, lightly grease your pie dish with butter or vegetable shortening and set it aside.
*** WHILE THE DOUGH IS IN THE FRIDGE, WE CAN PREPARE THE PIE FILLING
—————————————————————————————————————————
PREPARATION FOR PIE FILLING
*** NOTE: you might have some leftover pie filing(all depending on the size and the depth of you pie dish) ***
1) In a large glass bowl, beat the cream cheese with a hand mixture and then add the condensed milk and beat till combined.
2) Add the rest of the ingredients into the bowl, and beat till all the ingredients are well incorporated and place the filling in the fridge till ready to use.
TIME TO ROLL OUT THE DOUGH
***NOTE: we will be blind baking the pie dough for approximately 20-25 minutes in a preheated 350 degrees F before adding the filling.
1) Flour your working surface and roll out your pie dough, large enough that the dough overlaps the sides of your baking dish. (Use your pie dish as a guidance).
2) Trim off the excess dough and with a fork, dot the dough. Line the dish with parchment paper and fill the dish with dry kidney beans, rice or pie weights.
Bake in a preheated 350 F oven for approximately 20-25 minutes.
*** If you are baking baking mini pie shells, follow the instructions on the box
3) Once the pie crust has been blind baked, remove from the oven and pour in your filling and back into the oven to bake of 60 minutes.
While the pie 🥧 is baking, we can prepare the whipped cream.
1) In a large glass bowl, pour your COLD heavy cream and beat with an electric hand mixer. Make sure that your heavy cream is cold, as it will whip into soft peaks. Gradually add the powdered sugar and vanilla extra and place in the fridge unti the pie has completely cooled before decorating it. 🥧
2) You can decorate your pie by piping the whipped cream, or simply spread the whipped cream with a regular spatula or an off set spatula.
We also topped the whipped cream with some big walnut pieces and orange sprinkles.
—————————————————————————————————————————
Enjoy the fall season with this luscious pumpkin cream cheese pie 🎃🥧🍁🍂 🦃
Nancy and Franca thank you for watching
And as usual, continue to LOVE WHAT UEAT
🫶😋
55
views
Carne alla Pizzaiola (Meat Pizza Style)
#carneallapizzaiola #carne #meatsause #meatdishes
Carne alla Pizzaiola (Meat Pizza Style)
This dish is one of my childhood favourite meal !
Essentially, this is served as a main dish, consisting only of meat cooked in tomato sauce 🥫.
You can use any kind of meat, from chicken, pork chops, beef or veal. Also, any type of inexpensive cuts of meat (which should be tenderized with a meat mallet before cooking).
In our home, we cook this savoury dish in the oven. It brings the taste of the tomato sauce 🥫 to a whole new delicious level.
However, should you want to prepare a side dish to accompany the carne alla pizzaiola, may we suggest, roasted potatoes 🥔 and peppers, OR steamed green beans with polenta and pour some of that luscious sauce over the polenta. 😋
—————————————————————————————————————————
INGREDIENTS:
1 can of San Marzano tomatoes (or your own homemade sauce or passata)
4 flank steaks 🥩 (or your choice of meat)
1/4 cup of olive oil
1/2 tablespoon of black pepper
1/2 tablespoon of powdered garlic 🧄
2-3 tablespoons of oregano 🌿
Salt (to taste)
—————————————————————————————————————————
Preheat oven at 425 degrees Fahrenheit
1) In a large bowl, pour the canned tomatoes and crush them with your hands.Then add all your ingredients and stir until all are well combined.
2) Depending on your choice of meat, decide if you should use the meat mallet.In a deep baking dish, ladle some of the tomato sauce at the bottom of the dish and nestle in your meat. Ladle the remaining tomato sauce over the meat. Cover the dish with aluminum foil and into the oven for 2 - 2 1/2 hours (or until the meat is tender).
3) At the half way mark, remove the dish from the oven and turn over the meat and stir the tomato sauce, cover the dish again with the aluminum foil and poke a few holes in foil for some of the steam to escape. This will help the tomato sauce to thicken.
4) This dish is eaten with lots of bread (sliced pagnotta) to soak up all that delicious and savoury tomato sauce. When we wipe our dishes “clean” with bread, it’s called “la scarpetta”. SO GOOD…. YUM … YUM 😋
And my father would always have a bottle of wine on the table ! 🍷
Enjoy and BUON APPETITO !
We hope you give this recipe a try !
Nancy and Franca thank you for watching
And as always, continue to LOVE WHAT UEAT
🫶😋
Sent from my iPad
YOUTUBE: youtube.com/@lovewhatueat
INSTAGRAM : https://www.instagram.com/love_what_ueat/
28
views
Apple Fritters (soft, pillowy and so delicious)
#applefritters #appledessert #fritters
DRY MIXTURE INGREDIENTS
1 & 2/3 cup of all purpose flour
3 tbsp sugar
2 & 1/2 tsp baking powder
pinch of salt (about 1/4 tsp)
3/4 tsp cinnamon
*neutral oil for frying
WET MIXTURE INGREDIENTS
2 apples (any kind)
2 tbsp sugar
1/4 tsp cinnamon
2 large eggs
1/2 cup milk
1 tsp vanilla extract
zest of 1 whole lemon
juice of 1 whole lemon
2 tbsp melted and cooled butter
DIRECTIONS FOR WET MIXTURE
wash, peel and grate 2 apples
add the zest of 1 whole lemon
add the juice of 1 whole lemon
toss all together to insure no browning(the lemon aids in this, as well as adding flavour)
add 1/4 tsp cinnamon
add 1 tsp vanilla
add 2 tbsp sugar
add 2 tbsp melted and cooled butter
mix all to combine and set aside
break open 2 large eggs and give it a quick whisk,
then add 1 tsp vanilla and 1/2 cup of milk and mix again ad set aside (you could have added it to grated apple mixture as well- totally fine)
DIRECTIONS FOR DRY MIXTURE
in a large bowl add your 1 2/3 cup flour
add 3/4 tsp cinnamon
add 3 tbsp of sugar
add 2 1/2 tsp baking powder
add a pinch of salt (about 1/4 tsp)
give it a whisk and add all wet ingredients to bowl and mix with spatula until well combined (careful not to over mix)
in a deep frying pan fill it with a neutral cooking oil with high smoke point (ex: canola, vegetable, avocado, coconut oils etc)
with 2 tea spoons - scoop a dollop of the batter(about golf ball size) and place gently in the heated oil. (to insure oil is ready, simply place a tiny bit of batter inside- when it floats to the top then that means the oil is hot enough)
fry for a total of about 2-3 mins total until golden on both sides (1 min or 1 1/2 min each side)
then lay or cooling rack to drip and cool off.
finish with some powdered sugar icing which is a mixture of powdered sugar and milk (aim for a thick consistency) dip and lay again on rack to have icing fully dry-
or you can add powdered sugar or simply leave them plain
these are moist, soft and pillowy and ohhh so good!!!! absolutely delicious! and as the apples are grated they are not hard at all, perfectly tender and a great distribution of apple flavour.
as always we thank you for watching and hope you give this recipe a try,
until then, continue to Love What UEAT
Nancy & Franca
YOUTUBE: youtube.com/@lovewhatueat
INSTAGRAM : https://www.instagram.com/love_what_ueat/
20
views
Soft Burger Buns (no sugar added)
#burgerbuns #softbun
Ingredients
150 ML or about 2/3 cup of milk
150 ML about 2/3 cup of water
7 grams or about 2 1/4 tsp quick rise yeast
50 ml or about 3 tbsp of a neutral oil
1 egg white (keep the yolk)
1 tsp salt
550 grams or about 4 & 3/8 cups of flour
2 tsp of vegetable lard
(yolk of 1 egg and a splash of milk for egg wash)
Directions
add milk and water to a pot and warm it up slightly (just like you warm a baby's bottle) a touch more than room temp.
to a mixing bowl add the liquid, yeast, oil, egg white and lightly mix.
add the salt to the flour (whisk optional but always best) then add dry to wet and mix on low to incorporate- once incorporated add the vegetable lard and mix another min to incorporate and then speed up the process and mix on medium high for 2-3 mins
cover and let rest in warm spot for 1 hr until doubles in size.
meanwhile, grease your baking dish and prepare egg-wash mixture ( the remaining yolk of the egg earlier used and a splash of milk) be sure this is kept room temperature -
You can choose to egg wash before or after second rise but best to keep room temp egg wash because if you brush this on cold to your buns it can cause issues when rising or deflate your buns of brushed on after the rise.
when dough has risen, lightly flour your surface and roll the dough into a log to cut into size. this recipe makes 6 large burger buns or 8 regular size burger buns.
once cut, roll them in circular motions in the palm of your hands for a few seconds and then place in baking dish.
once done, egg wash them and cover with plastic wrap and cover and let sit in a warm spot for another 30-45 mins until double in size.
once the final rise is done, remove plastic wrap and bake in oven at 350 FH or about 177 celsius for around 30 mins (every oven is different, so please keep an eye on them) once light golden they are done-
remove and place on cooling rack for 10 mins-
then remove from baking dish and let cook another 5 before handling them.
Use them for any savoury meal , burgers, pulled porc, any kind of sandwich! it is absolutely the best classic bun recipe ever!
you can opt to grill the buns before using them- or eat them soft as is.
as for the rest of them, plastic wrap them or place them in a bread box- somewhere they would keep fresh for a few days- they also freeze well (wrap them individually) and remove from freezer as needed.
this is an inexpensive way to save money and not lack on flavour ! and control what is in your food
as always we thank you for watching,
hit that subscribe button and continue to Love What UEAT
Nancy & Franca
YOUTUBE: youtube.com/@lovewhatueat
INSTAGRAM : https://www.instagram.com/love_what_ueat/
21
views
Easy Pizza Dough Recipe (no sugar added)
#pizzadough #pizzadoughrecipe #pizzarecipe
Easy Pizza Dough Recipe (no sugar added)
This pizza dough makes 2 thin crust pizzas- (8 slices) or one thick crust
Ingredients
10 grams (about 2 tsp) Quick rise instant yeast
215 ml (about 7 1/2 ounces) of warm water
45 ml (about 3 tbsp) of olive oil
5 grams (about 1 tsp) of salt
300 grams (about 2 1/2 cups) flour
oregano
chili flakes
fresh basil
vegetable lard (about 1 tsp)
Directions
for best results use a scale (you can find affordable ones on amazon for about 20$)
Add yeast to bowl with warm water and olive oil, give it a light whisk and set aside for 5 mins, meanwhile measure out the flour and add your salt to it and gently whisk.
Now add the dry to wet and with a stand mixer start slow to incorporate the flour into the wet mixture- scrape down the sides if needed-
once fully incorporated, turn up the speed to a 5/6 (medium high) and mix for an additional 3 mins.
once done, scrape sides to gather dough into a ball and add a drizzle of olive oil to coat the bowl and dough so as dough rises it can grow easily and slide up the bowl as it grows.
for the dough to properly rise, cover the bowl with a lid or plastic wrap or kitchen towel and place it in a warm spot to be left unbothered and to rest and rise. dough should rise in about 1 hr (double in size)
once dough has risen, preheat oven to 475 degrees FH or 250 Celsius and prepare your pans with a little vegetable lard (this prevents the dough from shrinking), it will easily stay in place and bake the crust to utter perfection! light and crisp.
lightly oil your hands to handle the dough, shape it into a ball and divide in two. stretch both doughs on your pans and dress them as desired.
i made a pepperoni cheese (olive oil, tomato sauce, oregano, mozzarella, pepperoni, chili flakes) as well as a pizza bianca. ( oregano, chili flakes, olive oil, tomatos and mozzarella, fresh basil)
baked them for about 15 mins at 475 fh(250 celsius) or until done. *attn: all ovens are different so please pay close attention the first time making them as your oven may differ from mine*
once cooked, lay on cooling rack for about 5 mins before slicing into 8 beautiful pieces.
*NOTE: you can also do this by hand , no need for a stand mixer!
now sit back and enjoy the best pizza ever! keep in mind if you like a thick crust, simply omit dividing the dough! as simple as that :)
Nancy & Franca thank you for watching,
and remember to continue to Love What UEAT
YOUTUBE: youtube.com/@lovewhatueat
INSTAGRAM : https://www.instagram.com/love_what_ueat/
15
views
Fettuccine Alfredo (1 of many variations) rich and creamy sauce
#fettuccinealfredo #alfredosauce
Fettuccine Alfredo - A creamy delicious pasta dish
A simple, easy, healthy and economical meal that can be ready to serve in
30 minutes. This dish comes together quickly and so delicious 😋!
INGREDIENTS:
One pack of 450g fettuccine (1 pound)
1 stick of unsalted butter 🧈
2 containers (473 ml each) or 4 cups of 15% cooking cream
4 tablespoons of grated parmigiano reggiano
A handful of fresh chopped parsley 🌿
salt and pepper to taste
————————————————————————————————————————————-
DIRECTIONS:
1) Bring to boil a big pot of water. once water is boiling,add your fettuccine and salt
generously. Cook the pasta 2-3 minutes less than instructed on the package
because the fettuccine will finish to cook in the cream sauce as aldente.
2) While the fettuccine are cooking, in a skillet over a low/medium heat, start to melt the butter 🧈. Once the butter has melted, add your heavy cream, slowly whisking, bring the cream to a simmering boil and add the grated cheese.
3) Using a pair of tongs, lift the cooked fettuccine from the hot water and gently
add the noodles into the Alfredo sauce. Toss well to combine and add the black
pepper and IF NEEDED add another sprinkle of salt. Give it another toss.
4) Remove the skillet off of the burner and plate the fettuccine in a “family size”
serving dish and garnish with a handful of freshly chopped parsley 🌿, another sprinkle of pepper and Parmesan.
This dish is best served right away.
5) Should you have any leftover fettuccine, reheat over a low/medium burner and add
some milk or water to help loosen the fettuccine.
Serve with a glass of white wine !
Bon Appetite 😋
Nancy and Franca thank you for watching
And as always, continue to LOVE WHAT UEAT
🫶😋
YOUTUBE: youtube.com/@lovewhatueat
INSTAGRAM : https://www.instagram.com/love_what_ueat/YOUTUBE: youtube.com/@lovewhatueat
INSTAGRAM : https://www.instagram.com/love_what_ueat/
9
views
Friselle ( A refreshing dish that can be ready to eat in less than 15 minutes)
#friselle #italiansnack
Friselle ( A refreshing dish that can be ready to eat in less than 15 minutes)
Friselle is a big donut shaped dry bread that is twice baked that has a very long shelf-life and can be stored in your pantry for many months.
After the first bake, the friselle are completely cooled before being horizontally sliced in half, and back into the oven for the second bake until they are toasted to perfection.
It can be served as an appetizer, snack or a light meal with many different various toppings.
The first time I (Franca) ate friselle, it was over 30 years ago. My husband and I went to Italy for our niece’s wedding and my sister-in-law served her guests this dish as a light supper. I immediately took a liking to this dish! It was simply delicious 😋!
When I arrived back home to Montreal, I introduced this dish to my family and ever since then, we have been preparing this dish on a regular basis.
We will show you how to prepare the friselle, with 3 different toppings of our choice. Keep in mind that we “eye balled” the amount of ingredients, enough to top one friselle.
INGREDIENTS:
3 Friselle
Toppings:
1) First topping: Steamed green string beans, bocconcini, sliced red onions
2) Second topping: Cubed tomatoes 🍅 with Kalamata olives
3) Third topping: Tuna with cubed cucumbers 🥒
4) All the toppings have been dressed with a drizzle of olive oil, a sprinkle of oregano, and salt and black pepper to taste.
Here are some other topping ideas: a tossed salad, a mixture of canned beans,steamed vegetables 🥗, grilled chicken, ricotta, roasted peppers and so many more …..
DIRECTIONS:
1) Wet your friselle under cold water tap and place it on your plate. Top it with the topping of your choice and it’s ready to be sliced into and enjoy !😋 🍷 Now isn’t that easy !!!
Nancy and Franca thank you for watching
And as always, continue to LOVE WHAT UEAT
🫶😋
Sent from my iPad
YOUTUBE: youtube.com/@lovewhatueat
INSTAGRAM : https://www.instagram.com/love_what_ueat/
6
views
How to make soft Lemon Cookies (soft and chewy cookies)
#lemoncookies #softcookies #softlemoncookies
How to make soft Lemon Cookies (soft and chewy cookies)
Ingredients
1 stick (1/2 cup of softened butter)
3/4 cup granulated sugar
zest of 1 lemon
juice of half a lemon
1tsp of lemon extract
1 whole egg room temperature
1 1/2 cup of all purpose flour
1 tsp baking soda
pinch of salt
powdered sugar to roll cookies in
Directions
mix well your butter and sugar
add the zest of a lemon - mix to combine
add juice of half a lemon- mix to combine
add 1 tsp of lemon extract- mix to combine
add 1 whole egg room temp- mix to combine
sift in your flour, baking soda and salt and - mix to combine
cover with plastic wrap and chill in the fridge for 30 mins
scoop with a scooper for even size cookies and roll in powdered sugar and lay on baking sheet (i am using a silicone baking sheet- if you do not have one please place cookies on a parchment covered baking sheet)
bake at 325 F for 25-30 mins (or until light golden around the edge)
let fully cool on your baking sheet before biting into it!
you will have a soft chew bite of a lemon explosion cookie! your taste buds will thank you !
Nancy and Franca as always thank you for watching, until the next upload - continue to Love What UEAT.
YOUTUBE: youtube.com/@lovewhatueat
INSTAGRAM : https://www.instagram.com/love_what_ueat/
17
views
Orzo Pasta Salad- A refreshing summer dish
#orzopasta #pastasaladrecipe #pastasalad
Orzo Pasta Salad- A refreshing summer dish
Ingredients (we did as per our needs but you use as little or as much as you like)
Orzo pasta (1 pack 500 grams) in video we used 250 grams
cucumbers( 1 diced)
cherry tomatoes (diced about 2 cups)
marinated italian olives (pitted and chopped about 1 cup)
Bocconcini (1 container 400 grams diced)
Chickpeas strained (1can)
parsley washed and chopped
juice of 1 lemon
lemon zest of 1 full lemon
salt and pepper to taste
a drizzle of olive oil
Directions
boil your package or pasta in salad water and cook to all dente-
while pasta water is cooking - dice up all your ingredients
once pasta is cooked to al dente (about 8 mins or so)
remove and strain and rinse in cold water to stop cooking process
drizzle with olive oil, toss and set aside to fully cool-
once pasta is cooled you just add all your veggies to a bowl- season with salt, pepper, olive oil ,parsley, pesto, lemon juice and lemon zest and give it a good toss- you can serve right away- but preferably let chill at least a couple of hours in the fridge so that the flavours marinate and marry together making each bite that much more delightfully refreshing and bright ! this is such an easy pasta dish to make and impress anyone with!
serve as a side dish or a mail meal!
visually eye catching and your taste buds will burst with the flavour combination.
note that you can choose any seasonal veggies you want! make it your own and get creative.
Nancy and Franca thank you for watching and as always continue to Love What UEAT!
YOUTUBE: youtube.com/@lovewhatueat
INSTAGRAM : https://www.instagram.com/love_what_ueat/
2
views
How to make Peperonata (1 of many variations)
#peperonata #italianbreakfast
A one pan, great-tasting simple Southern Italian dish you can’t resist.
And now it’s popular all over Italy !🇮🇹
INGREDIENTS:
3 bell peppers - julienned
(we used one red, one orange and one yellow…you can also use green bell peppers 🫑)
3 large potatoes- julienned (Russet potatoes 🥔 work best for this dish)
2 onions 🧅 - julienned
5 medium size Italian sausages (we used the mild flavour; you may use the flavour of your choice)
Drizzle of olive oil
Salt 🧂 and black pepper to taste
DIRECTIONS: PREP ALL YOUR INGREDIENTS BEFORE HAND
1) Rinse your peppers 🫑 and pat them dry with a clean dish towel. Cut them in half and remove the core and seeds, cut them into julienne strips.
Peel and rinse your potatoes 🥔.Pat them dry with a clean dish towel and cut into julienne strips.
Peel your onions 🧅 and cut them into strips.
Remove the casings from the sausages.
2) In a deep large frying pan, over medium heat burner, drizzle the olive oil.
With your hands, tear apart the sausages into bite size pieces, sautéing
till the sausages are lightly coated. ( You may also use a knife to cut the
sausages into bite size pieces).
3) Add your peppers into the pan, give it a stir. Place a lid over the frying pan.This will create a bit of steam and will tenderize the peppers
(approximately 2-3 minutes).
4) Now it’s time to add the onions 🧅 and potatoes 🥔. Season with salt 🧂 and black pepper to taste. Keep in mind that there is salt in the sausages, so don’t over salt 🧂.
Periodically stir during the frying process, approximately another 5-7 minutes. OPTIONAL … Cover with lid from time to time -
5) The entire frying time is approximately 15 minutes; however, to make sure that the peppers 🫑 and potatoes 🥔 are fully cooked, insert them with a fork. The peppers and potatoes should be tender. If not, fry for a few more minutes.
6) This dish can be served hot or room temperature. Any leftovers can be refrigerated for 3-4 days.
7) E pronto da mangiare!!! It’s ready to eat !!! 😋
You can scoop the peperonata in between a panino, OR
eat separately with Italian sliced bread on the side, accompanied with a
nice glass of red wine 🍷!
Nancy and Franca thank you for watching
And as always, continue to LOVE WHAT UEAT
🫶😋
YOUTUBE: youtube.com/@lovewhatueat
INSTAGRAM : https://www.instagram.com/love_what_ueat/
10
views
How to make homemade Basil Pesto(Nut Free / Sugar Free)
Ingredients:
8 cups of basil leaves🌿 (no hard stems)
2 cups grated cheese (we use Parmigano Reggiano)
about 3/4 cup olive oil
4 garlic 🧄 cloves
One ice cube tray
Directions:
1) Rinse your basil leaves and lay them on a clean dish towel, cover with another clean dish towel and pat dry.
2) Place the basil leaves in a food processor, along with the garlic 🧄 cloves, & olive oil and on medium/high speed, blend all together.
3) Remove the cover and add the grated cheese and the rest of the olive oil. Scrap the sides to make sure that all is well combined. Your pesto should be silky smooth. If desired, you can thin out the pesto by adding more olive oil.
4) Pesto is ready to be used. Store the leftover pesto in the fridge, covered for up to one week.
*Note: taste the pesto along the way and adjust to your flavour profile.
5) HOW TO FREEZE PESTO: Spoon the pesto into the ice cube tray and cover with plastic wrap and top with aluminum foil, seal tightly and place in the freezer until frozen.
6) Once frozen, remove from freezer, flip over the ice cube tray to remove the cube sized pesto and place them in a container and then back into the freezer. The pesto can be easily kept in the freezer for up to 4 months.
This way you can thaw as little or as much as you need for your cooking recipe.
Nancy and Franca thank you for watching
And as always, continue to LOVE WHAT UEAT 🫶😋
YOUTUBE: youtube.com/@lovewhatueat
INSTAGRAM : https://www.instagram.com/love_what_ueat/
37
views
How to make savoury Chocolate Chip Bread / Soft Bread Recipe
#chocolatechip #breadrecipe #chocolatebread #painauchocolat #asmrfoods
How to make savoury Chocolate Chip Bread / Soft Bread Recipe
Ingredients
1 1/4 cup whole milk (slightly warmed) / 290 ml
1/4 cup water (slightly warmed) / 100 ml * + 2 extra Tbsp at the end / 30ml
4 tsp almond extract /20 ml
2 tsp dry activated yeast /14 grams
3 cups all purpose flour /430 grams
1 tsp salt /5 grams
1 tsp espresso powder/5 grams
3 tbsp cocoa powder /35 grams
directions
slightly warm up and add to a bowl your milk and water just enough to remove the chill (warm like a newborn baby bottle) as you do not want to kill the yeast if the mixture is too hot.
add the almond extract
add the yeast
whisk and set aside for 10 mins
in a separate bowl
add your flour (whisk it to fluff it up)
add your salt
add espresso powder
add cocoa and whisk this all
once your liquid mixture has rested 10 mins, gently pour it into your dry mixture and combine until well incorporated.
*ATTN: you may need a few more tsp's of warm water- go by the feel of the dough, if to dry add a touch of water 1 tbsp at a time and mix it in well.
I added 2 tbsp's extra / 30 ml
once well incorporated and no more flour bits remain, cover your dough with plastic wrap and keep in a warm spot in your home and let rest a min of 2 hrs- until it has doubled in size
once doubled in size, remove onto a floured surface and roll out enough to add some goodies to it-
while rolling be sure to keep lightly dusting flour to avoid it sticking-
add the zest of 2 medium oranges and some chocolate chips
I added about 2 handfuls (enough to cover lightly the surface of the dough)
you will see i added all the orange zest at once and gently spread it over the doughs surface and then sprinkles the choco chips- and then folded and re-rolled the dough for one last sprinkle of choco chips-
once done, i decided to them roll the dough in a long log and did 2 folds before using a bench scraper to help shape into a tight and neat ball-
once formed into a ball- add the ball to a floured silicone steamer for a last rest of 1 hr.
OR
choose to bake this in a dutch oven - by placing it onto parchment paper and covering with a towel for a final rest of 1 hr before adding to the pre heated dutch oven to bake in the oven.
once final resting is done, you can score your bread if desired (i scored before final rest, so i lost my design... usually you score right before baking*
bake in 450 degrees (230 celsius)preheated oven lid on for 30 mins to achieve a cooked yet soft bread.
if you want a crispy exterior- bake for extra 15 mins lid off-
slice warm or wait for it to cool down, as you wish!
this bread if kept wrapped up or in the steamer once fully cooled with lid on will remain nice and soft and also toasts very well! (just keep in mind if you put a lot of choco chips they may melt in toaster- be mindful of how much choco chips you added to your personal recipe).
I enjoy my slice with some cream cheese and jam! or also some peanut butter! yum!
ATTN: this is a savoury bread, the sweetness only comes from the choco chips- or toppings you add to it.
YOUTUBE: youtube.com/@lovewhatueat
INSTAGRAM : https://www.instagram.com/love_what_ueat/
23
views
Mozzarella in Carrozza / Italian grilled cheese
#mozzarellaincarrozza #grilledcheese #mozzarella
Mozzarella in Carrozza / Italian grilled cheese ( The bread is the “carriage” that holds the mozzarella)
Ingredients:
Plain day old bread 🥖 (we used Italian pagnotta bread)
Toast can also be used for this recipe
Eggs 🥚
Flour
Pinch of salt 🧂
Pinch of black pepper
OPTIONAL: Bread crumbs (plain or Italian seasoned)
Vegetable oil for frying (or any oil that is recommended for deep frying)
Directions:
NOTE: When dipping the sandwich into any of the stations, make sure that it is covered completely, including the sides. Making sure that the sides are covered, locks in the mozzarella and prevents it from oozing out during the frying process.
1) Cut off the crusts from around the slices of bread.
2) Place slices of mozzarella in between 2 slices of bread and press firmly on both sides. Make sure that the mozzarella does not surpass the bread, because it will burn and ruin the sandwich. (trim off if needed)
3) Dip the sandwich into the flour, ensuring that all the sandwich is covered with flour including the sides and shake off any excess flour.
4) Dip into the beaten eggs 🥚, (pinch of salt and pinch of black pepper has been added into the eggs) on both sides and all around the edges and place on a platter.
FOR THOSE VIEWERS THAT WANT TO ADD A LITTLE EXTRA CRUNCH, please
follow step # 5.
5) Lightly dip into the breadcrumbs and once again, ensure that the sandwich is completely covered, including the edges.
6) Once you have prepared all your sandwiches, place the platter in the refrigerator for 30 minutes. This will give time for the eggs to gently be absorbed into the slices of bread, making for a delicious sandwich 😋
7) Over a medium heat burner, place your skillet and add the vegetable oil, enough to cover 1/2 of the sandwich.
8) Once the oil is heated, carefully place the sandwiches into the skillet(do not overcrowd) and frying gently but well browned on one side (approx. 2 minutes) then flip and fry the other side.
9) Place the sandwich on a platter lined with paper towels to absorb the
excess oil.
10) Repeat the process with the rest of the sandwiches.
11) Sandwiches are best served warm/hot, as a snack, quick light lunch, or as an appetizer.
12) And now it’s time to EAT and ENJOY! 😋😉
Nancy and Franca thank you for watching
And as always, continue to LOVE WHAT UEAT 🫶😋
YOUTUBE: youtube.com/@lovewhatueat
INSTAGRAM : https://www.instagram.com/love_what_ueat/
26
views
How to make Marbled Biscotti / Biscotti Marmorizzati /cake biscotti / nut free
Ingredients:
2 1/4 cups of sifted all purpose flour (plus + 1/4 cup of flour extra for dusting your working surface)
1 cup of sugar
3 eggs 🥚 (room temperature)
1/4 cup unsalted butter 🧈 (room temperature)
1 teaspoon baking powder
1/2 teaspoon of baking soda
1/4 teaspoon of salt 🧂
1/2 teaspoon of vanilla extract
1/4 cup of cocoa powder (sifted)
EGG WASH: one egg 🥚 + 1 1/2 tablespoons of water
——————————————————————————————————————-
DIRECTIONS:
1) In a large mixing bowl, slightly mix the butter with an electric hand mixer on low speed, then gradually add the sugar, baking powder, baking soda and salt and mix on low/medium speed till well combined.
2) Add the eggs 🥚 and vanilla extract to the mixture and beat until all is well incorporated.
3) Time to gradually add the flour into the mixture, as much as the electric
mixer allows, then add the rest of the flour and mix and incorporate well by using a wooden spoon or spatula.
4) Divide the dough in half and set aside one of the portions. This will be used for the vanilla part of the biscotti.
5) Add the cocoa powder into the other portion of the dough. With a wooden spoon (or spatula), mix, combine and incorporate well.
NOTE: If you feel that the texture of the dough is too sticky, you may add a couple of extra tablespoons of flour.
FOR YOUR EASIER UNDERSTANDING: the textures of the doughs feel like a thick cake batter.
6) Wrap each dough separately in plastic wrap, place them in the refrigerator and let chill for 2 hours.
7) After the 2 hour mark, prepare your cookie sheet lined with parchment paper or silicone liner, and preheat your oven at 350 degrees Fahrenheit/180 degrees Celsius.
8) Divide the vanilla dough in half and do the same with the chocolate dough.
9) Lightly flour your working surface. Take one part of the vanilla dough and top it with one part of the chocolate dough.
10) Roll both dough’s together (dust with more flour, should your working surface stick) and fold and twist them into logs, and lightly flatten the top of the logs. We shaped the logs in approximately 12” in length and 3” in width.
11) Repeat step 10 with the other 2 halves of dough and place them on your cookie sheet. Lightly brush the logs with the prepared egg 🥚 wash,
don't forget to egg wash all around, including the sides. Keep in mind that you will have a lot of egg wash left over.
12) NOTE: The logs will expand as they bake due to the fact that there is baking soda and baking powder in the mixture.
13) Place and bake in a preheated oven for 20-25 minutes or until lightly browned. Cool the logs directly on the cookie sheet for 10-15 minutes before carefully transferring them on a wire rack to cool completely (approx. 40-45 minutes).
2nd BAKE: Preheat the oven at 325 degrees Fahrenheit/ 160 degrees Celsius
14) Transfer the logs (one at a time) on a cutting board and with a serrated knife (or a sharp knife) cut the logs into approximately 1” - 1 1/2” slices and place the slices, cut sides down on a cookie sheet. Bake for 5-10 minutes or until lightly browned at the bottom.
15) Turn slices over and bake for another 5-10 minutes or until lightly browned. Transfer to a wire rack and let cool completely.
16) We did the 2nd bake directly on a wire rack for 15-20 minutes.
This allows the flow of the temperature to circulate evenly over and
under the biscotti, and you eliminate the steps of turning them over and having to transfer them onto a wire rack.
HOPE YOU LIKE THIS TIP 😉
17) These biscotti are kept very, very well on your counter tops for weeks, OR can easily be stored in an air tight container and placed in the freezer
for up to 3 months.
And now it’s time to EAT and ENJOY with 🥛 ☕️ 🫖 🍷 ! 😋
Nancy and Franca thank you for watching
And as always, continue to LOVE WHAT UEAT 🫶😋
YOUTUBE: youtube.com/@lovewhatueat
INSTAGRAM : https://www.instagram.com/love_what_ueat/
63
views
How to make Pizzelle (classic authentic italian cookies)
#pizzelle #italiancookies
How to make Pizzelle (classic authentic italian cookies)
PLEASE NOTE that you will need a pizzelle iron to make these cookies.
Follow the baking instructions that come along your pizzelle iron, as the instructions might slightly vary from one maker to another.
Ingredients:
3 large eggs 🥚 (room temperature)
1 3/4 cups of all purpose flour
1 1/2 teaspoons of baking powder
3/4 cup of sugar
1/4 teaspoon of kosher salt 🧂
1 1/2 teaspoon of vanilla extract
1 1/2 teaspoon of Anise extract (or any other flavour of your choice)
1 stick (1/2 cup) of unsalted butter 🧈 (melted and cooled)
Cooking spray
Powdered sugar (optional)
DIRECTIONS:
1) Preheat your pizzelle iron
2) In a medium size bowl, sift the flour, baking powder and salt. Blend the ingredients together with a whisk and set aside.
3) In a large bowl, whisk by hand (or you can use a hand mixer) the eggs, sugar, vanilla and anise extract until smooth and foamy.
4) Stir in the flour mixture and with a spatula combine well. Add the melted butter and stir until the batter is smooth; don’t over mix. This makes for a thick batter.
5) Lightly spray the preheated iron with the cooking spray. Drop about 1 to 1 1/2 tablespoons of batter in the Center of the mold and close the lid.
Cook the pizzelle till they are golden (usually about one minute) and transfer immediately onto a wire rack to cool. Should you have any rough edges, gently break them off.
Repeat these steps for the remaining batter.
6) Once cooled, you may lightly dust the pizzelle with powdered sugar.
Enjoy them with a nice glass of warm milk 🥛, coffee ☕️ or tea 🫖!
And as always, continue to LOVE WHAT UEAT 😋
YOUTUBE: youtube.com/@lovewhatueat
INSTAGRAM : https://www.instagram.com/love_what_ueat/
6
views
Italian Classic Beef Braciole / Beef Roulade
#braciole #involtini #beefroulade
Italian Classic Beef Braciole
Ingredients:
8 pieces of thinly sliced beef
Your choice of grated cheese 🧀 (we used Parmigiano Reggiano)
Fresh parsley 🌿 Note: (Do not use the bottom stems of the parsley. They tend to be bitter)
Garlic 🧄- thinly sliced and chopped
Hard boiled eggs 🥚- chopped
Carrots 🥕- cut into julienne strips
Provolone cheese 🧀 - cut into julienne strips
Asparagus
Roasted pine nuts
Pesto
Thick toothpicks or butcher/cooking twine
Sauce:
2 cans of whole tomatoes 🍅 (strained in a food mill) or you can also use
Passata sauce
Olive oil, chopped onions 🧅, fresh basil 🌿, salt and pepper to taste
Preparation for the sauce:
1) Place your pot over a low/medium heat burner. Add your olive oil and chopped onions 🧅, and fry till the onions are translucent, then add your tomato sauce, fresh basil, salt and pepper to taste. While the sauce is starting to simmer, it’s time to prepare the braciole.
HOW TO PREPARE THE BRACIOLE: Note that in this episode, we prepared
2 slices each of the 4 different fillings
1) Place your pieces of beef (one at a time)on a wooden board in between two pieces of plastic wrap and with a mallet, gently pound out the pieces of meat till they are fairly thin.
2) Once you have finished pounding out all your beef pieces with the mallet, take one piece of meat at a time and place them on a large plate or a wooden board to fill them with the ingredients.
3) We prepared 2 pieces of braciole by sprinkling the grated cheese, chopped garlic 🧄 and parsley leaves. Then we start to roll the braciole by the bottom part of the beef slice, tuck and roll all the way up and then insert 2 thick toothpicks or wrap them with cooking twine. Should you have large pieces of meat, you might need to use more than 2 toothpicks.
4) Two pieces of braciole were filled with grated cheese, chopped garlic and chopped hard boiled eggs 🥚. Repeat the rolling instructions as indicated in step 3.
5) Two pieces of braciole were filled by lightly spreading some pesto on the entire piece of meat, then place 3 strips of asparagus at the bottom part of the braciole, and then sprinkled with a generous handful of roasted pine nuts. Repeat the rolling process.
6) The last 2 pieces of braciole were filled with a lightly spread of pesto over the entire piece of meat, and I placed 3 pieces of carrots 🥕 (cut in julienne strips) and 1 or 2 strips of provolone cheese.
Repeat the rolling process.
7) In a large frying pan, and some olive oil with 3 or 4 cloves of garlic, place the braciole in the frying pan over medium heat burner, and fry the braciole utill you get a nice crust all around the braciole.
8) At this point, remove the braciole from the frying pan and nestle them into the tomatoe sauce. Make sure that the braciole are completely immersed into the sauce and cook over a low/ medium heat for 2 - 2 1/2 hours, periodically stirring and add a bit of water into the sauce if needed.
9) Once the braciole have finished cooking, remove them and place them into a large dish and remove the toothpicks or cooking twine.
10) Since you have a delicious savoury 😋sauce ready, place a pot of water on the stove and cook yourself some pasta 🍝, to accompany the mouth watery braciole along with a glass of wine 🍷!
Buon Appetito and continue to LOVE WHAT UEAT
Sent from my iPad
YOUTUBE: youtube.com/@lovewhatueat
INSTAGRAM : https://www.instagram.com/love_what_ueat/
17
views
Easter Wheat Pie from Naples🥧 🐣/ Pastiera di Grano Napoletana 🥧🐣
Makes one pastiera - 9” inch pie dish
TIP: For best results & better tasting, prepare this pie 2-3 days in advance
Ingredients: Cooked Wheat (Grano Cotto)
1 jar (300 gr.) of Grano cotto (pre-boiled)
(You can find these jars in most Italian grocery stores)
1 cup of milk 🥛
2 lemon 🍋 strips
1 tablespoon of unsalted butter 🧈
Ingredients: Ricotta Filing
2 cups of strained ricotta (full fat)
3/4 cup of sugar
1/2 teaspoon of vanilla extract
1 grated zest of a lemon 🍋
2 eggs + 2 egg yolks
Ingredients: Pie Dough
2 1/2 cups sifted all purpose flour
1/2 cup of unsalted butter 🧈 (room temperature)
1/2 cup of sugar
2 eggs 🥚 (room temperature)
—————————————————————————————————————————-
NOTE: The very first thing you need to prepare is to cook the wheat (Grano)because it needs to cool completely before usage.
————————————————————————————————————————-
Preparing (cooking the wheat)
1) In a medium size sauce pan, pour the jar of pre-boiled wheat along with all the ingredients and cook it over the stove top burner on medium heat (stirring periodically) till the mixture starts to boil and the milk is almost all absorbed.This process will take approximately 10 minutes.
2) Remove the sauce pan from the burner and set it aside. While the wheat is cooling, it will continue to absorb the rest of the milk. And while the wheat is cooling, you can prepare the pie dough.
Preparation: Pie Dough
1) Place the flour on your working surface, and with the tip of your fingers,
make a “well” in the centre of the flour.
2) In a bowl, beat the eggs with the sugar till both are well combined and slowly pour the mixture into the “well” a bit of a time, while incorporating the flour into the egg batter with a fork.
3) When you have finished pouring the egg mixture, it’s time to place the cubed butter into the egg mixture and with a fork, mash all the butter into the egg mixture until the butter is mashed into the egg mixture.
4) At this point, with your hands, work the rest of the flour into the egg mixture.
5) Collect your dough and form it into a ball. Cut 1/3 of the dough and place it in plastic wrap and gently flatten out the dough. This dough is needed to make the top of the strips for the pie.
Wrap the 2/3 dough piece in plastic wrap and gently flatten out the dough. Flattening out the dough, makes it easier to roll it out.
Place both doughs in the fridge for an hour.
6) With a sheet of paper towel, lightly butter the bottom and the sides of your pie dish and set your dish aside.
While the doughs are in the fridge, it’s time to prepare the filing.
Preparation: Pie Filing
1) Place a strainer over a large bowl and add the ricotta in the strainer. With a spatula, gently press the ricotta through the strainer. This process is to ensure that you get a smooth, creamy and lump free ricotta.
2) Time to add the rest of the ingredients into the ricotta (sugar, eggs and egg yolks, vanilla extract, lemon zest) and combine all together.
3) Remove the lemon strips from the cooked and cooled wheat, give it a couple more stirs.
(OPTIONAL) Should you want a creamier wheat, you can lightly mash it with a fork, or with a food masher.
4) Incorporate the wheat into the ricotta filling and combine both mixtures till well blended and set the filling to the side.
*** TIME TO ROLL OUT THE DOUGH
1) Roll out the bigger piece of dough till you reach a circle large enough to cover the bottom and overlap the sides of the baking dish by approximately 2” inches.
***Tip: you can gently place your baking dish over the rolled out dough to make sure that have achieved the correct width ***
2) Gently lift the rolled out dough off of your working surface and place it into your baking dish. With the tip of your fingers, gently press the dough to the bottom and the sides of the baking dish. With a bench scraper (or a knife) trim off the excess overlapping dough.
3) Pour the filling into the pie shell and spread out the filling evenly with a spatula.
4) Roll out the smaller piece of dough (this is for the top strips) onto your working surface, ensuring that you roll it out to make long enough strips.
5) With a pinwheel pastry cutter, cut 1” inch strips(approx. 3-4 strips) and place them vertically, two inches apart over the pie and then 3-4 strips horizontally over the pie.
6) Your pie 🥧 is ready be placed on a lined baking sheet(this is to catch any overspills) and into a preheated 350 degree Fahrenheit oven for
one (1) hour, or until your pie is golden/ lightly brown. However at the 45 minute mark, check your pie because the baking temperature and baking time may vary slightly depending on your oven.
Happy Easter to everyone, filled with plenty of love, peace and happiness 🐣🐰
Buona Pasqua a tutti, piena di amore, pace e felicita 🐣🐰
YOUTUBE: youtube.com/@lovewhatueat
INSTAGRAM : https://www.instagram.com/love_what_ueat/
48
views
2
comments
Sweet Easter Tarallis 🐰- Taralli Dolce Pasquale 🐰
Note: This is a sweet type of cookie
Ingredients:
3 cups of all purpose (sifted) + 1 cup reserved of the side
3 large eggs 🥚 (room temperature)
3/4 cup of sugar
1/2 cup unsalted butter 🧈 (melted and cooled)
1/4 teaspoon of salt 🧂
1 1/2 tablespoon of baking powder
1 1/2 teaspoon of orange extract
Zest of one grated orange
Icing:
Approximately 2 cups of powdered sugar
Approximately 4 tablespoons of milk 🥛
Your choice of sprinkles for decoration
————————————————————————————————————————
Preparation:
1) In a large glass bowl, beat the eggs with a hand mixer until they are frothy.
2) Add the sugar into the eggs and beat with the hand mixer until the mixture is light and fluffy.
3) Add in the melted butter, orange extract and the zest of an orange 🍊 and give the mixture a quick mix.
4) Next, you add in the flour (in increments of 3), baking powder and salt and mix till all the ingredients are well combined.
5) Remove the dough from the bowl and place it on your work surface. Gently knead the dough into a ball (using more flour if needed).
NOTE: You DO NOT need to refrigerate the dough
6) Divide your dough into quarters and then divide the quarter pieces in half.
7) Cut a piece dough from the smaller divided quarter piece and roll out the dough into a “rope” of approx. 6” inches in length & shape it into a ring by pinching the ends together.
a) To form a TWISTED taralli, take 2 “ropes” and gently twirl them together and pinch both ends.
b) To form a BRAIDED taralli, take 3 “ropes” and pinch the top of the strips together and gently braid the “ropes” overlapping the “ropes” over each other, one at a time, and pinch the ends together.
8) Once you have finished assembling your tarallis, place them on a cookie sheet lined with parchment paper or silicone liner, and into a preheated 350 degree F oven for 18-20 minutes.
9) Let the cookies cool for 10-15 minutes before removing them from the cookie sheet & place them on a wire rack placed on top of a cookie sheet lined with parchment paper.
10) Prepare the powdered sugar and dip the top of the tarallis into the icing and immediately top them with the sprinkles.
It is your choice if you want to leave some tarallis simple, with no topped icing.
11) These simple and delicious 😋 sweet Easter taralli s are ready to be enjoyed with family and friends.
Wishes and greetings for a Happy Easter 🐣 to you all !
Auguri e Buona Pasquale 🐰 a tutti !
YOUTUBE: youtube.com/@lovewhatueat
INSTAGRAM : https://www.instagram.com/love_what_ueat/
99
views
Easter Dinner - Lamb and Potatoes
a very simple yet traditional meal during easter time.
Lamp Preparation
Spice Ingredients
black pepper
salt
smoked paprika
rosemary
olive oil
white wine
add a pinch of all the desired spices with a good amount of olive oil and white wine and give it a shake in a jar before coating your meat.
be sure to rub the spice mixture over both sides of your meat-
cover with foil and bake in the oven for 1.5 hrs (flipping them over at the halfway mark).
Once they are cooked- remove and place on a dish
strain the juices through a sift and keep it for pan frying
on medium high heat- pour the baking juices from lamb into a pan and fry for 2 mins on each side to build a nice crust on the meat.
drizzle with left over cooking juice on serving dish.
Potatoe directions
peal and slice into wedges your potatoes and rinse well in cold water.
add them to a bowl to season with
ingredients
salt
black pepper
rosemary
oil
season to your liking and toss around to coat well.
add to baking dish and cover with foil to bake for 1 hr.
(30 mins foil on- then remove foil to toss around the potatoes and do the last 30 min baking no foil on)
so they end up tender inside and crispy on the exterior.
drizzle with reserved lamb juice over the full dish and garnish with lemon wedges.
enjoy ! and happy easter to all.
YOUTUBE: youtube.com/@lovewhatueat
INSTAGRAM : https://www.instagram.com/love_what_ueat/
42
views
Easter Ricotta Pie 🐣 - Crostata di Ricotta Pasquale 🐣 with sambuca
#Eastereasterpie #ricottapie #easterdessert
Ricotta Pie 🐣 - Crostata di Ricotta Pasquale 🐣
NOTE: This recipe makes a 9” pie
Ingredients for the pie dough:
2 1/2 cups of sifted all purpose flour
1/2 cup of unsalted butter (cubed and room temperature)
1/2 cup of sugar
2 eggs (room temperature)
—————————————————————————————————————————
Ingredients for the filling:
4 cups of “full fat” strained ricotta
3/4 cup of sugar
4 egg yolks (room temperature)
4 tablespoons of Sambuca or Anisette (optional)
——————————————————————————————————————————
Preparation for the pie dough:
1) Place the flour on your working surface and make a “well” with your hands.
2) In a bowl, beat the eggs 🥚 with the sugar till all is well combined and then slowly pour the mixture into the “well” a bit at a time while incorporating the flour with a fork into the egg batter.
3) When you have finished pouring the beaten eggs it’s time to place the cubed butter 🧈 into the egg mixture and mash it all with a fork until the butter is well incorporated.
4) At this point, your are ready to work the rest of the flour into the egg mixture.
5) Collect your dough and form it into a ball and cut off 1/3 of the dough and place it in plastic wrap. This dough is needed to make the top strips of the pie. Wrap the 2/3 dough in plastic wrap and place both doughs into the refrigerator for an hour. For easier rolling, flatten out the doughs.
NOTE: THE DOUGH NEEDS TO BE WORKED TILL YOU ARE ABLE TO COLLECT IT ALL TOGETHER TO FORM A BALL. DO NOT KNEAD THE DOUGH.
6) With a paper towel, lightly butter the bottom and the sides of your baking dish and set your dish aside.
While the dough is in the refrigerator for an hour, you can prepare the ricotta filling
——————————————————————————————————————————
Preparation for the pie filling:
1) In a glass bowl, place the ricotta, sugar, egg yolks and Sambuca and with a fork or spatula, mix all the ingredients together.
2) Once all the ingredients are mixed well, it’s time to beat the mixture with a hand mixer to reach a creamy texture. (be sure eggs are well incorporated ijto the mixture) Place the bowl in the refrigerator util you are ready to roll out the dough.
——————————————————————————————————————————
TIME TO ROLL OUT THE DOUGH
1) Take the bigger piece of dough and place it on your working surface and roll it out with a rolling pin. Your dough needs to surpass the size of your pie dish by about 2 inch over the rim.
2) Gently lift your rolled out dough and place it into your pie dish. With the tip of your fingers, secure the dough to the bottom of your pie dish and around your pie dish.
3) With a bench scraper (or a knife) trim off the excess dough that is overlapping the pie dish.
4) Your are ready to pour the ricotta filling into the pie dish.
5) Roll out the smaller piece of dough(this dough is for the top strips) onto your working surface. Make sure that you roll out the dough to make long enough strips for the top of the pie.
6) With a pinwheel pastry cutter, cut the dough in approximately 1” inch strips, and place them vertically (about 3-4 strips) two inches apart from one another, and then 3-4 strips horizontally.
7) At this point, your pie is ready to go into a preheated 350 degree Fahrenheit for one (1) hour. However; we can’t say it often enough, every oven is different, so around the 50 minute mark check your pie.
The pie needs to be a light golden/ brown color.
——————————————————————————————————————————-
Franca and Nancy thank you for watching this video and we wish everyone
A Very Happy Easter🐣
A Tutti, vi auguriamo una Buona Pasquale 🐣
YOUTUBE: youtube.com/@lovewhatueat
INSTAGRAM : https://www.instagram.com/love_what_ueat/
151
views
How to make soft bread (just 3 ingredients) simple and easy!
#breadrecipeintamil #softbread #bread
How to make soft bread (just 3 ingredients) simple and easy!
Ingredients
3 cups all purpose flour
1 tsp salt
1 1/4 tsp yeast
2 cups lukewarm water
Directions
in a bowl add 3 cups of all purpose flour and lightly whisk
then add 1 tsp of salt and whisk once more and set aside
in a separate bowl add 2 cups of lukewarm water and 1 1/4 tsp of yeast, whisk well and set aside for 5 mins...
once 5 mins is up- add the water/yeast mixture to the flour and salt mixture and fold gently and continuously until all the flour is well incorporated.
then cover with plastic wrap and a tea towel and set in a warm spot in your house to rise -double in size (anywhere from 2-4 hrs)
once it has risen, prepare and flour your baking dish
i use a round silicone steamer (you can use a dutch oven also, see below tip for dutch oven)
release dough from edges of bowl and lightly fold a few more times before transferring to floured steamer.
cover once more with tea towel and set again in warm spot
to let rest/rise a second time (1-2 hrs)
now it is ready to bake for 30 mins LID ON at 450 degrees
then remove lid and keep baking for an additional 15 mins
remove from oven and let cool inside the dish so it cools and softens!
note that once it is fully cooled, to keep it from hardening or going stale while you eat it...
Keep it in the steamer lid on or tea towel over so it stays soft and fresh! (bot only cover it up once fully cooled!)
truth be told it never lasts more than 3 days in our home - we eat this so fast! it is also great toasted as well with some butter/jam or anything at all! i use this also for homemade cold cut sandwiches!!
* TIP*for the dutch oven it is the same cook time and method of lid on and off however you MUST heat the dutch oven before placing dough inside! and you must line it with parchment paper not to stick to dutch oven!
enjoy! and don't forget to look at the homemade butter recipe as well
https://youtu.be/eZbLIUtfnow
YOUTUBE: youtube.com/@lovewhatueat
INSTAGRAM : https://www.instagram.com/love_what_ueat/
77
views
How to make homemade butter (1 ingredient butter)
#butter #homemadebutter #buttermilk
How to make homemade butter (1 ingredient butter)
Ingredients
Heavy Cream (minimum 35% but 40% is best)
salt optional
Directions
add your heavy whipping cream to a stand mixer-
mix on high for about 15 mins until you see the butter separate from the butter milk
add the butter to a bowl filled with water and some ice cubes
squeeze out the rest of the buttermilk from the butter by pressing it against the sides of the bowl with a wooden spoon
once done- remove from water- tap a few more times with spoon to release any excess milk - and begin to shape to desired form-
lay on parchment paper and if desired, sprinkle with some sea salt.
you can also add any other flavour as seasoning (ex: garlic powder- or some fresh herbs) use your flavour profile to make the butter how you want it to taste-
refrigerate to harden like any typical butter- and remove from fridge to let it soften like any regular butter would.
this is so easy! also a fun thing to do with the kids.
*don't forget to watch the homemade soft bread recipe- click below
https://youtu.be/R3_1HA1-lsI
YOUTUBE: youtube.com/@lovewhatueat
INSTAGRAM : https://www.instagram.com/love_what_ueat/
62
views