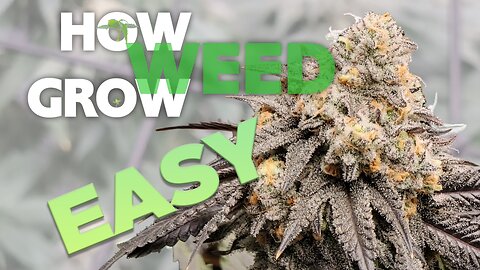
How to Pick a LED Grow Light in 2023- Top 10 Tips for Choosing The Best Light for Weed & Cannabis
The best LED grow light is definitely subjective but these are the top 10 features and tips on how to choose one in 2023. There are a ton of different factors to consider when picking a choosing the right one for you and to compare one to another may be overwhelming. In 2023, technology has definitely improved and there are many features and specs to factor in when selecting a LED grow light. After reviewing and using over 20 LED grow lights from seed to harvest, these are my top 10 features and tips and recommendations on how to pick the best ones for growing weed & cannabis.
Best App (and affordable method) to Test your Lights: https://bit.ly/3JLfOkg
Top LED grow light Picks All Verified and Used:
2 x 2 Grow Tent https://amzn.to/3J09A2w
$110 - 150 Watts: 3 Year Warranty, continuous dial, 352 Samsung LM301B LED's, Verified, Great Distribution
2 x 4 Grow Tent https://amzn.to/3EJI86L
$230 - 200 Watts(Tested at 220) 2 Year Warranty, continuous dial, 606 Samsung LM301B LED's, Verified, Great Distribution. USE CODE: SFHWGROW
4 x 4 Grow Tent: https://amzn.to/3ZaaKOA
$550 - 480 Watts: 1 Year Warranty, continuous dial, 1680 Samsung LM301B LED's, Verified, Great Distribution, Pre Assembled
5x5 Grow Tent: https://amzn.to/3Y7Xadp
$730 - 730 Watts: 1 Year Warranty, continuous dial, 2688 Samsung LM301B LED's, Verified, Great Distribution, Pre Assembled
0:19 Number 10. The Diodes
In 2023 the best diodes are still Samsung’s LM301H and LM301B diodes. There’s other companies that claim theyre better, but the only tests conducted are from the same companies making the claims. BUZZER.
0:42 Number 9. The number of LED’s.
This is self explanatory. The more diodes, the more potential light. Pay attention to this because usually cheaper lights have really low LED counts.
0:58 Number 8: LED Spacing
How the chips are placed is important. For instance, bar lights have a better distribution than most panel lights because they are spaced apart. Panel lights have really high light intensities directly under the center of the light and lower intensities as you get further out. Look for higher concentrations of LED’s on the edges for both.
1:28 Number 7: Spectrum
This factor could be ignored because as long as you’re buying a full spectrum grow light, it will emit all the colors of light you need. A simple thing you could do is check to make sure there’s 3 different types of chips (yellow, white and red diodes). The red diodes emit infrared light and OSRAM is the leader in this space.
1:55 Number 6, The Driver
I always thought meanwell and inventronics were the best drivers, but then I reviewed the updated 2023 Spider Farmer SF2000. I’ll admit, when they told me that they no longer licensed meanwell drivers, I assumed the upgrade was a cost cutting downgrade. Regardless, drivers matter and two well known reliable drivers I have used are Meanwell and Inventronics, I have yet to test the longevity of the in house spider farmer driver which leads me to.
2:41 Number 5: Warranties.
Now even though the unlicensed driver performs better, is there longevity. Most lights come with a warranty and for me 3 years is standard.
3:25 Number 4: A Continuous Dimmer.
Plants need different light intensities at different stages of their lives and you could adjust this by raising or lowering the light, or by using the dial. Some lights have interval lighting which is often at 25, 50, 75 and 100%, but continuous dials is by far the most convenient feature for targeting light intensity.
3:58 Number 3: Price
This definitely matter to me and to be honest, I’ve seen super expensive lights and the performance does not warrant the increase in price. All of these lights have the same components and the only thing that I could really tell is different, is sturdiness.
4:23 Number 2: Heat
This is absolutely the most neglected factor when it comes to picking lights. If you live in a place with hot summers, you cannot ignore temperature. Some lights get extremely hot and off the bat, you must eliminate these unless you are only growing in the winter. Unfortunately, a lot of online reviewers don’t consider this in their reviews and you won’t even notice this until mid to late bloom.
4:59 Number 1: WATCH THE VIDEO
Now when picking a light, the rule I use is 30 watts of lighting for each square foot of grow space. 3 by 3 is 9 feet, so that’s 270 watts, 4 x 4 is 16 square feet so 480 watts.
Growing Weed & Cannabis has always been a passion of mine ever since discovering the medicinal benefits of this plant. My goal is and always has been to help people improve their quality of life. I am not sponsored by any company and have no industry obligations
#ledgrowlights #spiderfarmer #marshydro
2.31K
views
3
comments
SMALL AUTOFLOWERS? Main Reason Why & How to Maximize Yields with Autos
Autoflowering cannabis plants have a shorter lifespan than traditional cannabis plants, which means they need specific care to maximize their yield potential. To grow large and maximize yield from your autoflowers, it's crucial to choose the right genetics, use balanced nutrients and perfect the grow environment but one of the most important triggers for flowering is something you might not expect. The key to success when growing autoflowers is understand what influences flowering and to provide them with the right conditions and care to achieve their maximum yield potential. If you ignore the main reason why autoflowers flower, you will have small autos and in turn have really low yields. Avoid this rookie mistake when growing autoflowers.
For a Masterclass on how to grow the biggest autoflowers, check out https://www.howweedgrow.com/how-to-grow-cannabis-weed-in-hydro-hydroponics-easy/
#howtogrowweed #cannabis #autoflowers
2.24K
views
3
comments
Hypocrisy 101 - YouTube's Community Guidelines BS - Termination, Monetization, Appeals, Advertising
YouTube gave me the ability to appeal their clear blackball of my channel and hypocritically called me harmful & dangerous. Oddly, they wanted a video appeal and this is my response I submitted and I am sharing with you. If I get banned again, LOL you know what happened. Protect the kids….. I’m serious.
1.29K
views
3
comments
How to HYDRO EASY - COMPLETE GROW GUIDE Cannabis & Weed Hydroponic DWC
#howtogrowweed #hydroponics #hydro
If you watched my hydro was a mistake video, you know I been through hell and back trying to learn this medium. Part of the reason why I found it so difficult, was because there was simply no tutorial I could find that taught it easily. After a whole year and 6 complete grows from seed to harvest, I present to you, my masterclass on how to hydro. This is a complete guide that features a fully interactive chart complete with links that teach you how to measure and dial in all feeds, environment every week.
Now before I begin, you need to understand that being good at growing in soil will not automatically make you good at growing in hydro. Hydro is more like being a bartender than a gardener. You’ll be mixing juices and responding to your ph and ppm readings to tell you what to do. Your ph and tds meter will be your best friend and you need to know how to store and calibrate them properly. Another important factor is cleanliness, youll have to clean out your reservoir at least 3 times throughout a full cycle and this doesn’t mean simply swapping out the water. Youre gonna scrub a lot. If you live in a place that is over 80 degrees, youll need to figure out a way to chill your water. Now, this tutorial requires no prior knowledge and it’s intended for beginners, but I assure you, if you follow the instructions, you will get some of the best quality buds you can possibly grow.
Timestamps for this Guide is as follows:
0:00 Intro – What to Expect and Why to grow Hydroponically
1:35 – Setup and Recommendation
3:13 – Strain Selection
3:51 – Germination & Sprouting Seeds
4:11 – Making Nutrient Juices & Concentrates
4:54 – Hydroponic Deep Water Culture Bucket Setup
8:44 – How to Use the Cheat Sheet & Feeding
10:24 – When to Swap & Replace your Reservoir
Bonus Content
11:29 – Pitfalls and Problems to Avoid
13:38 – Highlights of Hydroponic Grows that used the Methods taught in this Guide
For a link to the CHEAT SHEET:
For a complete guide on setting up your tent, Please goto https://www.howweedgrow.com/how-to-setup-a-grow-tent/
TPS Silica: https://amzn.to/3i1LcCI
GH FloraMicro: https://amzn.to/3VjTuEl
GH FloraBloom: https://amzn.to/3ABGYYK
Diamond Nectar: https://amzn.to/3AARVdj
pH Up: https://amzn.to/3GD0GqV
CaliMagic: https://amzn.to/3VfPbKe
Dyna-Grow Grow: https://amzn.to/3EPMmKt
TPS Signal: https://amzn.to/3ERfalY
H2o2: Dollar Tree or https://amzn.to/3GonVVg
Epsom Salt: Walgreen or https://amzn.to/3WdISY5
BEST pH METER - Waterproof, reliable, measures PPM and Temp: https://amzn.to/3tiJS10
20 ML Syringe: https://amzn.to/3iYA2za
To support our content, check out our Patreon: https://www.patreon.com/howweedgrow
📷 Instagram: https://www.instagram.com/growweedeasier
ℹ️ More tutorials; https://www.howweedgrow.com/
📅 Full My Proven Feed Schedule: https://www.howweedgrow.com/Howweedgrow%20Ultimate%20Chart%20Cheat%20Sheet.pdf
PROOF: https://discord.gg/nwDXKeBV4g
💬 For questions, comments or to chat: https://discord.gg/zKG85AuQBj
1.83K
views
3
comments
Top 10 MUST HAVE TOOLS for Cannabis Growers, The Best & Most Useful Gadgets Every Grower Needs
#photone #growtools #trichomes
These are my top 10 favorite must have tools for growing cannabis and weed. I think every cannabis grower should consider all of these items because the value they provide will absolutely make things easier and make the best grows possible. These have all be used by me and are the best quality and proven to withstand the test of time.
Number 10
When I first started growing, I was using the same measurements spoons I was using for baking and that’s a terrible look. You really want to be precise and a 20 ml syringe will give you accurate measurements. Just make sure you rinse this between each nutrients and so you avoid cross contamination. 10 pack is 9 bucks and this is a game changer for anyone using synthetic nutrients.
20 ml Syringe 10 Pack: https://amzn.to/3XVC3Lr
Number 9
Govee smart thermometer
This thing is 12 bucks and I compared it to 2 other brands. Despite being the cheapest, it has the longest range and it just dominates because it also shows you VPD which thermopro still hasn’t added.
Govee smart thermometer/hygrometer: https://amzn.to/3Kj0I9w
Number 8
Ultra fine mist sprays. This is normally used as a hair spray, but these are perfect for foliar spraying. Unlike a regular spray, this mist is super gentle and disperses wider.
Ultra fine mister/sprayer: https://amzn.to/3IERnrr
Number 7
Epsom salt – A lot of nutrients and top dresses do not include sulfur. And some strains require more than others. Magnesium is also something that is commonly deficient in coco mediums so if you see this type striping, Epsom salt will help. Epsom salt is also known as magnesium sulfate and using about .3 grams per gallon is all you need to add to your feeds until the issues are fixed. You could get a 2 lb bag for like 5 bucks at your local pharmacy.
https://www.walgreens.com/storelocator/find.jsp (cheaper)
Don’t get scented. https://amzn.to/3xxWm6E (gas and time is money)
Number 6
Jewelers loupe, If you don’t know, the best way to tell when to harvest is by looking at your trichomes. Unfortunately, our naked eyes cant do this so, this is the best tool to making sure all of them are milky or amber. A great tip is to just remove the case and use double sided tape and place it over your camera and a video on how to do so is on my site. 7 bucks, it’s a no brainer.
https://amzn.to/3XEIBOb
Number 5
This towkka oscillating fan.This small fan has the perfect amount of breeze, but it also packs a punch if you want it to. This is going on 2 years strong and most fans I have had don’t last more than a year so the value is undeniable at only 15 bucks.
Towkka Portable Oscillating Fan: https://amzn.to/3IzjmbV
Number 4:
The photone app. Even when youre using different mediums, the one thing that is consistent with all of my grows is lighting. Unfortunately, not everyone has hundreds of dollars to spend on a device like apogee. Photone is an app that has a full spectrum light mode that has been verified by several non sponsored youtubers including myself and my buds show its dependability. It’s only 6 bucks and it what I use for all my light readings. Just make sure youre using a 22 lb paper diffuser if youre using iOS.
Photone App: http://bit.ly/414KUwZ
3. hydrogen peroxide, also known as H2o2 this shit is like the franks hot sauce for weed. I put that shit on everything.
Tap water check
Bloom juice check
Veg juice check
Clean my tent check
Sprout water, check
This is like holy water, it sterilizes everything, prevents algae growth and it’s the only thing at this price point that kills mold spores. honestly, I would pay like 10 dollars if I had to.
H2O2: https://amzn.to/3xzwjMm
Number 2:
This generic pH/TDS meter. The truth of the matter is, all pH meters suck because you have to calibrate it at least twice a month. Consider yourself lucky if one of them lasts you more than a year, because the average lifespan I have in my history of growing is 7 months and I do everything from storing in KCL solution, to rinsing with distilled water to calibrating every 10 days. The only one I’ve ever had that lasted more than a year is this generic 3 in 1 meter with this grey cap. Maybe I just got lucky, but it still works. And Ive had it since June of 2021, even with looking as rusted as it does.
PH Meter, 3-in-1 TDS/PH/Temperature Meter: https://amzn.to/3YHVOHt
Number 1.
This is that Cadillac of dunk containers. If you don’t know what dunking is, goto my site and learn about the holy grail of fabric pot feeding because I swear itll make your soil grows look like hydro grows.
I literally went into home depot with a measuring tape to make sure that this container was the perfect size for dunking 5 gallon pots. This allows you to distribute water throughout all of your soil in the most even way possible. People ask whats my secret to beautiful plants in soil, and here it is, it’s the dunks (and follow my guide).
Brute 10 Gallon Heavy Duty Trash Can: https://amzn.to/3Eet9BG
DISCLAIMER: Please follow all local laws and this is intended to help people grow medicinal marijuana legally or learn about to cannabis plant's growth.
Growing Weed & Cannabis has always been a passion of mine ever since discovering the medicinal benefits of this plant. It has been the only natural way I alleviate pain and I teach people how to grow weed for this ability. New or old, these tutorials are constantly revised to give new growers a shortcut to produce the best quality with entry level knowledge. My goal is and always has been to help people improve their quality of life. I am not sponsored by any company and have no industry obligations.
1.65K
views
2
comments
Can Mr. Canucks, Dr. Coco, 420 Scene & BuildaSoil Actually Grow? META Soil Project Episode 1
Your Favorite YouTube Grower is Being Tested Out
For the full series, check out HWGrow.com
For 4 months, I have been hunting for a strain that is worthy of cloning to use for a 6 way comparison on organic super soil, coco coir and water only soils. I believe this would be the most in depth comparison and includes the grow styles of some of your favorite grow related youtubers. These mixes will be placed head to head in a battle royale which intends to determine which style produces the best quality. After deciding on my alpha female, I present to you the META SOIL PROJECT.
This series compares and reviews the following grow styles(you can click them for my initial analysis):
Mr. Canuck’s Gaia Green Super Soil Mix
BuildASoil’s 3.0 Organic Living Soil Blend
420 Scene’s Down to Earth Super Soil
Coco for Cannabis’s General Hydroponic’s Feed Schedule
TPS COMPLETE Nutrient Kit in Coco Coir
Detroit Nutrient Company’s Great Lakes Water Only Soil
EVENING THE PLAYING FIELD
I have controlled each grow variable as much as possible to give each slot the fairest chance. All of them are from the same mother plant which is a pheno hunted selfie seed created by backcrossing In House Genetic’s Slurricane with Sugar Cane. They will all be grown in the same tent so variables such as humidity and temperature will be identical. I decided to use 2 Spider Farmer lights to give them the most even distribution of light. PPFD readings had a variance of only 20 from each plant’s canopy throughout growth.
UNEVEN VARIABLES
No matter how you cut it, coco vs soil is coco vs soil. Coco is a medium that gives plants easier access to nutrients so I anticipate the growth in coco to be far greater than soil. Watering also varies with each slot and I decided to follow the exact instructions provided by each slot’s respective recommendation. The exact feed history will be documented throughout this project and is provided to our PATREON supporters.
The whole purpose of this project is to let growers see how each clone develops week by week in different mediums. It also verifies the reliability of different content creators and ready to use products. This project is intended to show you exactly what you can expect if you decide to follow their instructions. I am not sponsored in any way and I share this because I was curious to know if their methods worked.
NOW LET”S WATCH & LEARN
EPISODE 1: CLONES & TRANSFER
EPISODE 2: TOP, FIM & DRAINAGE
EPISODE 3: DIE OR LIVE – OVERCOMING LOCKOUT
EPISODE 4: AUTOMATING WATERINGS
EPISODE 5: VEGETATIVE SIZE COMPARISON
EPISODE 6: BLOOM PREPARATION
EPISODE 7: FLIP & MORE DEFOLIATION
EPISODE 8: TOP DRESSING IN BLOOM
EPISODE 9: AERIAL DEFOLIATION & BUDS STACKING
EPISODE 10: UGLY IS HERE – DEFICIENCIES
EPISODE 11: PREVENTING BUD ROT & STEM SUPPORT
EPISODE 12: INSPECTING TRICHOMES – MACRO
EPISODE 13: FLUSHING & SENESCENCE
EPISODE 14: CHOP & HARVEST
ENJOY!!
💬 For questions, comments or to chat
To see the full day to day grow journal
For MASTER LIST on Feed Schedule, Measurements, Supplies and Grow Equipment, go to https://www.howweedgrow.com/meta%20feed%20
1.69K
views
How to Cure Cannabis Buds Perfectly - Curing 101 - Automatic Cure Bin
In this video, we teach you how to Cure Buds Perfectly and Automatically. This is the best way to cure and has been fully automated so you don't have to constantly burp your jars. All you need to do is follow the instructions and place this tub in a room that is 60 degrees and this will automatically cure your trimmed buds. Curing is the last step of drying and harvesting weed and making sure your buds are perfectly dry greatly impacts the quality of your buds. It's a daily task that may be tedious at times when you are dealing with several mason jars and I devised a tub that was inspired by my failed bucket tek which basically over-dries buds. In this video, we teach you one of the best methods for making curing so easy. It automates burping and removes the daily routine of constantly having to open and close your mason jars.
Inkbird Controller: https://amzn.to/3RLW31s
Probreeze Dehumidifier: https://amzn.to/40EGjBt
1.61K
views
1
comment
How to Dry Weed Perfectly – Easy Guide to Hang Drying Cannabis
So your plants finally have the perfect amount of amber trichomes and now you’re ready to chop. But you don’t know how to dry weed? Congratulations, you made it this far, but your works not done yet. You can’t just smoke the buds off these plants and the next steps are drying, trimming and curing. There are hundreds of different ways you can dry your buds but for the purpose of this video, I’m going to show you how to dry weed and cannabis and the easiest way is to hang it upside down.
Freshly cut buds will have about 75% water weight and you want to bring this down to about 10-15%. This will allow chlorophyll in your buds to break down and remove the majority of the hay and grassy scent apparent in fresh cut buds. The whole process can take anywhere from 3 to 14 days, depending on size of buds, amount of foliage and stems and the environment. Properly dried buds will improve the smoke quality and preserve the terpene and THC content.
The first thing you need to do is pick a DARK location in your house that’s close to 60 degrees Fahrenheit and 55% humidity. Just find the room that’s closest to this combo using a thermometer/hygrometer. The room needs to be dark because sunlight contains UV light which will degrade THC. It’s also worth noting, that these plants will be DANK during the first couple of days of drying, so if that’s an issue, you may want to dry in a carbon filtered grow tent. These numbers don’t have to exact, but it’s important they don’t fluctuate and as long as you’re not more than 10 degrees off, I’d say you’re safe. If you’re more than 10 degrees, you may need to control the variables using a heater, AC unit, humidifier or dehumidifier:
Dehumidifier: https://amzn.to/3JOKNzv
Humidifier: https://amzn.to/3DOA8AU
Portable AC: https://amzn.to/3Ywlrel
Space Heater: https://amzn.to/3HL095l
High humidity may lead to mold and bud rot, where low humidity may result in your bud drying too fast. Bud that dries too fast will trap chlorophyll in the center of the buds and that doesn’t taste good. Now, were finally ready to chop, I chop right before I was supposed to feed the plants so that as much moisture evaporates naturally.
Some people like to leave their plants in complete darkness for up to 2 days before they chop, but I just chop right in the morning, right before light is about to start in the tent. Now, get your gloves and put them on because its gonna get real sticky.
Drying begins the day that you chop and if you could chop and flip the whole plant in one piece, DO IT. However, most of the time my plants will collapse once I remove the supports, so then, I have to chop by the branch.
While I’m chopping, I inspect and remove all the large fan leaves and that will slightly speed up the process of drying. I also remove any dying or yellowing leaves that are obvious before I hang because this will reduce the risk of bud rot and mold. You’ll notice you could kind of lift the bud to peek into where the dead leaves start and I like to pull the whole leaf off using tweezers.
Once all these leaves are off, you’re ready to hang. I like to hang using soft twist ties because they’re easy to use and for branches, you don’t even need to tie them. I reuse the ones I used for low stress training and loop it around branch onto the hanging line. As I’m hanging the buds, I am spacing them out and making sure none of them are touching or too close. If I’m drying in a small room, I like to add a small fan and put it on its lowest setting. I never aim the fan directly at the plants and usually aim it at a wall on an angle. This will help prevent isolated cases of high humidity which happens when buds aren’t spaced out evenly.
Once all the buds are hung, closely monitor the temperature and humidity to make sure nothing gets thrown off. For the first 2 days you will notice the same pungent bud like scent that came from your grow tent while the buds were ready to harvest. This is where the majority of the moisture evaporates and on day 3-5 you’ll notice more of the hay and grass like scent.
You may think that the plants have lost their aroma, but this is where the chlorophyll is just breaking down and with that, the grassiness is evaporating. The smell will be less obvious in the days that follow and soon you’ll be ready to trim. During days 5 and on, I use my sense of touch to know when the buds are dry. Find a stem that’s as thick as a toothpick and use both hands to see if the stem cracks. If it bends, theres still moisture in the buds and you want it to kind of snap. Another great method is weight based drying but it requires a hanging scale. By measuring the wet weight, I wait until around 70% of the water weight evaporates to start snapping. Ive been tracking these weights and 72% seems to be my sweet spot.
Hanging Scale: https://amzn.to/3YvqXNy
The buds will seem dry to the touch, but the inside still contains moisture which we’ll balance out in curing.
3.45K
views
10
comments
HOW TO GROW WEED 2023 UPDATE – Seed to Harvest – Complete Beginner’s Guide for New Growers
This is the shortest most detailed video on how to grow weed at home for new growers. I tried to make this beginner friendly and as easy as possible!
It has been created and data was mathematically calculated and verified in my live grow journal as well as verified by hundreds of users on my discord.
A cheat sheet is included here(click photo):
It will tell you what to do for each week of the plants life and all of it is based on multiple harvests and actual experience.
The time frame from seed to harvest is 3-5 months and there are essential supplies and equipment to have decent yields. The bare minimum is a grow light in a closet, preferably with white walls. Marijuana plants need plenty of light and without it, you will NOT produce any buds that are worth growing. LED’s are the best lights at the moment and the rule of thumb I use, 30 Watts for each square foot of grow space. A light is a plants MVP so if you’re going to spend your money on anything, spend it on a light. A decent light for 3 plants will cost around $150. You’ll also need a timed outlet or surge to control the day and night cycle.
Our Picks: (clip coupon if available):
MAKE SURE YOU CLIP COUPONS IF THEY HAVE ONE
3 x 3 TENT
4 x 2 TENT
2 x 2 TENT
4 x 4 TENT
TIMER(REQUIRED)
All of the recommendations are based on actual use:
Bloom Plus: https://amzn.to/3vNlpST
Verified Grow: https://discord.gg/ZTsYeekHbb
Spider Farmer: https://amzn.to/3PaNCKi
Verified Grow: https://discord.gg/nwDXKeBV4g
Mars Hydro FC6500: https://amzn.to/3U1asq1
Unboxing of FC-6500: LINK - currently using, working great so far, journal to follow.
Next, you’ll need soil and pots. The soil I use is froggy soil which barely has any nutrients but another great option for Autoflowers is ProMix HP
Each plant you grow will need it’s own pot and there is a direct correlation between the size of the pot and how big a plant can grow. We recommend 5 gallon pots for regular plants and autoflowers. More information on that below.
live by the cheat sheet die by the cheat sheet
Throughout your plant’s life, you’ll have to add nutrients that are essential for growth. Plants absorb different nutrients at different pH’s and the majority of problems with growing weed stems from nutrients. If a plant can’t absorb nutrients, it can’t eat. So, you’ll have to manually set your waters pH. To do this, you’ll need both pH Up or Down and a pH meter and slowly add pH down until your meter reads the pH you want.
Always pH balance your water AFTER all nutrients and supplements are added. The easiest starter set of nutrients is General Hydroponics Flora Trio is what we base our charts in this video on. You’ll also need cal mag which will helps build healthy cell walls and improves photosynthesis.
Also required is a small fan to supply fresh air, strengthen your stems, prevent pockets of humidity and assist in warding off pests.
Last, you will need a thermometer hygrometer combo which youll use to measure the temperature and humidity.
The rest of the items are optional and you could skip this next part to 4:07
Once you have your equipment, find a place that is about 60-70 degrees Fahrenheit. The light will usually bring the temperature of your space up 10 degrees leaving you with the ideal temperature of 70-80 degrees. Next, you’ll need seeds or clones. There are hundreds of strains to choose from and let me break down the 3 types of seeds that exist which will save you time and guesswork. VIDEO ON HOW TO CHOOSE A STRAIN
They are:
Regular seeds – These have 50/50 odds of being male or female. You do NOT want male plants unless you plan on breeding. Instead of producing buds, male plants produce pollen. Female plants are pollenates, it will make them produce seeds instead of buds. Regular seeds are also known as photoperiods. Which means you could control these plants by dropping the light cycle down to less than 12 hours a day.
Feminized seeds – These are seeds that are exactly like regular seeds except they will always be female. These are great because you wont have worry about growing any males.
Autoflowers –These plants will need a constant 18 hours of light each day throughout their whole lives. After about 5 weeks, they will automatically start producing buds. The problem with autoflowers is that once they start flowering, it’s the beginning of the end of the plants growth. At times, you could end up with really small plant. You also cant clone autoflowers, so for beginners, I would highly recommend feminized photoperiods. Also, cloning them is basically useless.
There are multiple ways to germinate the seeds, but for the purpose of making it easy, simply find a warm spot to place a mug. Fill the mug halfway with room temperature water and add pH down until it reads 5.8. Then add a couple of drops of hydrogen peroxide so that any germs that develop are killed and the water is oxygenated. Now add your seed(s) to the water and they’ll probably float. Leave them floating on the top and cover the mug with some aluminum foil. Now place the mug in the warm room (around 85 degrees) and check on it every day.
During this time, its a good idea to prepare feeding water. To do so, just take a large bucket or tub and fill it up with tap water. The more surface area exposed to air, the better. Then add 2-3 drops of hydrogen peroxide per gallon of water and let this sit for at least 24 hours to let the chlorine evaporate.
As soon as you see a small tap root comes out of the seed(usually 1 day), you want to transfer it to pot of moist NOT wet soil. HOW TO MAKE MOIST SOIL. Poke a hole into the soil and place the seed in with the root pointing down. Once the seed is in, you could lightly cover the top with loose soil. You'll need high humidity for these young plants, and a easy way to do that is to cover the top with a clear plastic bottle with some holes on it. Place a light about two feet above the plants on its lowest setting with the timer on 18 hours per day.
Keep the cheat sheet close by.
Now the rest of growing will be based on this handy cheat sheet I designed to guide you. There is two tabs, one for regular and one for autoflowers, so make sure you're on the right one. Once you understand this chart, you wont need to watch anymore tutorials.
5.08K
views
9
comments
How to Germinate Cannabis, Hemp, Weed & Marijuana Seeds with Rapid Rooters - Easy Sprout 2023 UPDATE
#rapidrooters #germination #howtosprout
Germination is the process of sprouting seed. Although most of the time, dropping a seed into some well balanced soil should be good enough, the use of rapid rooters with Cannabis, Hemp, Weed or Marijuana Seeds ensures a perfect sterile environment so they can have the best possible start in life. A rapid rooter provides a perfect balance of moisture and oxygen as long as it is used right and this video is years of experiences with germinating and tweaking to ensure the best possible germination rates. This is still my go to method of germination and we
Rapid Rooters: https://amzn.to/3TAdhy3
Seed Starter Tray: https://amzn.to/3AeU4LI
Hydrogen Peroxide: Get it at the dollar store, but if you cant, https://amzn.to/3g82VI6
Continuous Spray Mist Bottle: https://amzn.to/3X4NAbO
Optional Seed Mat Station: https://amzn.to/3tsyBLi
1.25K
views
2
comments
How I Pick Strains to Grow - 7 Factors to Avoid when Choosing the Best Cultivars
#strainhunt #beststrain #mostpotent
There are several factors to considering when you pick and choose your next strain to grow. Strains all have unique physical characteristics and chemical compositions that set them apart from other strains and crosses. The difference between a strain and a cross is that strains have been selectively bred for generations (usually 5) in order to stabilize the genetics so that the seeds usually have uniform results. Crosses on the otherhand are usually first or second generation seeds and posses a high variance in phenotypes (physical and chemical features capable of being measured). More important than picking an indica or sativa strain is the terpene profile which results in different psychological effects when smoking. THC is not the only cannabinoid that has psychoactive effects and different strains can be preferred by different individuals. In this video, I list the 7 most important things I think of when selecting a new strain to grow.
I know a lot of people might think this list is a bit excessive, but think about it this way, if you spend 4 months growing something from seed to smokeable bud, the least you could do is spend 4 hours researching your strains before you purchase.
814
views
Best 2022 STRAIN HUNT WINNER - Highest THC and Yield
#strainhunt #strainhunter #mostpotent
After 3 months of simultaneously growing 8 different strains, I finally narrowed down my selection to just 1 and thanks to all who participated in voting in this series. We are left with the strain that smells like pink Pixy Stix and has traffic light colors all around it. It is both the highest yielding and highest THC strain in the tent so it is undoubtedly the keeper strain I will be using in my meta soil project series. This female has been cloned 8 times from a mother I have set aside and one of the clones was reversed and used to pollinate itself and other plants in my main tent. This has been difficult, but I wanted nothing but the best in my comparison series and after such a failed comparison in my last hydro vs soil series, I knew I needed to control all the variables better.
Overall, this is definitely the outcome I wanted and both the male and female form of this strain dominated. I was worried that there was going to be a debate, but I dont think 2nd place even comes close.
Equipment Used:
Tent: https://amzn.to/3InFvIg
Lights: https://amzn.to/3nPE7oE running at 70% no need for higher. Use CODE SFHWGROW
AC Infinity Airflow: https://amzn.to/3NUtStN video tutorial on settings here: https://youtu.be/iZqL9KMMx1s currently min fan speed set at 5
Fan: https://amzn.to/3yoU2Pv
Nutrients: https://amzn.to/3OT2sFR
Soil: https://amzn.to/3ySc2TW
Govee Smart Thermometer: https://amzn.to/3RnuYBa Best $13 bucks I spent, S/O comrade on discord for the tip
📅 Full Feed Schedule: https://www.howweedgrow.com/Howweedgrow%20Ultimate%20Chart%20Cheat%20Sheet.pdf
💬 For questions, comments or to chat: https://discord.gg/zKG85AuQBj
To see the full day to day grow journal: https://discord.gg/nwDXKeBV4g
ℹ️ More tutorials; https://www.howweedgrow.com/
📷 Instagram: https://www.instagram.com/growweedeasier/
842
views
How to Install/Setup Inline Fan Kit - 2022 UPDATE - Hang and Floor Install - Vivosun, AC Infinity
#vivosun #acinfinity #inlinefan
Properly installing and setting up an inline fan system is important because the direction of the airflow will be different depending on a bunch of different factors. You must make sure you choose the best setup and in this video we teach you how and why you want to place your fan, carbon filter and duct in different orders and in different directions and show you 3 different scenarios that apply to every single small grow tent setup. This brands featured in this video are AC Infinity, igrowtek and Vivosun, but we have used them on Mars Hydro, Spider Farmer and Generics as well.
If your fan did not come with rope clip hangers, get them here: https://amzn.to/3q9KKnG It is the best value deal guaranteed.
This video is broken down into 3 parts and you must first measure the temperature of the inside of your tent with the lights on. Try to measure near where your plants would be and based on that, go to the following timestamp:
A. Above 78 Degrees - 0:00 - Hot air escapes through the top, cool air sucked in to bottom
B. Below 78 Degrees - Limited Space in Tent - 6:29 - Hot air sucked in from above, cool air blown out from bottom.
C. Below 78 Degrees - Adequate Space in Tent - 8:21 - Hot air sucked in from above, cool air blown out from bottom.
D. Internal Oscillating Fan Setup 9:41 - best for creating stronger stems in younger plants and preventing bud rot in bud
The best fan system and controller I have used is AC infinity's Cloudline and I have 2 of them. Uses less energy and is powerful: https://amzn.to/3asa3Md
Comparison Video: https://youtu.be/7ckZxTUpnVA
Guide to Best Controller Settings: https://youtu.be/TXRwXgM6v64
Their carbon filter is also the best: https://amzn.to/3xrXsSs
Here is a comparison video: https://youtu.be/drbpXhQoIps
For Inline fans, I recommend Towkka - Favorite because it oscillates, lights up, could be hung, comes with a bendable tripod, had it on for 7 months straight and hasn't let me down yet: https://amzn.to/3mn0Asj Video Comparison: https://youtu.be/2FHxT7tXz5A
This video is Part 3 of a 4 part guide series and the complete full guide to setup a home grow tent kit can be found here: https://youtu.be/6Lz5xjx_894
📅 Full Feed Schedule: https://www.howweedgrow.com/Howweedgrow%20Ultimate%20Chart%20Cheat%20Sheet.pdf
💬 For questions, comments or to chat: https://discord.gg/zKG85AuQBj
To see the full day to day grow journal: https://discord.gg/nwDXKeBV4g
ℹ️ More tutorials; https://www.howweedgrow.com/
📷 Instagram: https://www.instagram.com/growweedeasier/
645
views
1
comment
How to Tell When To Harvest Weed -Best Quality & Highest THC - 2022 Update
Harvesting weed at the wrong time is one of the most common rookie mistakes and in this video, we teach you the absolute best way to know when it’s time to chop your marijuana and weed plants.
From seed to harvest, marijuana plants have a broad range of growth periods. The duration of the growth cycle may depend on several factors, including growing medium,environment, nutrients and genetics. This combination of factors means that there is a high variability in how long it will take for peak and optimal THC and CBN levels. For the most part, it takes about 9 week of flowering for buds to fully mature but based on the factors listed above, it could be more or less.
The most effective way to tell when the best time is to harvest is by using a jeweler’s loupe to magnify the trichomes and use the color as a guide. Depending on the color of the trichomes, you can choose for optimal THC or CBN content and if you are going for the highest THC content, wait until all of the trichomes are clear. If you want more of a sedative high, THC converts to CBN and when trichomes turn amber, this signifies conversion.
Jeweler's Loupe 🔍 https://amzn.to/3QOUxLd
📷 Instagram: https://www.instagram.com/growweedeasier/
ℹ️ More tutorials; https://www.howweedgrow.com/
📅 Full Feed Schedule: https://www.howweedgrow.com/Howweedgrow%20Ultimate%20Chart%20Cheat%20Sheet.pdf
💬 For questions, comments or to chat: https://discord.gg/zKG85AuQBj
Lights seen in this video:
Spider Farmer SF2000: https://amzn.to/3xAidLP
Verified Grow: https://discord.gg/nwDXKeBV4g
Use code SFHWGROW
USA: https://spider-farmer.com
Canada: https://spiderfarmer.ca
Europe: https://spiderfarmer.eu
UK: https://spiderfarmer.co.uk
Australia: https://spiderfarmer.com.au
Bloom Plus XP4000: https://amzn.to/3GWbAGo
Verified Grow: https://discord.gg/ZTsYeekHbb
#howtogrowweed #trichomes #harvesting
1.32K
views