
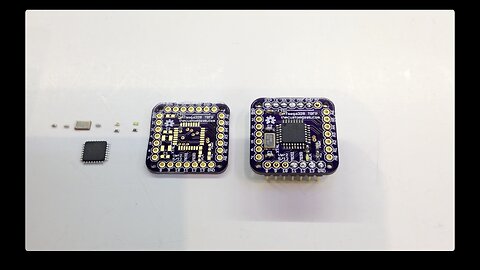
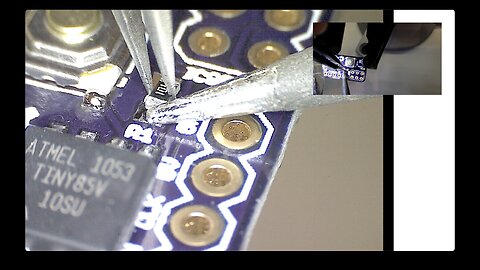
Programming the Square Inch - TQFP Jig
Read more at: http://thecustomgeek.com/2012/08/17/p...
First, I am happy to announce that the One Square Inch of Goodness and the FTDI Adapter are in the stock now and available for purchase!
In the video above, I show how I programmed the assembled kits as well as the raw TQFP IC's without soldering anything to them. It's a pretty simple setup, but solved the problem I was facing as well as made things a lot faster. As I mentioned in the video, pogo pins are found here, USBtinyISP here, and breadboard switch here (from Adafruit).
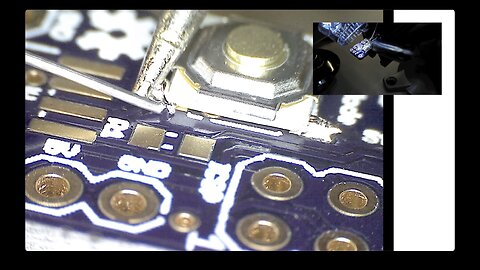
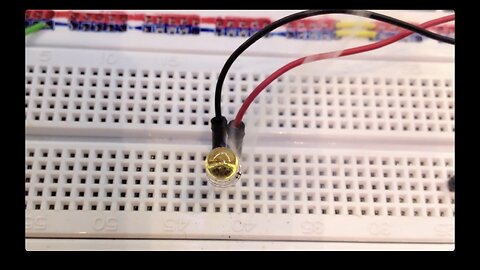
A note on using ICSP: - The Square Inch is designed to accept an FTDI connection for programming. Because of this, a .1µF capacitor is between the reset line of the ATmega328P and the pin labeled DTR. This is so when you load new sketches on the Square Inch, it will reset automatically via the DTR line on the FTDI adapter. When you use ICSP, you need to bypass this capacitor! Otherwise it will not work. The programming board I used in the video had the capacitor bypassed with solder (pictured below). There is also a via to the right of the capacitor that leads to the reset line. This can be shorted to the DTR pin to accomplish the same task, as I did to program the assembled boards.
On the assembled boards, if you wish to change the bootloader or upload sketches via ICSP, you can temporarily short the cap using tweezers on the cap itself (green arrows) or the DTR pin and the via leading to the reset line of the 328 (red arrows) as shown in the picture below.
Link to make pogo probes: http://thecustomgeek.com/2011/09/01/p...
47
views
RGBW LED Controller v3.1
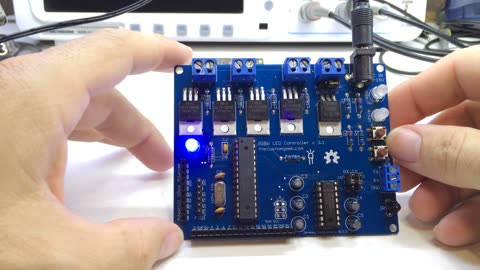
RGBW LED Controller v3.1 description and features. Read more and order one at: http://thecustomgeek.com/2013/12/28/r...
24
views
Small(s) GPS
Read more at: http://thecustomgeek.com/2012/07/15/r...
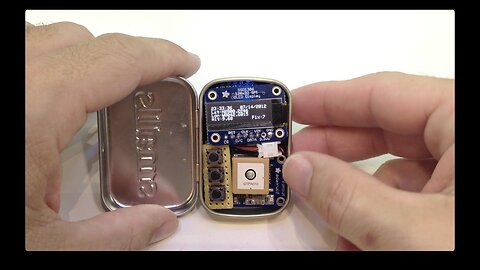
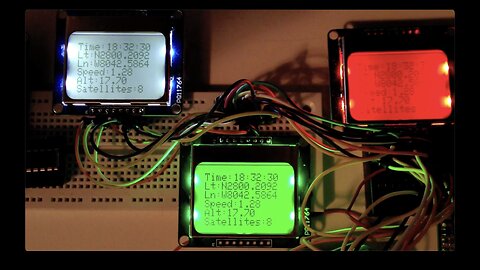
Hi peeps, I have been wanting to make a small GPS device (GPS receiver and some sort of screen) that I could carry around for a while now, but I didn't want it to be too big, so I made this. Mission accomplished.
This unit is explained in the video above, but is basically a GPS receiver, 1 CR1220 battery for the RTC on the GPS breakout, one of my Square Inch of Goodness boards, one 128x32 OLED display, three 6mm buttons, and a 400mAh Li-Po Battery (from Sparkfun). It even has FTDI headers on it so I can update the firmware with ease (with my own FTDI adapter!). The awesome part is that all of those things fit in an Altoids Smalls tin, measuring 2.15" (W), 1.35" (L), and .56" (H), or 55mm (W), 34mm (L), and 14mm (H).
The GPS breakout board is from Adafruit and uses the MTK3339 GPS module, and man does it work well. I have had other GPS modules that worked, but it was a fight. If you're thinking about putting GPS in a project, use this. They also have a great library for it. They even have the raw MTK3339 GPS module if you want to use your board. Read the Adafruit product page for all the features, there are many.
The 128x32 OLED display is also from Adafruit, it works well and has the typical OLED crispiness. Very easy to read, even in sunlight, for the size and you can even multiply the text size if you want to.
So I'm going up to NY in a few days, and I wanted a new and exciting way to talk with the TSA folks, so I figured this would work. (kidding) If only Hollywood had not trained everyone to think a gadget with a few wires and a flashing red LED, that they didn't understand, was a bomb.. ugh. (not kidding)
5
views

Fast Voltage Switching FTDI Adapter
Read more at: http://thecustomgeek.com/2012/07/13/f...
I have been working more with 3.3 volt projects lately and wanted to make programming them with an FTDI adapter as easy as possible. Sure you can switch most FTDI adapters from 3.3 to 5 volts (the FT232RL chip has a built in 3.3 output as well as logic level selection), but it involves scratching a jumper wire and soldering pads. This isn't bad to do once, but to go back and forth is time consuming and rough on the boards.
So, I made my own with an easily changed jumper for voltage selection. I also added a power LED to let me know that it's plugged in and ready to go, threw in some RX and TX indicator LED's and all required caps (read the data sheet), and mini USB jack. I ordered the boards from OHSPark.com, and as always, they were great.
Links to cad files and schematics are on my site linked above.
1
view
Homemade Flux Remover
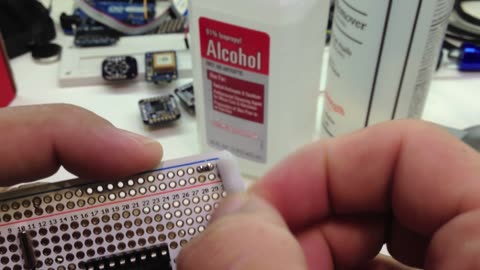
More at: http://thecustomgeek.com/2012/07/09/h...
I was inspired by a video by Jeri Ellsworth that showed her using homemade flux remover. This is super simple a combo of alcohol and acetone. In this video, I use a 50/50 combo of both. So that 32 oz. of remover for $3. I googled flux remover and it ranges from $10 to $25 for 12 oz. So that a savings of at least about $70. I have been using this on about every board I can find and it has been fine on all of them. I heart saving money.
2
views
One Square Inch of Goodness
Read more at: http://thecustomgeek.com/2012/07/09/o...
So a while ago I discovered that I needed a microcontroller in a really tight space. I tried an ATmega328P PU (DIP package), but try as I may, It would not fit. The answer? The ATmega328P AU (TQFP) this is a much smaller package, and for the added bonus, it has 2 extra ADC's. This a great little board to squeeze in various projects, and opens the door to some very cool stuff I have coming up. Some of you might remember I put this board in a project I did a while ago when space was very limited. It's just a handy little board to have on hand. :) Links to files are on my site.
3
views
Serial or Speed?
Read more at: http://thecustomgeek.com/2012/07/03/s...
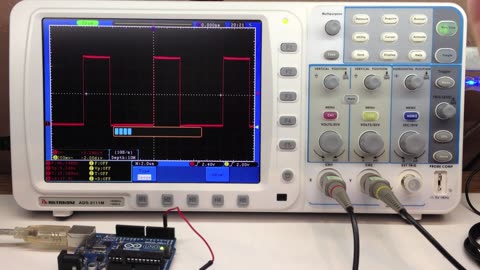
This video demonstrates the speed difference between serial enabled/disabled on an Arduino Uno while toggling a pin output. Just a really simple test of how fast it can pull a pin high and low (without using direct port manipulation), with and with out serial enabled. I think that was the smallest Arduino sketch I ever wrote..
1
view
SMD Soldering - Full Video
Read more at: http://thecustomgeek.com/2012/06/14/s...
Here is a video on SMD (Surface Mount Device) soldering. In this video I show how to solder some SMD components on to a little board with an ATtiny85V, switch, LED, and resistor. The short version of this video just shows the resistor and LED (size 603) being soldered, the long version of this video shows everything being soldered. It's really neat to open up the world of SMD. You can make really tiny (and cheap!) widgets!
The microscope used is this one: http://www.adafruit.com/products/636
5
views
SMD Soldering - Short
Read more at: http://thecustomgeek.com/2012/06/14/s...
Here is a video on SMD (Surface Mount Device) soldering. In this video I show how to solder some SMD components on to a little board with an ATtiny85V, switch, LED, and resistor. The short version of this video just shows the resistor and LED (size 603) being soldered, the long version of this video shows everything being soldered. It's really neat to open up the world of SMD. You can make really tiny (and cheap!) widgets!
2
views

Yamaha AG Stomp Mod
Complete post at: http://thecustomgeek.com/2012/06/11/y...
I wanted to do a quick post on a mod I did to a Yamaha AG Stomp. An AG Stomp is a acoustic guitar effects pedal that was made in 1994, but no longer available.
The need was this: to gain more real estate space under a keyboard that was full of pedals, controllers, and switches. The need to switch banks without taking up the whole size of the pedal was the goal. The answer was to build a small (3.64"L x 1.52"W x 1.22"D) pedal that had a single switch, had an easy way to tell witch bank you were on, have a signal indicator, and be road tough. The end result made the customer very happy, and he requested that I share, so here it is. :)
You can check out Austin Biel at austinbiel.com, an awesome musician (including the best keyboard player I have heard), and an outstanding friend.
4
views
Nokia 5110 Color Change
Read more at: http://thecustomgeek.com/2012/05/02/n...
I was sitting at my dining room table the other night looking at a project, and thought, wow, that Nokia 5110 display would look really good in red! I was right..
I wanted one in green and decided to share how it was done. This is a quick video of how to change the LED's on a Nokia 5110 display from Adafruit. Really quite simple, but it requires removing the glass LCD from the board (be careful!). If you are not familiar with these LCD's, they are low power, fast, easy to read in sunlight, and cheap. Kind of hard to beat really. I have used them before in projects and have always been happy with the results.
3
views
DorkbotPDX PCB's
More and hi res photo's at: http://thecustomgeek.com/2012/04/26/d...
So I picked up a new good habit, ordering PCB boards. I know it might sound odd, but it really has become a habit. It started with an iPad charger I made, and now it is much more, and often.
It's quite a simple process, dream up some neat little board, design it in Eagle, and order it via DorkbotPDX. There are even .dru and .cam jobs for you to use with Eagle, or you can just send the Eagle .brd file if you'd like. About 2 weeks later, you get 3 copies of what you ordered. It's a fantastic way to get a few PCB's made to test before ordering a big quantity, or just get a few for a personal project. It only cost $5 per square inch, with no setup fees and free shipping! It's a great way to get boards made for the first time without the fear of losing a large amount of money involved with minimum quantities or setup fees. I have placed 7 orders and all have been perfect. So what are you waiting for? Give it a go! You can find all of the info on the DorkbotPDX PCB Order page.
For larger boards (150 square inches or more), or 4 layer boards ($10 per square inch), there is also a service. Details on http://oshpark.com
5
views
Powering Solar Projects
Read more at: http://thecustomgeek.com/2012/02/24/p...
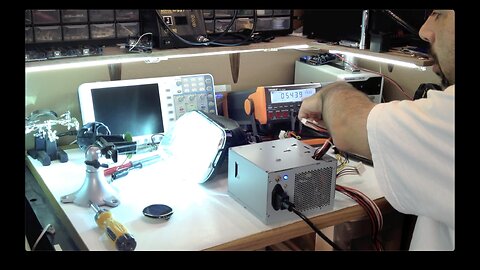
I had mentioned in my Solar Badge post that I had tried to replicate the sun to power a Solar Badge and could not. I improved my method (by placing the HID lamp in a driving light reflector) and achieved full voltage, but not full amperage. You can see in the pictures below, the Solar Badge will put out 5V at 40mA without question. In this quick video you will see an HID light powering a Solar Badge as well as my ATX power supply failing and quickly (and time lapsely) preparing another one.
Bench-top power supplies are a great way to safely power your projects. ATX power supplies are good, but I don't always want to pump 22 A ( yes, 22 amps) into my project. A good bench-top supply will limit current so you don't feed your project too much. A decent bench-top supply will also tell you how much power is being consumed by the load it is connected to, a handy display to keep an eye on how much juice is being consumed by your project. My particular supply is capable of 0-30V and 0-5A. Plenty of power for most of my projects, outside of powering HID headlights of course..
5
views
Stress Relief.. (destroying LED's)
More info at: http://thecustomgeek.com/2012/02/22/s...
So I had a long day, and as I was cleaning my office I found some LED's that were less than optimal. I'm not usually destructive, but it was time to blow them up. I love how the LED's physically move as they die, so cool. The picture below is the last LED that smoked (click for full size), it was a trooper, lots of smoke. Outtakes at the end of the video.
3
views
Solar Temperature Badge
Read more at: http://thecustomgeek.com/2012/02/18/s...
Adafruit now carries Solar Badges! It's like free outdoor 5V batteries forever! I picked up a few of these and have been toying around what I'm going to do with them. They pump out 5V at 40mA for all of your portable power needs. The other huge plus about these is that the cell is a 2″ round badge that comes with a pin. This makes your power supply wearable to show the world your project! As described in the video above, this badge measures temperature, displays a color scale from red to blue, and flashes digits, displayed as numbered pulses for the temperature. It also has a RGB 'rainbow' mode for bling as well as constant color changing temperature display. It was a fun little project and you can pick up the Solar Badge, Perma-Proto Boards, TMP36 Temp Sensor, Tilt Switch, Push Button, RGB LED, and even the ATmega328 at Adafruit.
6
views

Quick, Cheap Camera Stand
More at: http://thecustomgeek.com/2012/02/13/q...
Needed a stand for my video camera (iPhone 4S) and came up with this. Sometimes simple = good.
2
views
Quiet your fan please, I'm working
Learn more at: http://thecustomgeek.com/2012/02/13/q...
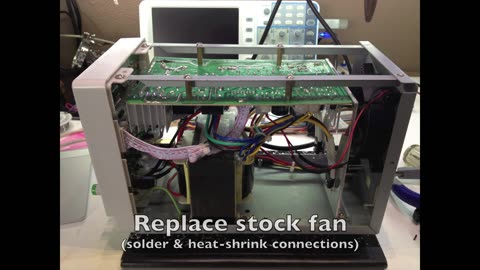
So I got a new power supply this last week, and thats a good thing right? It's 0-30 volts, 0-5 amps, programmable, voltage and current limiting, and LOUD!!! The loud part had to be fixed, it was driving me batty! So the first thing I did was crack open the unit and get the size and voltage of the fan, went to my favorite computer parts website and found a '15dB' fan that looked pretty good, and it was only $11. And 5 days away.
4
views
RGBW LED Strip Controller
Learn more at: http://thecustomgeek.com/rgbw-led-con...
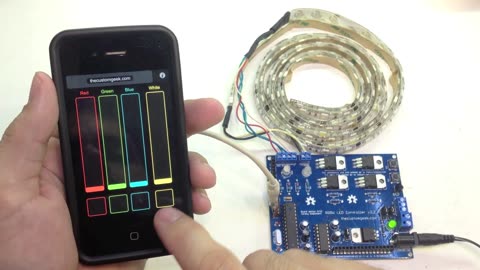
Meet the RGBW LED Controller. It is a LED controller that features an embedded ATmega328 with an Arduino bootloader for easy programming, 4 channel LED control with dimming, 5 or 12 volt output, IR receiver, XBee header, RS-232 or TTL serial I/O, 2 push buttons, 12 pin extensions for all unused pins (6 analog and 6 digital), power and channel LED indicators, and dual power input options. You can control 5 or 12 volt LED's via serial with adjustments to the level of any channel with ramping to the desired level, rate of ramping, color cycle start and stop, rate of color cycle, length of stay on each color during cycle. Fans and motors can also be driven with ease. You can buy one for only $35 with the Paypal link below! Be sure and also visit the complete assembly tutorial! Power supplies, RGB and white LED strips, FTDI Friend or FTDI Cable and XBee's and XBee adapters are available at Adafruit!
** Now shipping ver 2.2! Updates include an additional power input option, more pin options, thicker traces for more power handling, and some slight fixes/adjustments. **
I now have an updated downloadable PDF manual with pictures and linked index!
Remember, this is not a shield, it works standalone, without an Arduino!
53
views
Home Automation Intro - HAI
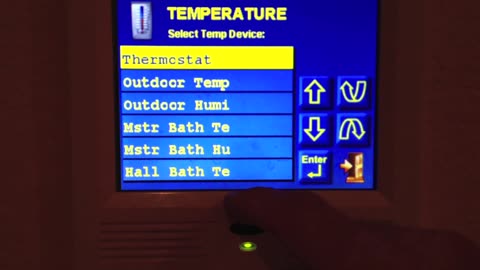
I wanted to give a tour/crash course on automation systems, so I put together a video showing some of what an automation system can do.
for more info visit: http://thecustomgeek.com/2012/01/23/a...
2
views
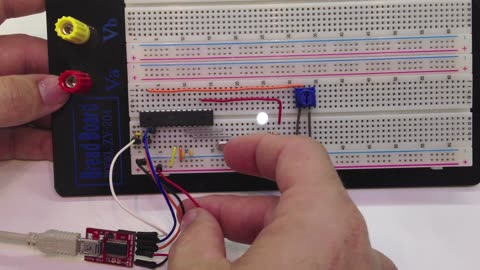
Get on Board - Breadboard That Is
For more information visit http://thecustomgeek.com/2011/12/07/g...
4
views
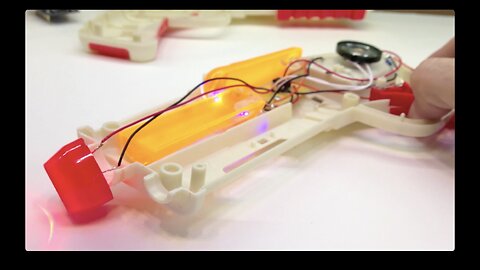
Quietish Ray Gun
Hi everyone! I had an idea a while ago to modify this toy gun my kids have. The problem you ask? Noise. Too much noise.. Read more at http://thecustomgeek.com/2011/11/03/q...
7
views

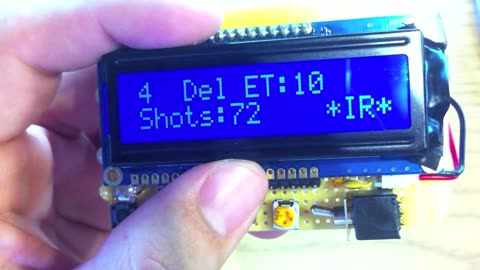
RGB LCD Arduino Intervalometer
I am getting ready to sell some kits and wanted a good way to photograph the assembly without fumbling around trying to hold a camera in one hand and a project in the other. The answer? An intervalometer. Read more at: http://thecustomgeek.com/2011/10/0...
12
views
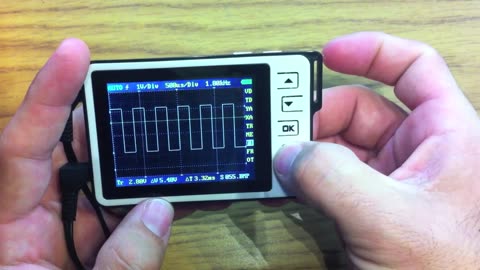
DSO Nano v2 Walkthrough and the BenF 3.62 Firmware
This video covers installing BenF firmware and a feature walkthrough on a Seeed Studio DSO Nano v2. More information and files are available at: http://thecustomgeek.com/2011/09/2...
12
views
Fun with a few 9V batteries. (244 of them)
Just some goofing around with a bunch of batteries. DO NOT TRY THIS AT HOME (or anywhere). Read more at: http://thecustomgeek.com/2011/09/1...
40
views
2
comments