Premium Only Content

2GIG Go!Control: Creating and Using Rules
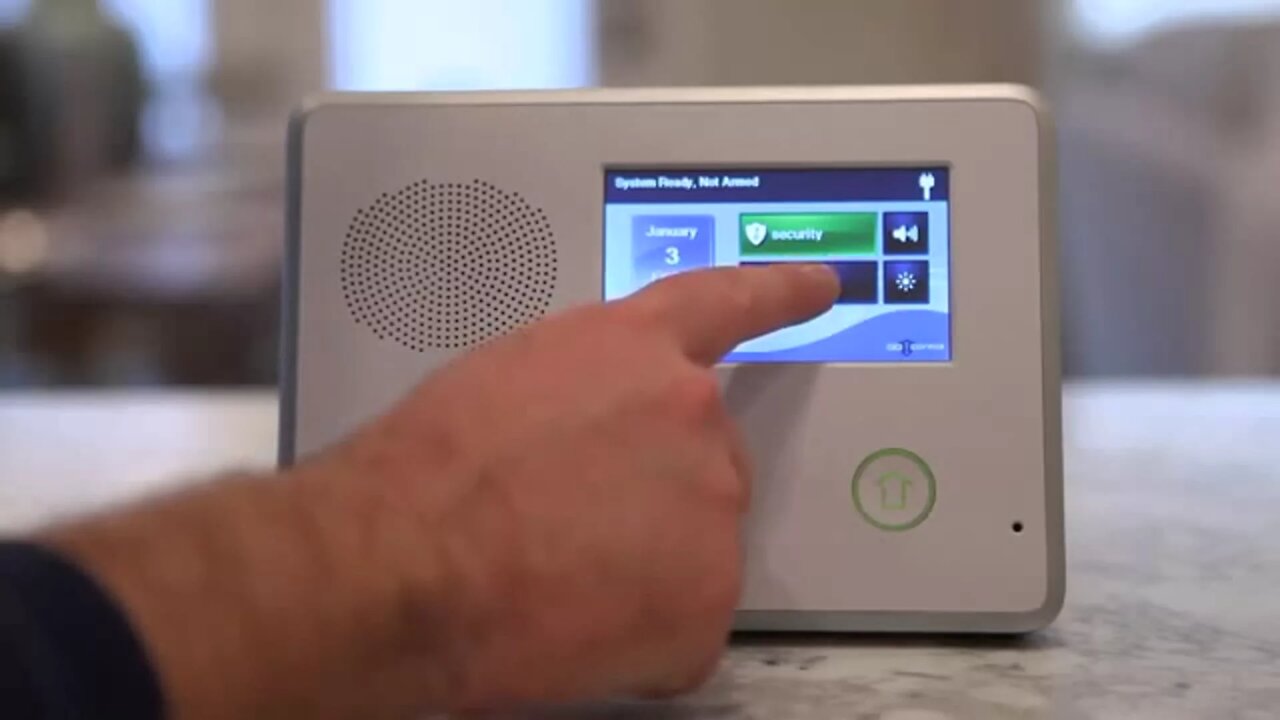
In this video you will learn how to create rules on your 2Gig Go!Control panel and then learn how to use them.
Using rules on your 2Gig Go!Control panel will enable features for your home security system when you activate alerts. For example, you can set a rule that will turn off lights when you set the alarm to away.
As the video guide explains, the system can run several rules such as locking your doors, adjusting the lighting and many other handy features. You will be able to see each rule in the control panel of your Go!Control system. Selecting a rule and assigning it to an action is a simple and straight forward process.
As you will see in the video, each rule is programmed in to the panel memory. You just have to select the action and the rule and activate it. The process is easy and once you have selected your rule set and assigned it to an action it is ready to go.
Follow along with the video tutorial to learn how the process is accomplished. Creating and using rules will allow you peace of mind when leaving the home. You will know that doors are locked, lights are out and your home is secure and monitored.
To create a rule, the first step it to access the control panel. Follow along with the video: Once you are on the home screen press “Home Services” button. This will take you to a secondary menu screen. From here, you want to press “Z-Wave” and finally “Rules.”
On the rules screen you will have only two options: Back, to return to the previous screen, and “add a rule” which will allow you to select and enable a rule. Press “add a rule” to be taken to the rules selection menus screen. Our tutorial will explain this in detail.
On this screen you will see two sets of left and right arrows. Pressing the left and right arrow buttons will scroll through the available rules as well as the available scenes. A scene is what happens when the rule is activated. So, in our previous example locking the doors and turning off the lights when the alarm is set to away would be a scene.
Using the video as a reference, use the left and right arrow buttons to find and select the rule and the scene you wish to use. Pressing the “Okay” button will set the rule and activate it. You will also be taken back to the rules screen.
Your new rule will now be listed. You can press the back button to return to the home screen, or the “add a rule” button to add another rule. You can continue to add rules and scenes until you are satisfied with the set up of your system.
When you have completed setting rules and scenes, be sure to return tot he home screen and your system will be ready to arm. When ever a rule set is activated, the scene will run automatically. If you have any difficulty, refer to the video for guidance.
-
 10:19
10:19
Alarm Grid Home Security DIY Videos
1 year agoPROA7 or PROA7PLUS: Awareness Zone Types
28 -
 10:11
10:11
A Frugal Homestead
3 years agoCREATING DEFENSIBLE WILDFIRE ZONES USING GOATS
231 -
 6:27
6:27
Home Decor DIY & More
3 years agoCreating an Easter Wreath with Rolls, using Rainbow Deco-Mesh|MarthasWreath|How to
92 -
 34:43
34:43
Lynda Cromar Online Training
3 years agoCreating A Smashing Page To Traffic Authority Using SendShark
1 -
 9:06
9:06
Colion Noir
10 hours agoKid With Gun Shoots & Kills 2 Armed Robbers During Home Invasion
16.9K3 -
 54:28
54:28
LFA TV
1 day agoUnjust Man | TRUMPET DAILY 2.27.25 7PM
19.7K2 -
 DVR
DVR
CatfishedOnline
7 hours ago $1.19 earnedGoing Live With Allen Weekly Recap
21.8K -
 20:10
20:10
CartierFamily
7 hours agoAndrew Schulz DESTROYS Charlamagne’s WOKE Meltdown on DOGE & Elon Musk!
36.8K45 -
 1:36:39
Redacted News
5 hours agoBOMBSHELL EPSTEIN SH*T SHOW JUST DROPPED ON WASHINGTON, WHAT IS THIS? | Redacted w Clayton Morris
145K242 -
 2:03:31
Revenge of the Cis
6 hours agoEpisode 1453: Fat & Fit
48.6K8