Premium Only Content

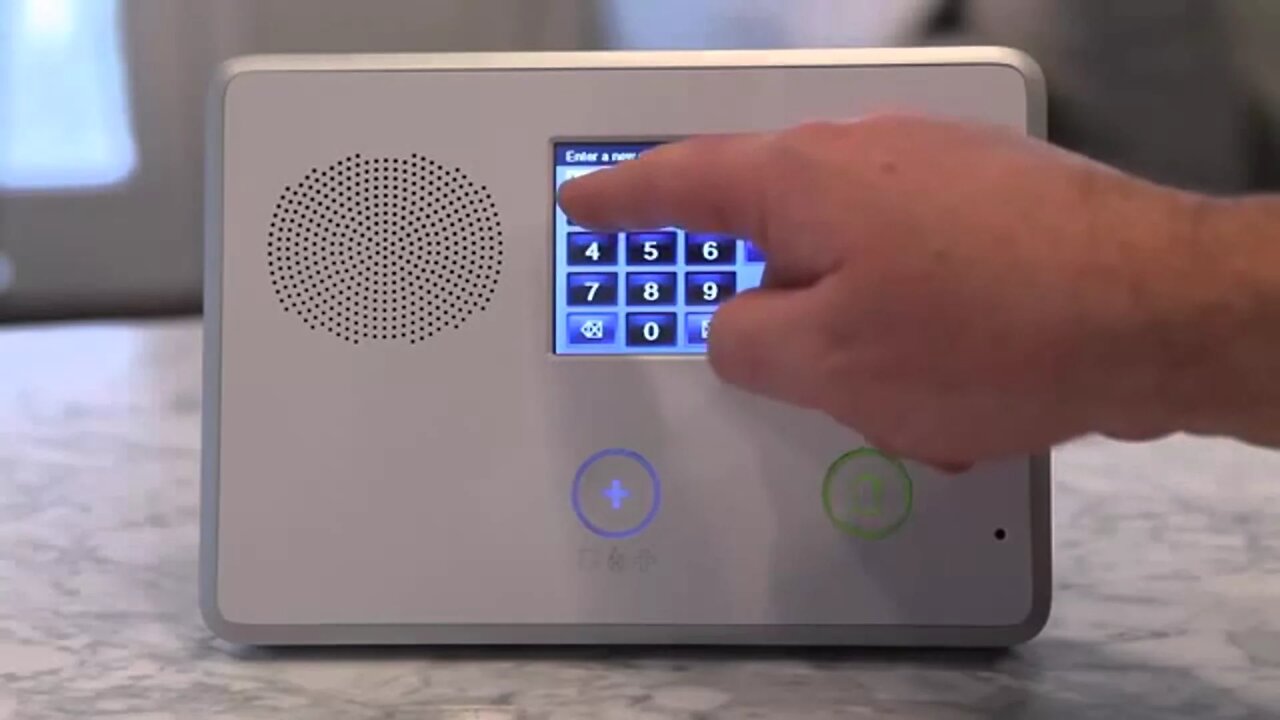
2GIG Go!Control: Creating Schedules
In this video you will learn how to create schedules on your 2Gig Go!Control panel and then learn how to use them.
Schedules are the perfect way to allow temporary access to your home when you are away. This will come in handy when you have guests staying over, or arriving when you are out. If home repairs are needed while you are at work, you can assign a user code and schedule when that code can be used.
This will enable the repairman access to your house when you aren’t there, and only for the days or hours you allow that code to be used. Follow along with our video to learn how to create a schedule and activate it.
A housekeeper, for example, can have their own code which is only activated for a certain day of the week at certain times of the day. Schedules make it possible to know who has access to your home and when so you don’t have to rearrange your life to make sure you are always home when the alarm panel is active.
Follow the video guide to create a schedule. First you need to enter the toolbox menu screen. From there, you enter the user code and then enter the user management section menu. Select the option for adding a secondary user code. Enter the code you want to use and touch the okay button.
As the video explains, the panel will ask you to confirm the code by entering the same code again. After you have re-entered the code, press the okay button a second time. The user code will be stored in the system.
Next the panel will ask you when the system should accept the secondary user code. You will see 3 options on the panel screen. If you are in doubt, follow along with the video. The options available are always, never or by schedule. Select the by schedule option and follow that by pressing the “edit schedules” button that appears on the screen.
From here you will press the add schedule button and be given 3 schedule options. The options presented are: recurring, date or date range. Recurring gives you the option to select days of the week and times of those days that the user code is valid.
Date will select a single date and time range to accept the code. Date range will allow you to select a start and end date as well as a time range during those dates to accept the user code. The video tutorial will show you how to accomplish this.
Depending on your needs for that user code, follow the prompts on the panel screen to select the needed ranges. When you have completed the process exit back to the home screen.
The system will automatically store the information and the new user code will be allowed access during the set times and dates. Refer to our instructional video to follow along with all the prompts and schedule options. You will be able to create and run schedules in no time.
-
 10:19
10:19
Alarm Grid Home Security DIY Videos
1 year agoPROA7 or PROA7PLUS: Awareness Zone Types
28 -
 1:03
1:03
DocWhitt
3 years agoDigication: Creating a Portfolio
3 -
 LIVE
LIVE
Kim Iversen
1 hour ago"Canada's Trump" Is Trudeau’s Worst Nightmare: Is Maxime Bernier the Future of Canada?
1,487 watching -
 DVR
DVR
Bannons War Room
10 days agoWarRoom Live
2.58M435 -
 16:06
16:06
The Rubin Report
7 hours agoProof the Islamist Threat in England Can No Longer Be Ignored | Winston Marshall
34.3K24 -
 2:07:07
Robert Gouveia
4 hours agoFBI Files Coverup! Bondi FURIOUS; SCOTUS Stops Judge; Special Counsel; FBI Does
40.5K32 -
 56:15
56:15
Candace Show Podcast
5 hours agoBREAKING: My FIRST Prison Phone Call With Harvey Weinstein | Candace Ep 153
107K69 -
 LIVE
LIVE
megimu32
1 hour agoON THE SUBJECT: The Epstein List & Disney Channel Original Movies Nostalgia!!
183 watching -
 9:06
9:06
Colion Noir
10 hours agoKid With Gun Shoots & Kills 2 Armed Robbers During Home Invasion
16.9K3 -
 54:28
54:28
LFA TV
1 day agoUnjust Man | TRUMPET DAILY 2.27.25 7PM
19.7K2