Premium Only Content

2GIG Go!Control: How to Change the Master Code
In this video you will learn how to change the master code on your 2Gig Go!Control panel.
Your Go!Control panel is shipped form the factory with a default master code. This code is used for initial set up of your home security system. Once you are set up, it is recommended that you change the master code from the default shipping code to a code that you will be able to remember and difficult for anyone else to guess.
Our tutorial video will show you how easy it can be to change the code. You can follow along with the instructions from your own panel to ensure everything goes smoothly.
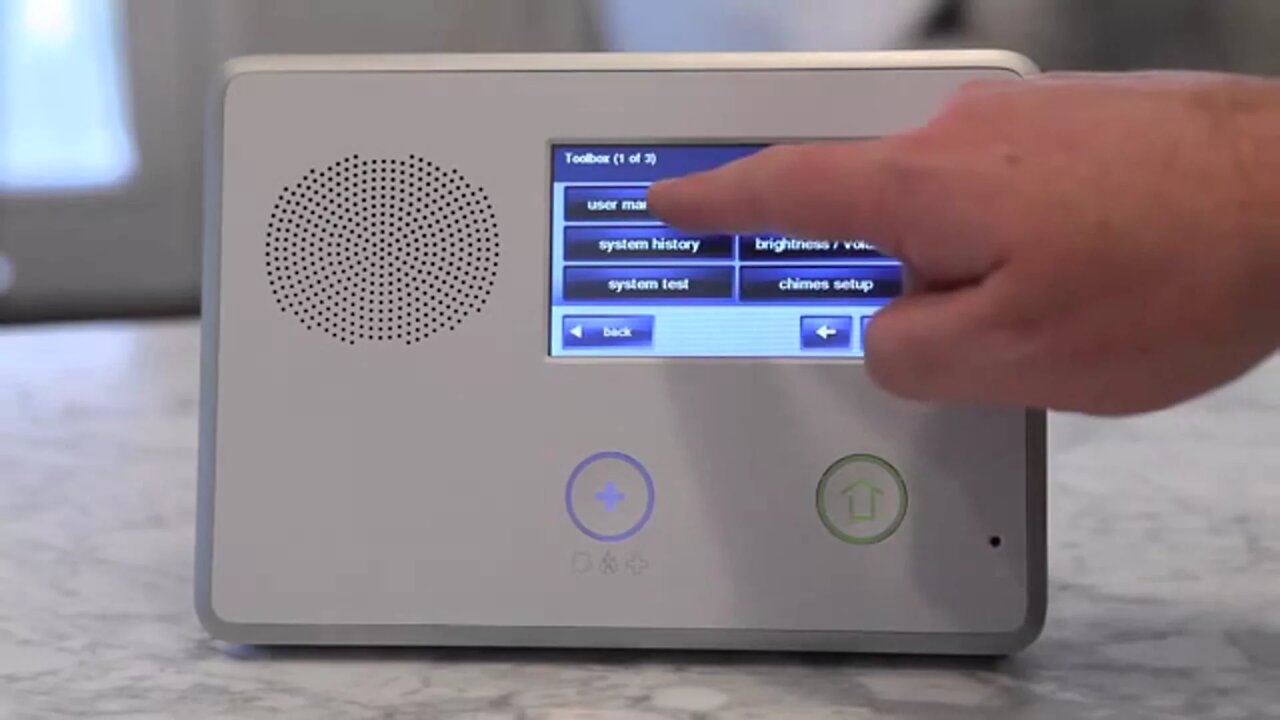
In the event you need to change the default master code, or change the code again at a later point, you simply need to access the user management section of the menu. To access the menu, touch the menu options for “Security” followed by “Menu” and finally “Toolbox.”
You need to then enter the current master code. If you are changing the master code from default, the default code is “1111.” Otherwise, the code will be the last master code you entered when the code was changed previously, as our video explains.
Once you enter the code, you will be in the user toolbox menu screen. From this screen you will press “User Management” as the video will show.
The master code is listed as the master user. The master user is also known as user number 1.
Select “Master User” from the user management screen and you will see the option for changing you PIN. Press the change PIN button and a number pad will appear on the screen.
The number pad screen is where you will enter your new master code number. Follow along with the video guide for exact details. This number should be easy for you to remember and hard for others to guess. Do not use birthdays, anniversaries or other important dates. You should also refrain from using repeating numbers, like the default master code.
The selected number is limited to only 4 digits. Select your new master code numbers and enter them into the control panel. Once you enter the 4 new numbers you will be asked to confirm your new code. Enter the same 4 numbers again to confirm.
When you have entered the numbers for the second time, press the “Okay” button and you will be prompted with the Conformation screen.
This screen tells you, as the video explains, that the code for user 1 (master user) has been successfully changed.
Hit the “Okay” button again to exit the screen and return to the main operation panel.
Your Go!Control alarm panel is now ready. You may repeat this process as many times as you like. You should change your master code at least once a year. Never duplicate the same code.
You can refer to the video to see how the process is completed. Following the tutorial will ensure you have no trouble changing the master code on your Go!Control panel.
-
 3:31
3:31
Alarm Grid Home Security DIY Videos
1 year ago $0.01 earnedWireless Repeater: Use With Life Safety Devices
24 -
 7:19
7:19
Alarm Grid Home Security DIY Videos
3 years ago2GIG Edge: Default Master Code
7 -
 0:56
0:56
InfernoStar Gaming
3 years agoTier Change Rewards - Professional Racer V | Racing Master
97 -
 5:50
5:50
Alarm Grid Home Security DIY Videos
3 years ago2GIG Edge: Changing the Master Code
12 -
 1:13
1:13
InfernoStar Gaming
3 years agoTier Change Rewards - Racing Novice III | Racing Master
33 -
 4:12
4:12
Alarm Grid Home Security DIY Videos
3 years ago2GIG Edge: Resetting the Master Code
22 -
 48:05
48:05
Stephen Gardner
1 hour ago🔥IT'S OVER! Congress CAN'T HIDE this from Elon MUSK and Trump!!
13.8K11 -
 1:01:47
Tucker Carlson
3 hours agoHungary Prime Minister Viktor Orban on USAID, Trump, Immigration, NATO, and the Russia/Ukraine War
79.3K38 -
 1:32:52
Russell Brand
21 hours agoThe Battle for Truth: Gregg Hurwitz on Myth, Power & Cultural Control
105K4 -
 1:56:59
The Charlie Kirk Show
3 hours agoVance Buries the Globalists + Inside DOGE + AMA | Dowd | 2.14.2025
143K15