Lyric Security System: Tools Needed for Installation
This instructional video will explain the tools needed for a DIY install of the Honeywell Lyric security system.
Honeywell Lyric Controller: http://alrm.gd/lyric-controller
Get Monitored: http://alrm.gd/get-monitored
The Honeywell Lyric security system was designed with the end user in mind. While professional installation is always available, sometimes you just need to do things yourself. Installing the Honeywell Lyric control panel is a fairly straight forward and simple process.
Ensuring you have the right tools for the job is essential to a smooth install process. This video will show you all of the tools you need to properly and professionally install the system in your home.
The obvious first step to installation is determining where the control panel will be mounted. It should be mounted in an area that is accessible in a short amount of time form the entry point of the home. This will ensure you are able to get to the panel to deactivate it when you return home.
You should also note that the control panel will require an AC outlet for its main power supply. You should be able to mount the control panel near an outlet, which the installation video will show how to hide the power wires behind the wall.
The tools you will need and their objective will be covered in detail in this video. Follow along prior to starting installation to ensure you have everything you need.
Aside from the control panel itself and the transformer for the outlet, you will need a set of screwdrivers. A small flat head and small Phillips head screwdriver will work just fine. In the video we show you that we use a double ended pocket screw driver.
You will also need a pencil, pen or fine tip marker for drawing on the wall when placing the mounting bracket and to outline where to cut the holes into the wall itself. To make the cuts you will also need a drywall saw to make the precision cuts in the wall.
You should also have a stud finder. This will be important to locate studs so that you can avoid them when making the mounting bracket cuts. This will also help eliminate the possibility of cutting into power wires that may be attached to the studs in the wall.
You will need a power drill also. The video will explain this is used for securing the mounting bracket to the wall and the holes needed for the screws. You can use a large screwdriver to manually secure the screws to the wall, however, if you do mount to a stud or bracket, it may become difficult.
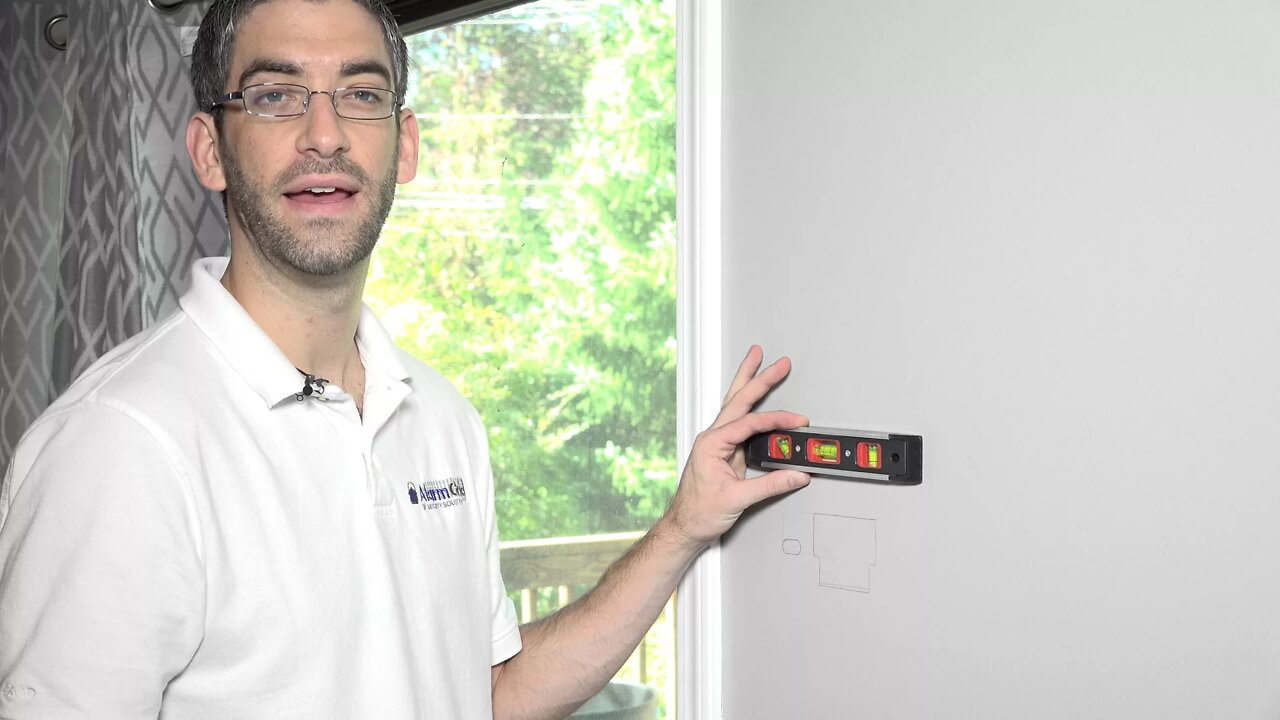
Drill bits and screwdriver bits for the drill are essential also, as is a level. The video will explain how to use the level to get a professional mount for your control panel. You will also need wire strippers and the correct wire for the power supply.
The video will discuss in detail the proper wire as well as the wire fisher that will ensure the wire is fed through the wall and remains unseen.
-
 10:19
10:19
Alarm Grid Home Security DIY Videos
1 year agoPROA7 or PROA7PLUS: Awareness Zone Types
28 -
 0:59
0:59
Steve90247
3 years agoCrappy split system installation
29 -
 0:25
0:25
ViralHog
3 years ago $0.03 earnedSecurity System Hits A Snag
217 -
 2:46
2:46
StraightArrowRepair
3 years agoTools For Mobile Home Skirting Installation
37 -
 15:36
15:36
Dr David Jockers
3 hours ago $0.75 earnedWhat's the Dark Side of Eggs That No One Talks About?
18.6K4 -
 38:35
38:35
BonginoReport
6 hours agoTrump is Conquering a Foreign Land and It’s Not Greenland (Ep.133) - 02/05/2025
156K219 -
 2:58:44
Wendy Bell Radio
8 hours agoTaking Out The Trash
104K59 -
 1:22:24
Graham Allen
5 hours agoDems Try To RAID USAID Office!! + Trump Meets With Netanyahu In The Oval Office! Peace Is HERE!!
67.8K65 -
 1:01:16
Randi Hipper
3 hours agoGROUNDBREAKING CRYPTO BILL INTRODUCED! WHAT THIS MEANS FOR BITCOIN INVESTORS
57.8K1 -
 LIVE
LIVE
Vigilant News Network
17 hours agoRFK Jr. Clears Major Hurdle for HHS Secretary | The Daily Dose
716 watching