Premium Only Content

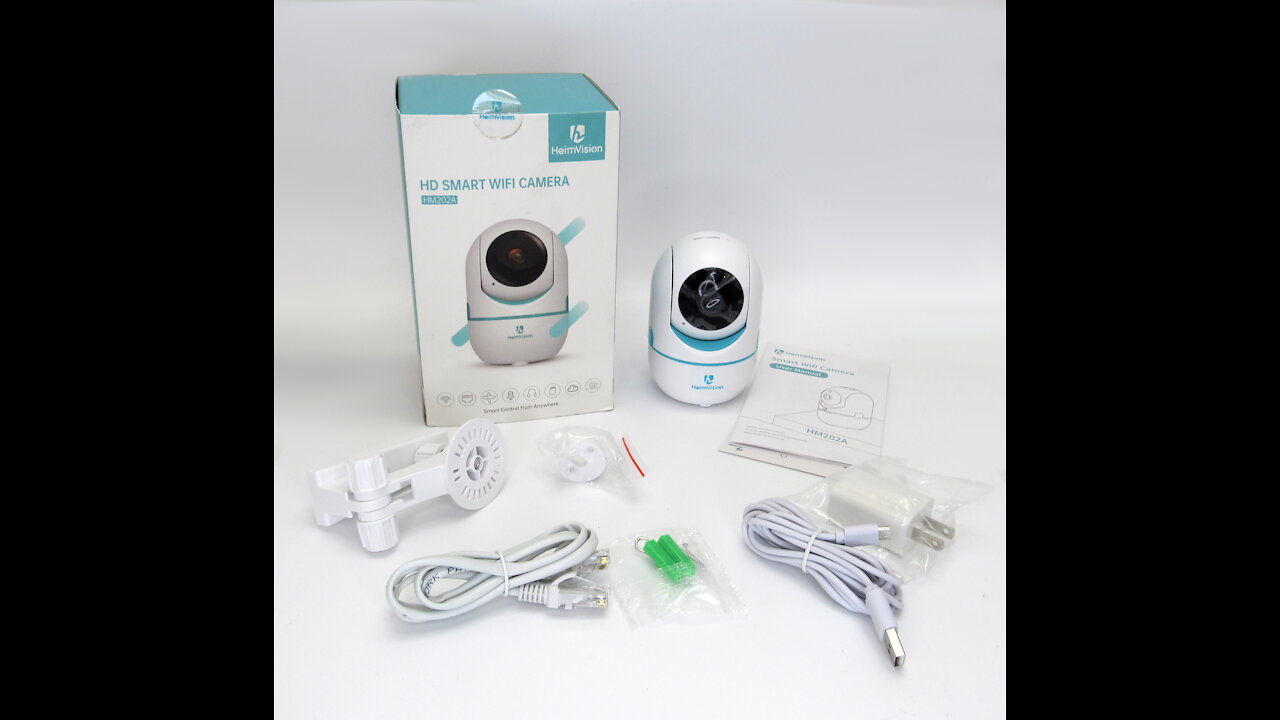
Heimvision HM202A HD SMart WIFI Camera “what’s in the box” Unboxing & Setup instructions.
A short “what’s in the box” unboxing of a Heimvision HM202A IP camera.
Showing what is actually in the box if you order one yourself.
I do not show the set up, but it is easy.
1. Unbox it and plug it in to power it up.
2. Download the app using your smartphone and QR code on the side of the box.
Alternatively you can use a computer or laptop to connect by going to the website https://heimlink.heimvision.com,
and set up you account (email and password of your choosing).
3. Once you have an account set up, (free unless you want to purchase cloud storage), select the setup guide where you select “add device” then the “+” button then, “add smart camera”, then select “device added by scanning a code” then “next” where you are prompted to add you WiFi router name and password. After that it generates a QR code on your phones screen which you point/hold close to the camera so it can read it, like 2” close in my case and it will pair the camera to your phones app.
4. last select a name, on the screen, living room, garage etc. and once you do that touch the blue “Start to experience” bar on the bottom of the screen and it switches to a live view on the screen.
5. Mounting. Select where you want it, it my case I used the mount and screwed it to the ceiling and even though the camera is upside down there is a setting to rotate 180 degrees which flips the image upright.
There is also a flicker setting for 50 or 60hz and mine was set on 50hz so I changed it to 60hz and it reduced the flicker quite a bit. I use LED lights and they produce a flicker on digital cameras.
-
 56:15
56:15
Candace Show Podcast
5 hours agoBREAKING: My FIRST Prison Phone Call With Harvey Weinstein | Candace Ep 153
107K69 -
 LIVE
LIVE
megimu32
1 hour agoON THE SUBJECT: The Epstein List & Disney Channel Original Movies Nostalgia!!
202 watching -
 9:06
9:06
Colion Noir
10 hours agoKid With Gun Shoots & Kills 2 Armed Robbers During Home Invasion
16.9K3 -
 54:28
54:28
LFA TV
1 day agoUnjust Man | TRUMPET DAILY 2.27.25 7PM
19.7K2 -
 20:10
20:10
CartierFamily
7 hours agoAndrew Schulz DESTROYS Charlamagne’s WOKE Meltdown on DOGE & Elon Musk!
36.8K45 -
 1:36:39
Redacted News
5 hours agoBOMBSHELL EPSTEIN SH*T SHOW JUST DROPPED ON WASHINGTON, WHAT IS THIS? | Redacted w Clayton Morris
145K242 -
 2:03:31
Revenge of the Cis
6 hours agoEpisode 1453: Fat & Fit
48.6K8 -
 2:38:12
The White House
7 hours agoPresident Trump Holds a Press Conference with Prime Minister Keir Starmer of the United Kingdom
160K60 -
 1:01:04
In The Litter Box w/ Jewels & Catturd
1 day agoDrain the Swamp! | In the Litter Box w/ Jewels & Catturd – Ep. 751 – 2/27/2025
91.7K35 -
 1:11:24
Dr. Drew
8 hours agoNEW: Cardiac Arrest In Healthy Young People After mRNA w/ Nicolas Hulscher – Ask Dr. Drew
72.7K32