Premium Only Content

Learn Motion Design Week 09
Week 09 A
1. The difference between tweening and Morphing
2. Draw star shape, number of points- change this overtime
This is tweening, computer goes from one shape to another and does all the work for you
3. You can also tween with a Mask shape path, but takes more work
Put in photo, go from a star to a circle mask shape
Draw both masks on same layer, try and get them lined up and as close in size as possible for the best tween
Twirl down each and add a keyframe to teh pask path- this will hold important info we need
Move forward in timeline add a 2nd keyframe to the star mask path layer,
Copy the circle keyframe in teh circle mask layer, and paste it into the 2nd eyframe in the mask path to make our mask tween
We needed that 2nd mask to get a keyframe for its shape path layer, this is a vital step when morphing, which we will go over soon
Masks have different uses than shape layers, and have some pretty powerful uses.
4. Bring in a 4k video clip, go over display info in project panel thumbnail
5. Bring in the green glare effect and scale down 50% since it is 4k in a 2k comp
6. This has black behind it, add new solid layer, ake it bright pink
7. We can remove the black with either a blending mode or by using effect UnMult
8. If we use blending mode change it to Screen to remove te black
9. If client feels it is too slow, how to speed up clip
Right click on the clip - time - time stretch
Go over durations, taking note of them and how adjusting % alters length of clip
Right click clip Time - Time reverse layer
Clip now playing backwards, starting at the end of the clip
Another useful time trick is to split a layer, right click Time- Freeze frame, freezes video clip where playhead is, useful for pausing sections of a video or to make still images stay on screen longer
You’ve seen this is title sequences where character freezes and text pops out behind them
Split layer one more time and remove teh toggle hold keyframe so it plays again
Time warp effect
Go to part of video you want to speed up or slow down, not the full video clip, just a section of it- like bullet time in the matrix or in the movie 300
Effects - time warp
Default speed is 50. 100 is normal, full speed
Now move forward or backwards in time and alter speed, 600 woul play at 6xs teh speed.
If you want that for 3 seconds, go forward 3 seconds and click teh diamond button to add a keyframe that uses values of the one before it
Them move playhead again and end at 100, normal speed
10. Now empty sequence make a star shape again place anchor point in the middle
11. Drop in audio form Youtube song
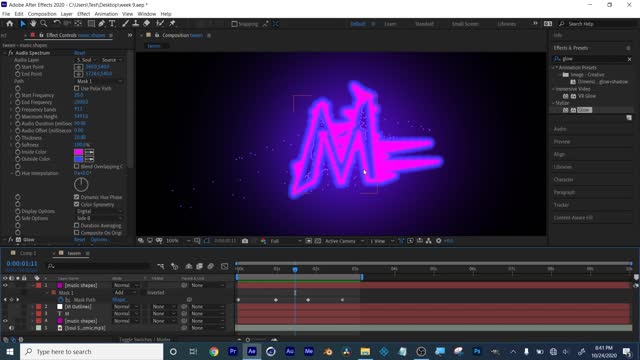
12. Select the layer with teh song, right click - keyframe assistant - convert audio to keyframes
13. Hit U key on new layer that as created, go to Star layer hit S for scale, hold down ALT or option as we click on it to make an expression
14. Drag the pick whip from teh expression field, not the one by parent & link, and drag it to the word SLider under Both Channels layer in audio
15. Click out of teh epxresssion field and hit space bar to preview animation
16. You can use thai technique for almost anything with a stop watch, like the glow effect
1st try this with gow radius, if to osubtle try glow threshold
17. To experiment ad push further apply effect Echo to the star to get echos as it animates
Change blending mode in the effect for a completely different look try Screen
Adjust opacity in echo effect to get more interesting positive and negative spacial relations
Having motion follow along to a beat is useful in music videos and credit sequences and some commercials
Be sure to play around and experiment in after effects, that is half the fun of motion design, pushing yoru ideas
It would have taken a long time to achieve this look without the keyframes from teh audio
and hold down ALT or option to open the expression field Just watch what you are pickwhipping to and from
18. That is 1 way to get keyframes form audio, delete all layers except teh song we placed.
-
 56:15
56:15
Candace Show Podcast
5 hours agoBREAKING: My FIRST Prison Phone Call With Harvey Weinstein | Candace Ep 153
107K65 -
 LIVE
LIVE
megimu32
1 hour agoON THE SUBJECT: The Epstein List & Disney Channel Original Movies Nostalgia!!
184 watching -
 9:06
9:06
Colion Noir
10 hours agoKid With Gun Shoots & Kills 2 Armed Robbers During Home Invasion
16.9K3 -
 54:28
54:28
LFA TV
1 day agoUnjust Man | TRUMPET DAILY 2.27.25 7PM
19.7K2 -
 DVR
DVR
CatfishedOnline
6 hours ago $1.19 earnedGoing Live With Allen Weekly Recap
21.8K -
 20:10
20:10
CartierFamily
7 hours agoAndrew Schulz DESTROYS Charlamagne’s WOKE Meltdown on DOGE & Elon Musk!
36.8K45 -
 1:36:39
Redacted News
5 hours agoBOMBSHELL EPSTEIN SH*T SHOW JUST DROPPED ON WASHINGTON, WHAT IS THIS? | Redacted w Clayton Morris
145K236 -
 2:03:31
Revenge of the Cis
6 hours agoEpisode 1453: Fat & Fit
48.6K8 -
 2:38:12
The White House
7 hours agoPresident Trump Holds a Press Conference with Prime Minister Keir Starmer of the United Kingdom
160K60 -
 1:01:04
In The Litter Box w/ Jewels & Catturd
1 day agoDrain the Swamp! | In the Litter Box w/ Jewels & Catturd – Ep. 751 – 2/27/2025
91.7K35