"Step-by-Step Guide to Creating Kisame's Makeup from Naruto"
Creating Kisame's makeup from Naruto requires several steps to achieve his signature look. Here’s a step-by-step guide:
1. Preparing the Tools and Materials
Blue face paint (water-based or cream body paint)
Foundation and setting powder to smooth out the skin tone
Black eyeliner for facial details
Contour makeup (gray/dark blue) to create depth and sharp features
White or yellow contact lenses (optional) for his shark-like eyes
Prosthetic sharp teeth or white paint to mimic his jagged teeth
2. Applying the Makeup
1. Cleanse and prep your face with a primer for long-lasting makeup.
2. Apply blue face paint evenly over your face and neck using a sponge or makeup brush.
3. Use contouring with gray or dark blue tones to sharpen your facial features.
4. Draw Kisame’s signature facial markings with black eyeliner or face paint.
5. Enhance the eyes with black eyeliner to create a sharp, anime-like effect.
6. Use white or yellow contact lenses to match his eerie gaze.
7. Add sharp teeth using prosthetics or by painting them white.
8. Set the makeup with a setting spray to keep it intact.
3. Completing the Look with a Costume
Wear a short spiky black wig or style your hair accordingly.
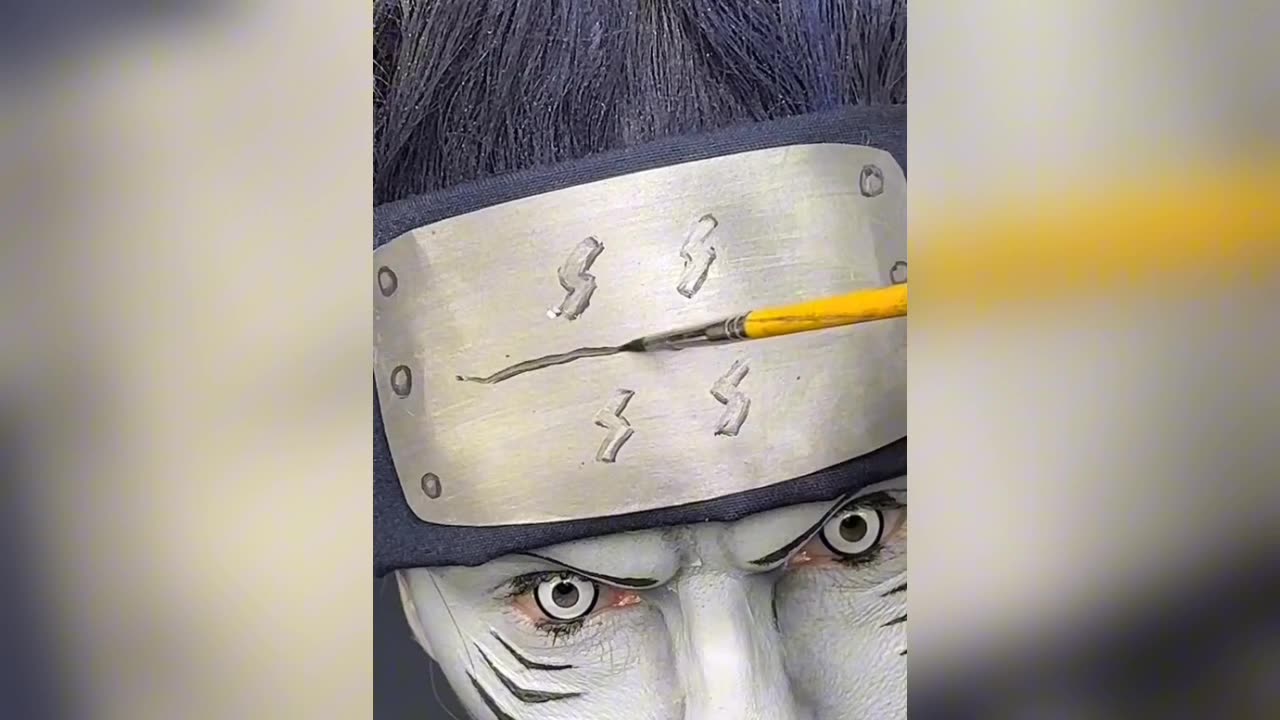
Put on the scratched Akatsuki headband as Kisame wears.
Wear the Akatsuki cloak to finalize the look.
By following these steps, you’ll achieve an authentic Kisame cosplay look!
-
 46:08
46:08
Kimberly Guilfoyle
8 hours agoBad Day to be a Bad Guy: FBI Taking Down World’s Worst Criminals, Live with John Nantz | Ep.203
97.5K31 -
 DVR
DVR
Redacted News
6 hours agoWhat's REALLY going on in Syria? | Redacted with Natali Morris
124K61 -
 54:18
54:18
Candace Show Podcast
7 hours agoHarvey Speaks: Jessica Mann & The Five Year Affair | Ep 3
119K33 -
 56:53
56:53
Grant Stinchfield
5 hours ago $4.78 earnedFreeze Spending & Kick the Can Down the Road... Why Republicans Should do Just That!
57.9K10 -
 56:48
56:48
VSiNLive
6 hours agoFollow the Money with Mitch Moss & Pauly Howard | Hour 1
50.9K -
 3:28:27
Barry Cunningham
7 hours agoTRUMP DAILY BRIEFING: INTERNET UNDER ATTACK! X & RUMBLE DOWN! EXECUTIVE ORDER SIGNING!
75.3K37 -
 5:53:56
Scammer Payback
10 hours agoCalling Scammers Live
66.7K5 -
 1:36:15
In The Litter Box w/ Jewels & Catturd
1 day agoABOLISH NGOs | In the Litter Box w/ Jewels & Catturd – Ep. 758 – 3/10/2025
88.4K55 -
 2:04:36
Film Threat
1 day agoVERSUS: DAREDEVIL: BORN AGAIN + MICKEY 17 + THE STATE OF SCI-FI | Film Threat Versus
38.2K -
 1:21:46
The HotSeat
7 hours agoIt's A Trap America! Do Not Fall For It!
29.2K19