Step-by-Step Winged Eyeliner Tutorial
A winged eyeliner is a timeless makeup look that enhances the eyes and creates a lifted effect. Whether you prefer a subtle flick or a bold, dramatic wing, this tutorial will help you achieve the perfect shape!
1. Prep the Eyes
Apply eye primer or concealer to create a smooth base.
If needed, set with a light matte eyeshadow or translucent powder.
2. Choose Your Eyeliner
Gel eyeliner (for precision and a matte finish)
Liquid eyeliner (for a sharp, bold look)
Pencil eyeliner (for a softer, smudged effect)
3. Create the Guideline
Look straight into the mirror and identify where you want the wing to extend.
Using a light hand, draw a thin diagonal line from the outer corner of your eye toward the end of your eyebrow.
Adjust the angle based on your eye shape (more upward for hooded eyes, slightly flatter for almond eyes).
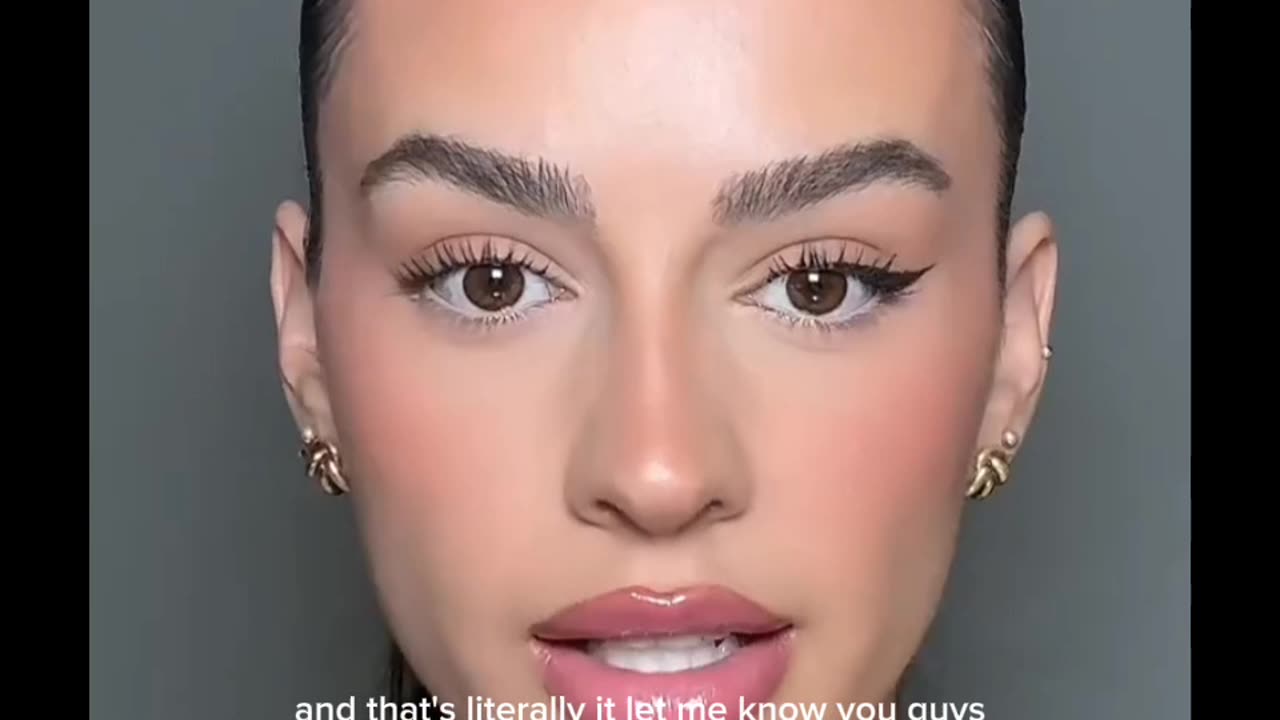
4. Draw the Wing Shape
From the tip of the first line, draw a small triangle, connecting it back to the upper lash line.
Keep the inner corner thin and gradually thicken the line as you move outward.
5. Fill in the Wing
Fill in the triangle smoothly, ensuring no gaps.
Keep the lines sharp and clean for a precise look.
6. Perfect & Clean Up
Use a cotton swab with micellar water or a concealer with an angled brush to sharpen the edges.
7. Finish with Mascara or Lashes
Apply mascara or false lashes to complete the look and enhance the wing’s effect.
Would you like specific tips for different eye shapes or eyeliner recommendations?
-
 6:57
6:57
Cooking with Gruel
16 hours agoMake Cheese Great Again
6.42K6 -
 5:17
5:17
Mrgunsngear
20 hours ago $1.73 earnedPresident Trump Has Appointed A New ATF Director
15.8K22 -
 48:17
48:17
Athlete & Artist Show
8 days agoS5E1: Chucky Announces First Kid, 4 Nations Face Off, and more!
6.35K -
 38:30
38:30
hickok45
5 hours agoSunday Shoot-a-Round # 269
10K10 -
 1:39:55
Squaring The Circle, A Randall Carlson Podcast
1 day ago#040 Humanity's Expansion Into The Cosmos: A New Age - Squaring The Circle
7.84K3 -
 12:54
12:54
ariellescarcella
14 hours agoYou're NOT Queer, Just Annoying And Boring
4.94K5 -
 18:57
18:57
Fit'n Fire
11 hours agoA PDW That Thumps -- Stribog SP45A3 45ACP
10.1K1 -
 2:06:23
Game On!
14 hours ago $0.77 earnedAnother Sunday Without Football...
21.9K1 -
 17:53
17:53
Forrest Galante
16 hours agoHow I Joined a Dangerous Remote Tribe (feat. Nelk Boys)
78.3K13 -
 LIVE
LIVE
Vocalot
1 day agoDay 6! New Here! New Rumble Friends!? 🤙
698 watching