Premium Only Content

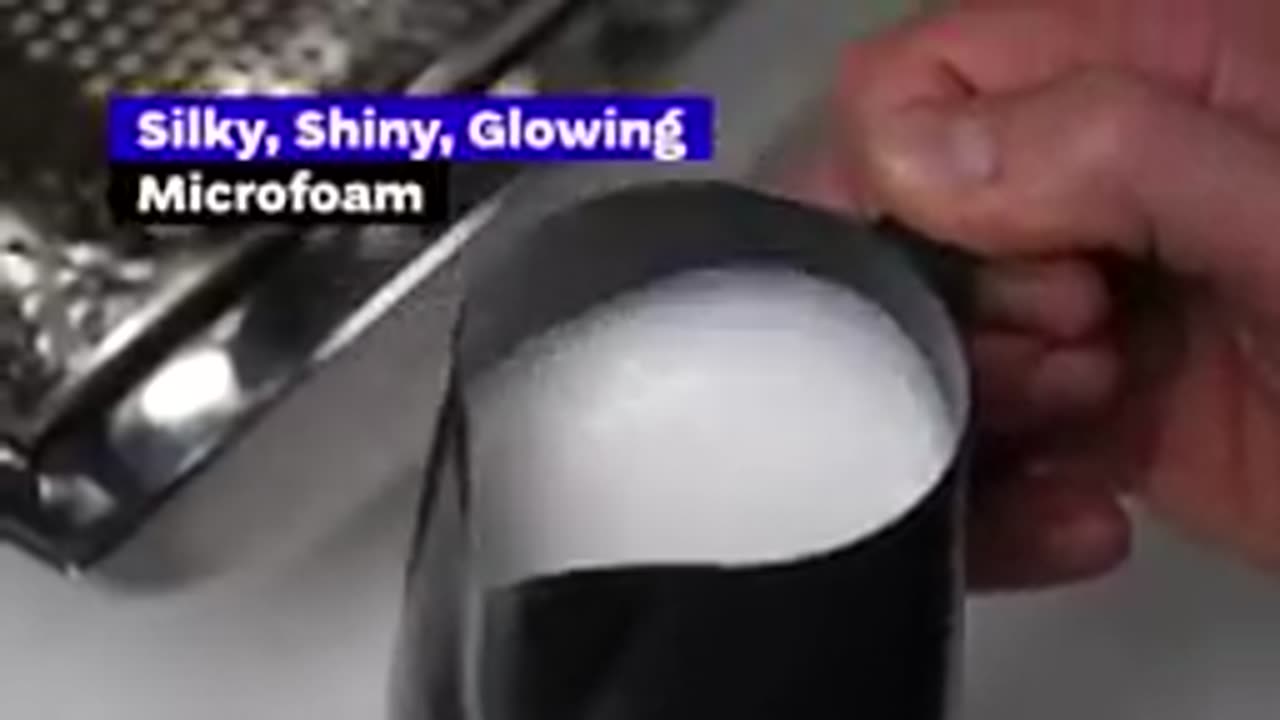
How To Steam Milk For Latte Art (Barista Training For Beginners)
Steaming milk for latte art is an essential skill for baristas. It involves creating microfoam (smooth, velvety milk foam) that integrates seamlessly with espresso. Here's a step-by-step guide for beginners:
---
### **1. Prepare Your Tools**
- **Milk Jug (Pitcher):** Choose a stainless steel pitcher with a spout, ideal for pouring latte art.
- **Espresso Machine:** Ensure the steam wand is clean and functional.
- **Milk:** Use fresh, cold milk. Whole milk is ideal for beginners due to its fat content, which creates stable foam. Non-dairy options like oat or almond milk can work but require more practice.
---
### **2. Fill the Milk Jug**
- Pour cold milk into the pitcher, filling it about halfway. Avoid overfilling, as the milk will expand when steamed.
---
### **3. Purge the Steam Wand**
- Before steaming, release a short burst of steam to clear any water or debris from the wand.
---
### **4. Position the Jug and Steam Wand**
- Insert the steam wand into the milk at an angle, placing the tip just below the surface. This is the "stretching" phase where air is introduced into the milk.
---
### **5. Begin Steaming: The Two Phases**
#### a. **Stretching (Aeration):**
- Turn on the steam wand and allow it to inject air into the milk.
- Keep the tip slightly below the surface so it creates a gentle hissing sound (like tearing paper).
- Stop introducing air when the milk has increased in volume by about 30% (1-2 seconds for a latte).
#### b. **Texturing:**
- Submerge the wand slightly deeper into the milk and angle the pitcher to create a whirlpool effect.
- This motion helps break down large bubbles and creates a silky, velvety microfoam.
---
### **6. Monitor the Temperature**
- Use your hand to feel the temperature of the jug or a thermometer for precision.
- Ideal milk temperature is **60°C–65°C (140°F–149°F)**.
- Stop steaming when the jug becomes too hot to touch comfortably (~65°C).
---
### **7. Turn Off the Steam and Clean the Wand**
- Turn off the steam before removing the wand from the milk to avoid splashing.
- Wipe the steam wand with a damp cloth and purge it again to clear any milk residue.
---
### **8. Swirl and Tap**
- Swirl the pitcher to mix the milk and foam into a uniform texture.
- Tap the bottom of the pitcher on a counter to remove any large bubbles.
---
### **9. Pour the Milk**
- Start with the pitcher a few inches above the cup to allow the milk to flow under the crema.
- Lower the pitcher as you pour to create patterns for latte art (e.g., hearts, rosettas, or tulips).
---
### **10. Practice, Practice, Practice**
- Mastery comes with repetition! Practice steaming milk and pouring to refine your skills.
---
### **Common Beginner Mistakes**
- **Over-aerating:** Too much air creates a bubbly or stiff foam.
- **Under-aerating:** Not enough air results in flat milk without foam.
- **Burning the milk:** Overheating destroys proteins, leading to burnt-tasting milk.
---
### **Tips for Success**
- Start with simple patterns like a heart.
- Use high-quality espresso to complement the milk.
- Watch tutorials or practice with water and dish soap in the pitcher to simulate steaming without wasting milk.
Would you like advice on creating latte art patterns or troubleshooting specific steaming issues?
-
 1:35
1:35
HSESafetyInformation
1 day agoMutton Chops two ways- baked & grilled Recipe by Food Fusion (Eid Recipe)
27 -
 1:30:58
Game On!
14 hours ago $1.98 earnedNFL EXPERTS PREDICT 2025's FIRST ROUND PICKS!
21.6K -
![TRUMP: Ukraine War With Russia Could Start World War 3 [EP 4444-8AM]](https://1a-1791.com/video/fwe1/e3/s8/1/A/I/6/2/AI62x.0kob-small-TRUMP-Ukraine-War-With-Russ.jpg) LIVE
LIVE
The Pete Santilli Show
22 hours agoTRUMP: Ukraine War With Russia Could Start World War 3 [EP 4444-8AM]
1,341 watching -
 LIVE
LIVE
Jeff Ahern
1 hour agoNever Woke Wednesday with Jeff Ahern (6am Pacific)
272 watching -
 38:16
38:16
CryptoWendyO
20 hours ago $2.80 earnedSolana Sandal Keeps Getting Worse! (Bullish for Ethereum and BNB)
20.6K4 -
 1:10:57
TheRyanMcMillanShow
1 day ago $2.17 earnedRaul Mendez: Stopped A Mass Shooting After Being Shot in the Head - RMS 018
18.6K1 -
 58:31
58:31
State of the Second Podcast
17 hours agoHollywood's Closet Gun Owners, LEGAL Exploding Targets, & It's NOT Alec Baldwin's FAULT?!
27.2K -
 1:00:08
Trumpet Daily
22 hours ago $5.24 earnedTrump vs. Karl-Theodor zu Guttenberg - Trumpet Daily | Feb. 18, 2025
28.3K7 -
![EP. 151 - [your]NEWS & CrossCheck USA - Synergistically UNITED!](https://1a-1791.com/video/fwe1/54/s8/1/x/I/E/P/xIEPx.0kob-small-EP.-151-yourNEWS-and-CrossC.jpg) 55:35
55:35
Kat Espinda
6 days agoEP. 151 - [your]NEWS & CrossCheck USA - Synergistically UNITED!
24K1 -
 3:08
3:08
UnboxRemedy
3 days ago $0.48 earnedUNBOXING: CryBaby Crying Again Series (Ep.2)
17.8K1