"Learn How to Fill Text with Images in InDesign!
Here's a step-by-step guide on how to insert an image into your text in Adobe InDesign:
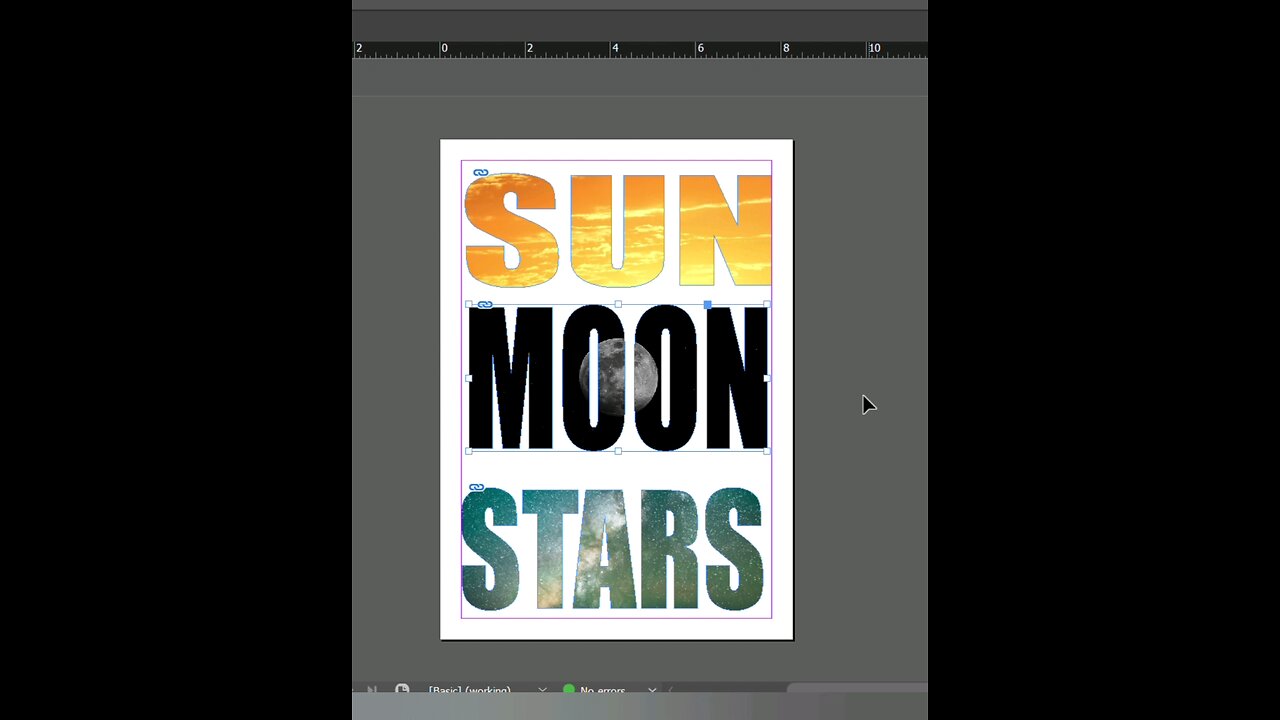
*Step 1: Select the Text Frame*
Select the text frame where you want to insert the image. You can do this by clicking on the text frame with the Selection Tool (V) or the Type Tool (T).
*Step 2: Create an Inline Frame*
With the text frame selected, go to the "Object" menu and select "Inline Frame" (or press Ctrl+Alt+I on Windows or Command+Option+I on Mac). This will create a new inline frame within the text.
*Step 3: Place the Image*
With the inline frame selected, go to the "File" menu and select "Place" (or press Ctrl+D on Windows or Command+D on Mac). Navigate to the location of the image you want to insert and select it.
*Step 4: Resize the Image (Optional)*
If you need to resize the image, select it with the Selection Tool (V) and use the bounding box handles to adjust its size.
*Step 5: Adjust the Image Position*
To adjust the image position within the text, select it with the Selection Tool (V) and use the arrow keys or the Align panel to position it as desired.
*Step 6: Save Your Work*
Finally, save your InDesign document to ensure your changes are preserved.
Tips:
- To wrap text around the image, select the image and go to the "Object" menu > "Text Wrap" > "Wrap Around Object".
- To adjust the image's opacity or other effects, select it and use the Effects panel or the Object Styles panel.
- To remove the image, select it and press the "Delete" key.
-
 9:34:03
FusedAegisTV
19 hours agoMario Galaxy, Batman, Real Talk/Politics, & MORE - V-Day 💗 Friday Variety Stream!
39K1 -
 1:10:49
Vigilant News Network
7 hours agoRFK Jr. Drops a Stunning Announcement | The Daily Dose
62.2K39 -
 49:49
49:49
Candace Show Podcast
10 hours agoEXCLUSIVE: Blake & Ryan’s Desperate Legal Strategy Exposed! | Candace Ep 147
178K130 -
 1:32:20
2 MIKES LIVE
8 hours ago2 MIKES LIVE #180 with guest Kyle Rittenhouse!
46K3 -
 9:40
9:40
Tactical Advisor
13 hours agoBest Home Defense Shotgun Build | Genesis Gen 12
41.1K1 -
 56:44
56:44
VSiNLive
10 hours ago $3.79 earnedFollow the Money with Mitch Moss & Pauly Howard | Hour 1
67K1 -
 1:05:48
The Amber May Show
13 hours ago $3.19 earnedBig Balls | You Know It's Bad When Legacy Media Reports On Big Balls | Sam Anthony
37.1K6 -
 LIVE
LIVE
SoniCentric
1 day agoEnjoy a COZY Valentine's Day Escape to Paris with the BEST blend of Romantic Music
73 watching -
 1:59:52
Revenge of the Cis
11 hours agoEpisode 1447: Love Train
61.7K7 -
 1:03:34
In The Litter Box w/ Jewels & Catturd
1 day agoCONFIRM KASH NOW! | In the Litter Box w/ Jewels & Catturd – Ep. 742 – 2/14/2025
83.5K58