Premium Only Content
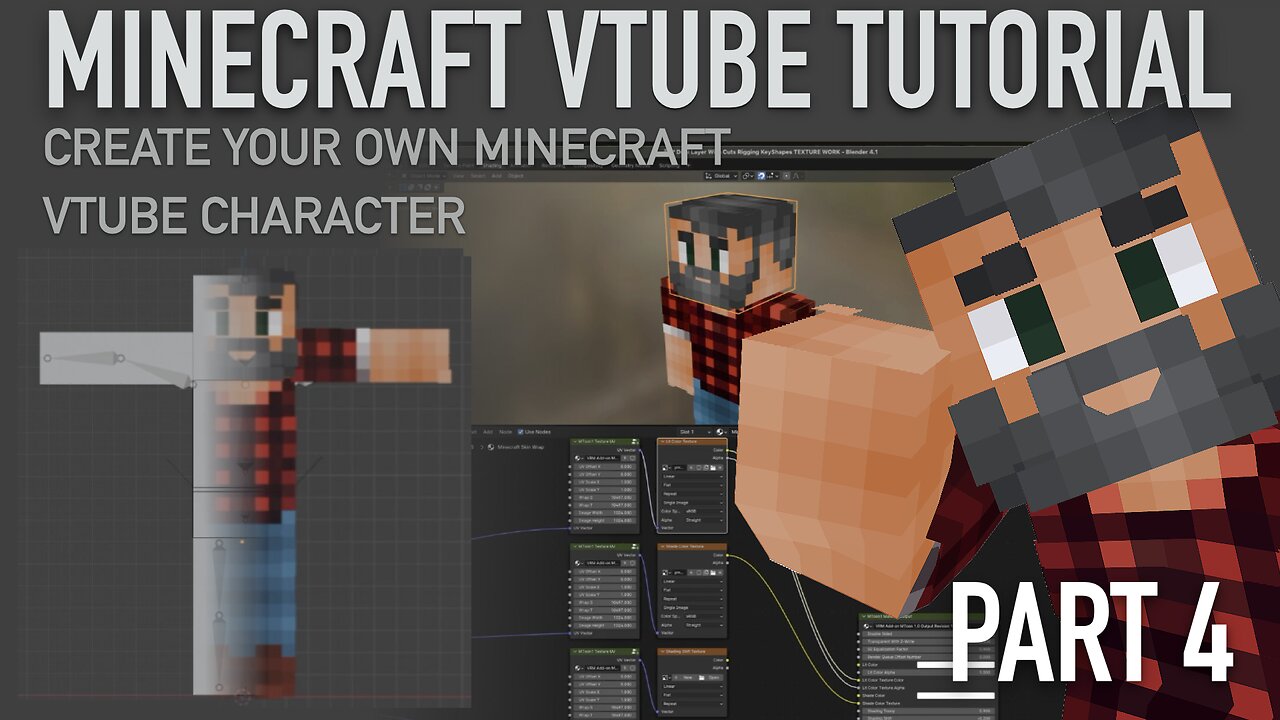
Minecraft Player Character vTuber Creation Tutorial | Part 4 | Blender | VRM | 3tene
Welcome to the fourth and final part of our process to create a vTuber based on a Minecraft player character from absolute basics. In this part, we'll be:
- Looking at texturing basics and what we’ll need to know as we texture the model
- Making necessary refinements to keep valid VRM model export and usefulness. This includes introducing the T-Pose, and Weight Painting.
- Exploring the basics of Shape Keys to create facial animations for our model, including supporting speech.
- Making the final adjustments to the export settings to have our fully detailed and rigged model ready for use in our vTube software
With all of this in place, have we done enough to create a viable model that reacts to inputs and can lip-sync speech? Well, the answer’s in here.
Key tools and websites in use
-----------------------------
► Blender - https://www.blender.org
► VRM Add-on - https://vrm-addon-for-blender.info/en
► VRoid Hub - https://hub.vroid.com/en
► 3tene - https://3tene.com
Where to find Untalented Amateur?
--------------------------------------------------------
► Twitter - https://twitter.com/UntalentedAm
► Twitch - https://www.twitch.tv/untalentedamateur
► Youtube - https://www.youtube.com/@untalentedamateur
► Github - https://github.com/UntalentedAmateur/fabpack
► Ko-fi - https://ko-fi.com/untalentedamateur
► Discord - http://discord.gg/sQpSDP4fHR
00:40 Starting point from previous tutorial - Texturing Basics
10:44 Refining the Model - The T-Pose
12:58 Refining the Model - Weight Painting
15:15 Refining the Model - A Working Second Layer
17:12 Texturing the Complete Model
22:02 Alternate Material Choices
23:28 Animating the Face - Shape Keys
28:33 Final Export Settings - Shape Keys to Blend Shapes for VRM
-
 4:31:24
nickelsYT
11 hours ago $19.38 earned🔴LIVE-First Day on Rumble Warzone Area 99 Big Map...Proximity Fun
44.2K1 -
 9:18:07
cbsking757
12 hours ago $17.58 earned★FINISHING NEBULA BEFORE WE START THE ABYSS GRIND! #callofduty #blackops6
43.6K2 -
 5:14:30
SpartakusLIVE
12 hours agoGIGA Spart exudes PEAK MASCULINITY
62.9K3 -
 45:41
45:41
Stephen Gardner
11 hours ago🔥Elon Musk’s SHOCKING Role in Trump’s Plan to EXPOSE DC Criminals | Errol Musk Speaks Out!
114K128 -
 20:10
20:10
DeVory Darkins
17 hours ago $27.39 earnedThe View ERUPTS Over Call for Biden to Pardon His Son
87.7K112 -
 5:14:10
GamingChad
14 hours agoMS Flight Simulator 2024 - Lets Make this Turkey Fly -Career mode Pt.2
103K7 -
 5:00:01
Pepkilla
15 hours agoHappy Thanksgiving ~ Wumble StwEeeem
64.7K5 -
 7:24:25
Rotella Games
1 day agoThanksgiving Side Missions & Hangout | GTA San Andreas
75.4K7 -
 4:07:31
MafiaTwin
13 hours agoFrist Stream On Rumble
55K1 -
 19:41
19:41
Neil McCoy-Ward
17 hours agoFinally! Some Good News Today... (& Happy Thanksgiving!)
39.2K22