2-way Drill Press Machine Handmade Drill stand
Creating a 2-way drill press machine involves building a handmade drill stand that allows for both vertical and horizontal drilling. This guide will walk you through the process of making a versatile and sturdy drill stand.
Materials and Tools Needed
Materials:
Hardwood or plywood for the base and supports
Metal rods or pipes for the guide rails
Bearings or bushings for smooth movement
Screws, nuts, and bolts
Springs for the return mechanism
Clamps for securing the drill
Wood glue
Rubber feet for stability
Hinges for the tilting mechanism
T-tracks for adjustability
Knobs for easy adjustments
Tools:
Drill and drill bits
Saw (circular saw, table saw, or hand saw)
Measuring tape or ruler
Square
Screwdriver
Wrench
Sandpaper or sander
Clamps
Chisel (optional, for fine adjustments)
Steps to Make a 2-way Drill Press Machine
1. Cut the Base and Support Pieces
Base: Cut a piece of hardwood or plywood to serve as the base, typically around 18” x 18” for stability.
Vertical Supports: Cut two pieces of hardwood or plywood for the vertical supports, approximately 18” high.
Horizontal Arm: Cut another piece for the horizontal arm, about 12” to 15” long, depending on the reach you need.
2. Assemble the Base and Vertical Supports
Attach Supports to Base:
Secure the vertical supports to the base using screws and glue, ensuring they are perpendicular to the base and parallel to each other. Use a square to check alignment.
Install Guide Rails:
Drill holes in the vertical supports to fit the guide rails. Insert metal rods or pipes through these holes and secure them with screws or epoxy.
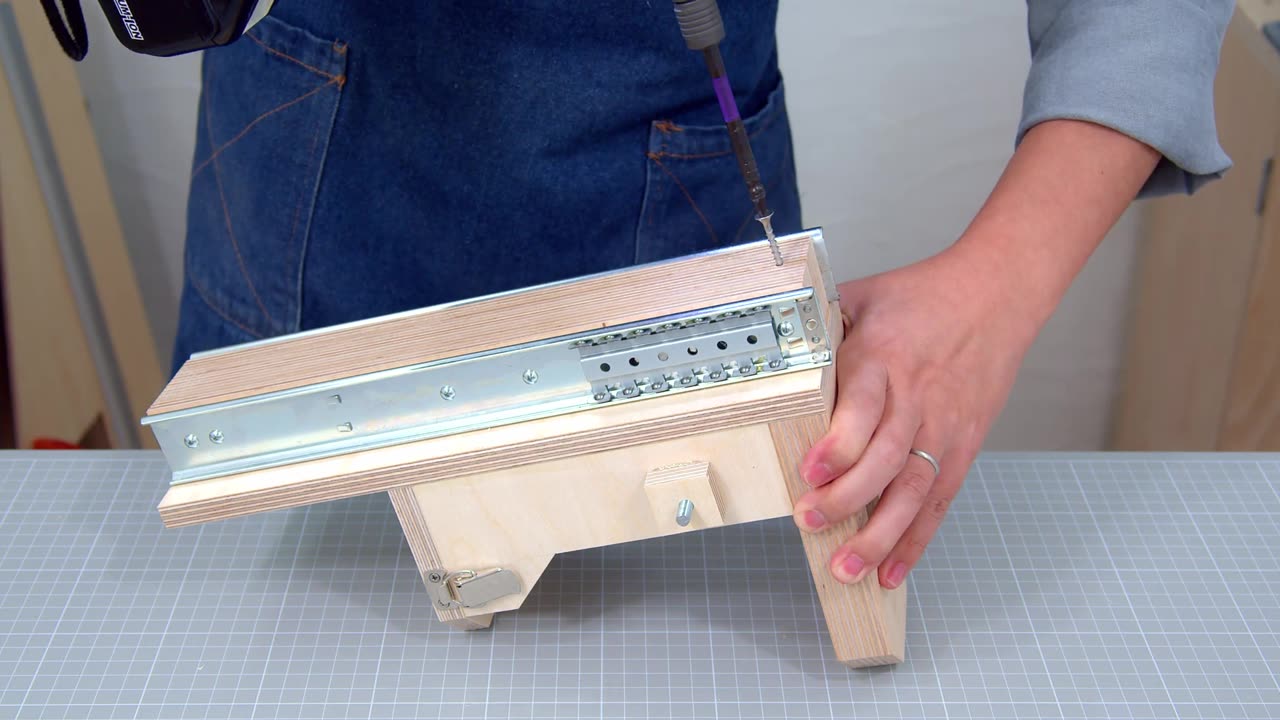
3. Create the Drill Carriage
Carriage Platform:
Cut a piece of hardwood or plywood to serve as the carriage platform. This platform will hold the drill and move along the guide rails.
Bearing or Bushing Housing:
Attach bearings or bushings to the carriage platform. These will slide along the guide rails, ensuring smooth and accurate movement.
Drill Holder:
Attach an adjustable clamp or custom-made holder to the carriage platform to secure the drill. Ensure it can be easily adjusted and removed.
4. Install the Return Mechanism
Springs:
Attach springs to the top of the vertical supports and the carriage platform. These springs will help return the drill to the upright position after drilling.
5. Add Horizontal Drilling Capability
Hinged Horizontal Arm:
Attach a hinge to one of the vertical supports near the top, connecting it to the horizontal arm. This hinge will allow the horizontal arm to pivot.
Horizontal Guide Rails:
Install guide rails on the horizontal arm similar to those on the vertical supports. Ensure the carriage platform can move along these rails for horizontal drilling.
Locking Mechanism:
Add a locking mechanism to secure the horizontal arm in place when not in use, and to adjust the angle when needed.
6. Add Adjustable Stops and Depth Control
Vertical Stop:
Install a T-track or strip of wood with pre-drilled holes along the vertical support. Create a stop block that can be secured to this track using a bolt and knob.
Horizontal Stop:
Attach another T-track along the horizontal arm. Create a stop block that fits into this track and can be adjusted to control the drilling position.
7. Install Measurement Scales and Angle Guides
Ruler Scale:
Attach a ruler or measuring tape along the vertical support for easy reference when adjusting the drilling depth. Add another scale along the horizontal arm.
Angle Guide:
Install a protractor scale at the hinge to measure the angle of the horizontal arm. Ensure it is easy to read and adjust.
8. Enhance Stability and Precision
Rubber Feet:
Attach rubber feet to the bottom of the base to prevent slipping and provide stability.
Guide Rail Stiffeners:
Add additional support to the guide rails by attaching stiffeners or additional rails parallel to the existing ones.
Testing and Final Adjustments
Test Movement:
Slide the drill carriage up and down the vertical and horizontal guide rails to ensure smooth movement.
Check Alignment:
Ensure the drill bit is perfectly perpendicular to the base and parallel when horizontal. Adjust the vertical supports or carriage if necessary.
Secure Drill:
Place your drill in the holder and secure it firmly. Test the return mechanism by lowering and releasing the drill.
Usage Tips
Vertical Drilling:
Use the vertical guide rails for standard drilling tasks. Adjust the vertical stop to set the desired drilling depth.
Horizontal Drilling:
Pivot the horizontal arm into position for horizontal drilling. Use the horizontal stop to set the drilling distance from the vertical supports.
Angle Drilling:
Adjust the angle of the horizontal arm using the protractor scale and locking mechanism for precise angle drilling.
By following these steps, you will create a versatile and functional 2-way drill press machine that allows for both vertical and horizontal drilling. This handmade drill stand will significantly enhance the accuracy and efficiency of your drilling tasks.
-
 2:38:54
TimcastIRL
13 hours agoElon Secret Child Scandal ERUPTS, Ashley St. Clair Story Goes Viral w/Bethany Mandel | Timcast IRL
194K125 -
 2:04:52
Kim Iversen
15 hours agoElon's Pumping Out Babies Like They're Tesla Model 3's | EU Panics Over Peace Talks, Wants More War
183K194 -
 1:05:35
Man in America
18 hours agoFort Knox & Trump’s Secret Gold Move—The Financial Reset NO ONE Is Ready For?
129K136 -
 2:21:20
Robert Gouveia
14 hours agoTrump Goes to SCOTUS! Judge CAVES on DOGE? Fani Willis Not Happy!
134K35 -
 20:41
20:41
Stephen Gardner
14 hours ago🔥You Won't BELIEVE What JUST Happened To Don Trump Jr.!!
145K234 -
 58:00
58:00
The StoneZONE with Roger Stone
12 hours agoEuropean Leaders Resist Trump Peace Overtures To Their Own Demise | The StoneZONE w/ Roger Stone
103K12 -
 9:29
9:29
AlaskanBallistics
14 hours ago $12.57 earnedWyoming Suppressors and Rifles at Shot Show 2025
118K6 -
 1:06:40
Donald Trump Jr.
18 hours agoThe Left is Taking one L After Another, Live with Michael Knowles | Triggered Ep. 217
207K161 -
 47:17
47:17
Kimberly Guilfoyle
18 hours agoWoke Gets DOGE’d, Live with AJ Rice & Jarrett Stepman | Ep. 197
148K46 -
 20:11
20:11
Candace Show Podcast
16 hours agoBecoming Brigitte: Candace Owens x Xavier Poussard | Ep 6
221K383