Premium Only Content

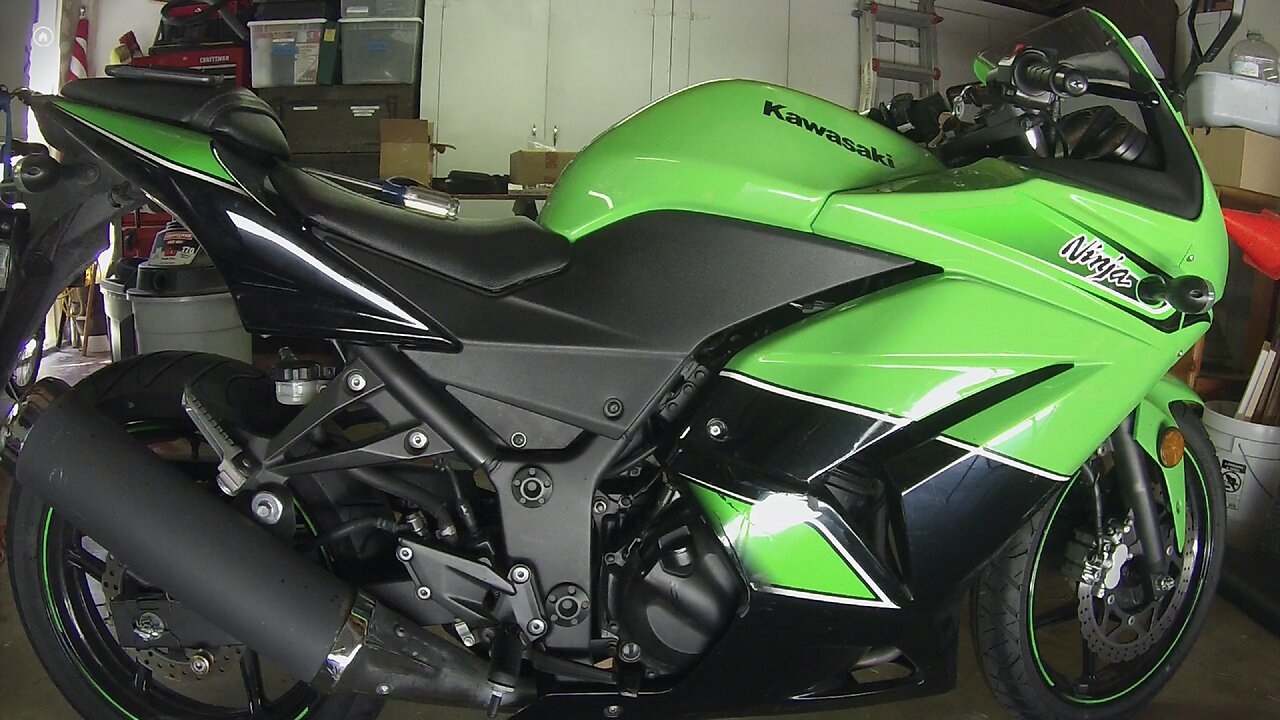
How to Inspect and Adjust Valve Clearance on a 2011 Ninja 250 (Part I)
If you like these videos, and would like to see more, support the channel through PayPal or Patreon.
https://www.paypal.com/paypalme/MattGDellinger?locale.x=en_US
https://www.patreon.com/user?u=41261286
Email me directly: mattgd80@sbcglobal.net or joejohnjohnstonn@gmail.com (there are two n's).
Part one of a five part series showing every step of a valve inspection and adjustment on a 2011 Ninja 250. Use the arrow keys on your keyboard to jump five seconds forward or reverse or the "L" and "J" keys to jump ten seconds forward or reverse. Below are links to the four other parts of the series, a table of contents for this first video, and a list of special tools you will need for this job. Only the shim kit and cam chain tensioner holder plate are not available in local stores. Click on the numbers in the table of contents to take you to specific sections of the video.
If you have trouble positioning the crankshaft at the 1T position, watch my video on "Trouble Positioning the Crankshaft at the 2T Position."
Side Fairings Removal 00:36
Radiator Fairing Removal 14:33
Draining Coolant 15:48
Coolant Reserve Tank Removal 32:56
Driver Seat Removal 40:25
Gas Tank Removal 41:53
Battery Disconnection 48:10
Radiator Removal 51:22 (continued in part 2)
List of Tools:
--Rear Stand (not required, but makes things a lot easier because it levels and stabilizes the bike).
--Drain pan and storage container (e.g. milk carton) for old coolant.
--Inch-pound torque wrench, range encompassing 44 in-lbs and 106 in-lbs (the smallest you can find, Harbor Freight is the only place I know that sells a small torque wrench, 1/4" Drive; others will work, but they're harder to use).
--TWO open ended 12mm wrenches (to disconnect the bottom end of the clutch cable).
--2x2x6 inch wood block to hold up the gas tank while disconnecting hoses and wires (not necessary, but recommended). Can also use this block under the kick stand to temporarily level the bike when a rear stand is not available).
--TWO 14mm sockets (one deep wall) and TWO fairly long socket wrenches (to remove the engine mounting bolts and rotate the crankshaft), an 18'' ratcheting breaker bar would probably be optimal (also sold at Harbor Freight).
--Large screwdriver or hex extension to push out the engine mounting bolt.
--Organizers (three or four), sticker labels, plastic bags, and twist ties.
--Two washers to remove the timing plugs (larger washer: diameter = 45mm, Width = 3mm, smaller washer: diameter = 30mm, width = 2mm), but if these cannot be found, a half dollar will do.
--Feeler gauges (range encompassing 0.15mm to 0.29mm).
--Marker (for marking the cam sprockets to assist timing when reinstalling).
--Reusable cable ties to hold up the cam chain.
--Clean rag to stuff into the cam chain tunnel.
--Long flexible magnet and/or soft jaw pliers (less than seven inches long with serrated plastic) in case you are not able to pull the lifters out by hand.
--Micrometer and digital calipers (use each device to check the accuracy of the other).
--7.48mm diameter shim kit (range encompassing 2.5mm to 3.5mm widths), readily available online.
--Engine assembly lube/grease (available at O'Reilly's in a black tube--made by CRC).
--SAE 10W-40 4-stroke motorcycle engine oil-check the user manual for specific certifications (to mix with the assembly lube and for the oil pools next to the lifters).
--Two oilers (one for engine oil and the other for the mixture of oil and assembly lube).
--Gasket sealant (not gasket maker). Be sure to buy a product that is designed to be used with a gasket and not in the absence of a gasket or you will spend three hours picking off little pieces of gasket maker off your cylinder head and gasket.
--Small flathead screwdriver, roughly 4mm thick at the end (for retracting the cam chain tensioner).
--Tensioner holder plate—not sold in stores (dimensions displayed in video, part four). Your local Kawasaki dealer might have one lying around, but don't count on it. Make it yourself or find a metal worker and ask him to make it (saves time).
--Tensioner replacement gasket and cap bolt o-ring (never needed them, but they're inexpensive so might as well buy, just in case).
--Foot-Pound torque wrench (for the engine mounting bolts, 51 ft-lbs).
--Coolant (50% ethylene glycol, 50% distilled water, compatible with aluminum engines, and contains no silicates or phosphates which are bad for the water pump).
--Small funnel, roughly 5 inch diameter, to insert coolant (some larger funnels will not fit next to the front fairing and gas tank).
--Basic tools (socket extensions, socket adaptors, wrenches, screwdrivers, etc.).
-
 LIVE
LIVE
GamingChad
2 hours agoMS Flight Simulator 2024 - Lets Make this Turkey Fly -Career mode Pt.2
1,395 watching -
 LIVE
LIVE
Pepkilla
3 hours agoHappy Thanksgiving ~ Wumble StwEeeem
416 watching -
 7:24:25
Rotella Games
1 day agoThanksgiving Side Missions & Hangout | GTA San Andreas
5.09K2 -
 LIVE
LIVE
MafiaTwin
2 hours agoFrist Stream On Rumble
468 watching -
 1:13:41
DDayCobra
4 hours ago $5.43 earnedHappy Thanksgiving!
30K2 -
 42:24
42:24
Professor Nez
4 hours ago🚨Kamala's Staff CONFESSES to FRAUD! Trump is Already MAKING AMERICA GREAT AGAIN! 🇺🇸
58.6K76 -
 5:12:17
Akademiks
6 hours agoDrake Sues Universal Music Group over Kendrick Lamar 'Not Like Us' again!! Diddy Denied Bail!
74.8K10 -
 1:23:15
Viss
5 hours ago🔴LIVE - Thanksgiving PUBG (Short Stream)
25.5K26 -
 22:56
22:56
Rethinking the Dollar
6 hours agoTrump, Crypto, and Chaos: Why Our Financial System is Facing Uncharted Territory
13.8K3 -
 2:47:46
TheSaf3Hav3n
17 hours ago| FORTNITE THANKSGIVING STREAM!! | WHAT ARE YOU THANKFUL FOR!!?) | #RumbleTakeOver
30.4K9