Premium Only Content

How to Build a Cheap and Easy 3D Printer Enclosure
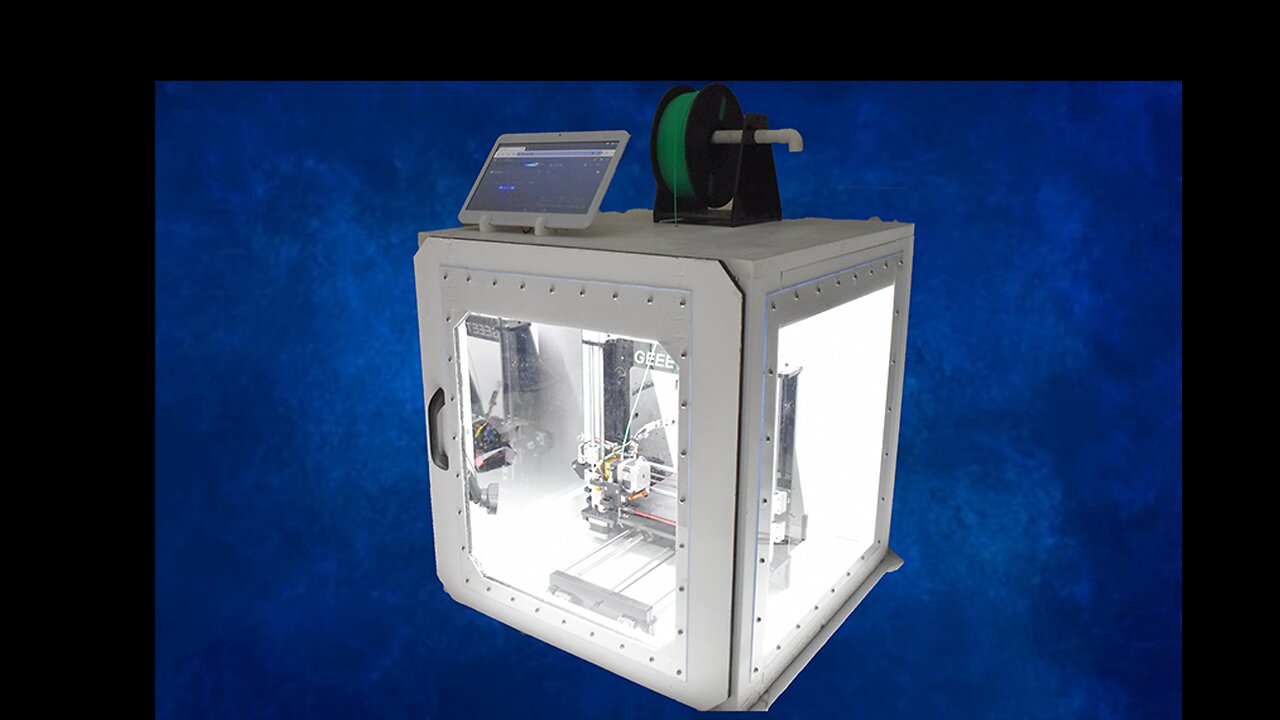
Since the old Mainboard(GT2560) had died, we decided it was time for an upgrade on our old 3D Printer. We DIY a 3D printer enclosure for our Geeetech I3 (Prusa I3 clone).aswell as new components for the printer itself. A new BigTreeTech mainboard is installed and Klipper firmware is used in combination with a Banana Pi M2 zero.
The box is made of scrap wood. This enclosure is needed to be able to print materials like ABS and ASA.
Most of the electronics are brought outside of the heatchamber and mounted to the side of the enclosure. The Printer is screwed down in place, this helps with frame rigidity.
This simple enclosure will fit most small bedslinger-type printer such as: Anet A8, Geeetech I3, Original Prusa I3, Ender 3, etc.
Links for all the STL files used in this project:
BLtouch Bracket https://www.thingiverse.com/thing:2329594
Electroincs Housing GT2560 https://www.thingiverse.com/thing:1279978
Tablet holder https://www.thingiverse.com/thing:1474004
Mean Well PSU cover https://www.thingiverse.com/thing:3603117
BTT adapter flange https://www.thingiverse.com/thing:5822993
Banana Pi Case https://www.thingiverse.com/thing:5823006
DCDC stepdown mount https://www.thingiverse.com/thing:5823011
Switch Mount https://www.thingiverse.com/thing:5823015
USB hub mount https://www.thingiverse.com/thing:5823019
Enjoy watching!! :p
-
 LIVE
LIVE
xBuRnTx
22 minutes ago1st Warzone Stream Online
276 watching -
 LIVE
LIVE
JdaDelete
22 hours ago $0.11 earnedDino Crisis - Sega Saturday
325 watching -
 23:22
23:22
MYLUNCHBREAK CHANNEL PAGE
23 hours agoUnder The Necropolis - Pt 5
14.1K6 -
 2:26:11
Jewels Jones Live ®
1 day agoWINNING BIGLY | A Political Rendezvous - Ep. 108
39K20 -
 LIVE
LIVE
Bare Knuckle Fighting Championship
4 days agoBKFC FIGHT NIGHT MOHEGAN SUN FREE FIGHTS
363 watching -
 25:09
25:09
BlackDiamondGunsandGear
3 hours agoYou NEED to be Training For Whats to Come
3.55K3 -
 20:03
20:03
Sideserf Cake Studio
9 hours agoA HUNGRY HUNGRY HIPPOS CAKE THAT ACTUALLY WORKS?
2.5K4 -
 23:51
23:51
marcushouse
9 hours ago $0.15 earnedStarship’s Next Move Is Coming Sooner Than You Think!
1.84K2 -
 22:24
22:24
The Finance Hub
15 hours ago $1.16 earnedBREAKING: JOE ROGAN JUST DROPPED A MASSIVE BOMBSHELL!!!
6.29K9 -
 55:02
55:02
PMG
5 hours ago $0.06 earnedHannah Faulkner and Miriam Shaw | Moms on A Mission
3.45K