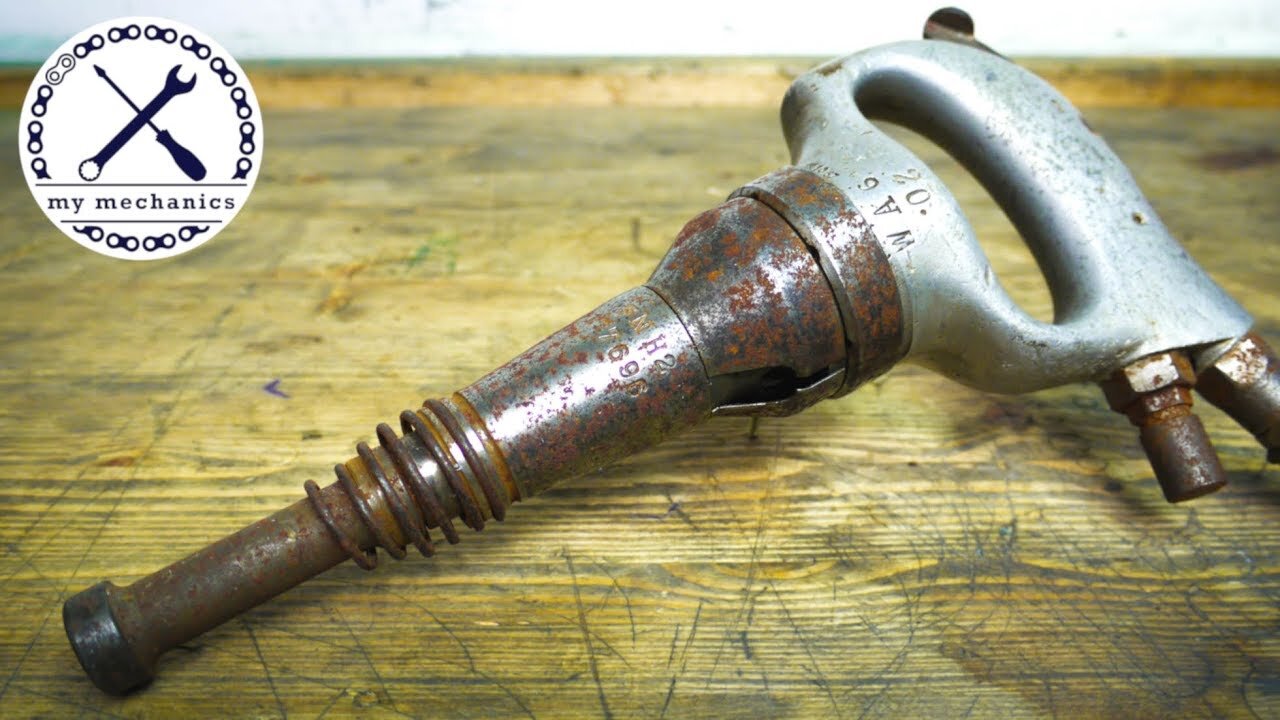
1918 Aircraft Rivet Hammer - Restoration
SUBSCRIBE and check out my new Channel:
https://www.youtube.com/channel/UCM65z7cJmZUOpWUXVwHOc7g
In this video I'm restoring an aircraft rivet hammer.
This pneumatic rivet hammer was sent to me by one of my subscribers from Germany, thank you for that. It's a very cool and unique looking tool, I've never seen this tool before and that's why I decided to restore it and make a video for you guys. I was told that this tool was stored in the basement when they had a flooding, that was probaly the reason why it was rusty and didn't work anymore. I had a few ups and downs during this restoration. The cast of the aluminium handle was very porous and a lot of tiny holes appeared after fine sanding and polishing, also the welding didn't work quite well. I first tried to TIG weld, but that didn't work at all. For the visible steel parts I decided to make them black, for the optic and also as rust protection. My idea was to sandblast those parts to make a nice and even finish, but because I'm using very fine glas bead all the small damages in the surface from the rust were still visible. So I had to sand them all away. The bluing worked very well and it makes a nice contrast to the polished parts in my oppinion. The old air fitting was put together out of three different pieces made of brass to get the right thread size. I didn't really liked that option and decided to make a new one. I really wasn't pleased during the restoration just because of the porous cast of the handle and I thought about it for a long time to not even publish the video because of that. But as soon as I tested it after the restoration I had a huge smile all over my face, this is a very cool tool and it ended up working perfectly fine. I hope you don't judge me to hard for my very bad welding abilities and the bad outcome of the aluminium handle.
I hope you like my work and the video.
Timestamps:
00:00 preview
00:25 pre-testing
00:33 disassembling
02:22 showing all the parts
02:39 cleaning the parts with the parts washer
02:57 removing rust with MC-51 rust remover
03:26 restoring the aluminium handle
06:43 making a new pin for the trigger on the lathe
07:07 restoring the front piece (hammer head)
07:31 restoring the adjustment screw
08:00 making a new air fitting on the lathe and mill
09:35 roughly cleaning all parts for sandblasting
10:56 masking for sandblasting
11:14 sandblasting the visible steel parts
12:04 sanding the sandblasted parts
13:00 restoring the small pin
13:16 bluing the visible steel parts
14:09 cleaning the mechanical parts
15:43 showing all the parts before reassembling
16:10 reassembling
18:23 showing the finished product
19:08 final testing
Time of this restoration:
This Project over 2,5 weeks
My camera:
Panasonic HC-V180
If you have any questions about the process, machines I'm using or other stuff, just ask me in the comments. I read them all and I try to reply as soon as possible.
Sorry for my bad English, it's not my language. I try my best to improve my technical English.
Subscribe for more of my content. I'm uploading videos about mechanical stuff, as new creations and buildings and also restorations.
Thank you for watching :-)
My Patreon Page:
patreon.com/mymechanics727
-
 LIVE
LIVE
Dr Disrespect
7 hours ago🔴LIVE - DR DISRESPECT - DELTA FORCE - STARFALL NEW SEASON
2,197 watching -
 1:58:31
Revenge of the Cis
3 hours agoEpisode 1432: Take Two
27.6K4 -
 5:43:05
Bitcoin Magazine
7 days agoLIVE: Donald Trump Inauguration | America's First Bitcoin President
51.8K2 -
 1:04:13
In The Litter Box w/ Jewels & Catturd
19 hours agoINAUGURATION DAY | In the Litter Box w/ Jewels & Catturd – Ep. 723 – 1/20/2025
54.8K21 -
 3:20:22
Steven Crowder
9 hours agoCrowder Inauguration Day Live Stream 2025 | The Return of Donald Trump!
1.15M405 -
 3:54:12
vivafrei
8 hours agoTHE DON OF A NEW AMERICA! Trump Inauguration Live Stream! Viva Frei Live!
118K71 -
 3:42:54
The Quartering
1 day agoTrump Inauguration LIVE Broadcast & Commentary With DecoyVoice, Hannah Clare & Styxhexenhammer!
210K53 -
 6:25:30
LFA TV
1 day agoLIVE: INAUGURATION OF PRESIDENT DONALD J. TRUMP
301K84 -
 53:47
53:47
Russell Brand
7 hours agoInauguration Day Live! – SF522
206K114 -
 2:43:30
Donald Trump Jr.
9 hours agoFull Coverage of My Father’s Inauguration, America is Back. | TRIGGERED Ep.209
356K316