Premium Only Content

How to create checklist in Excel step By Step
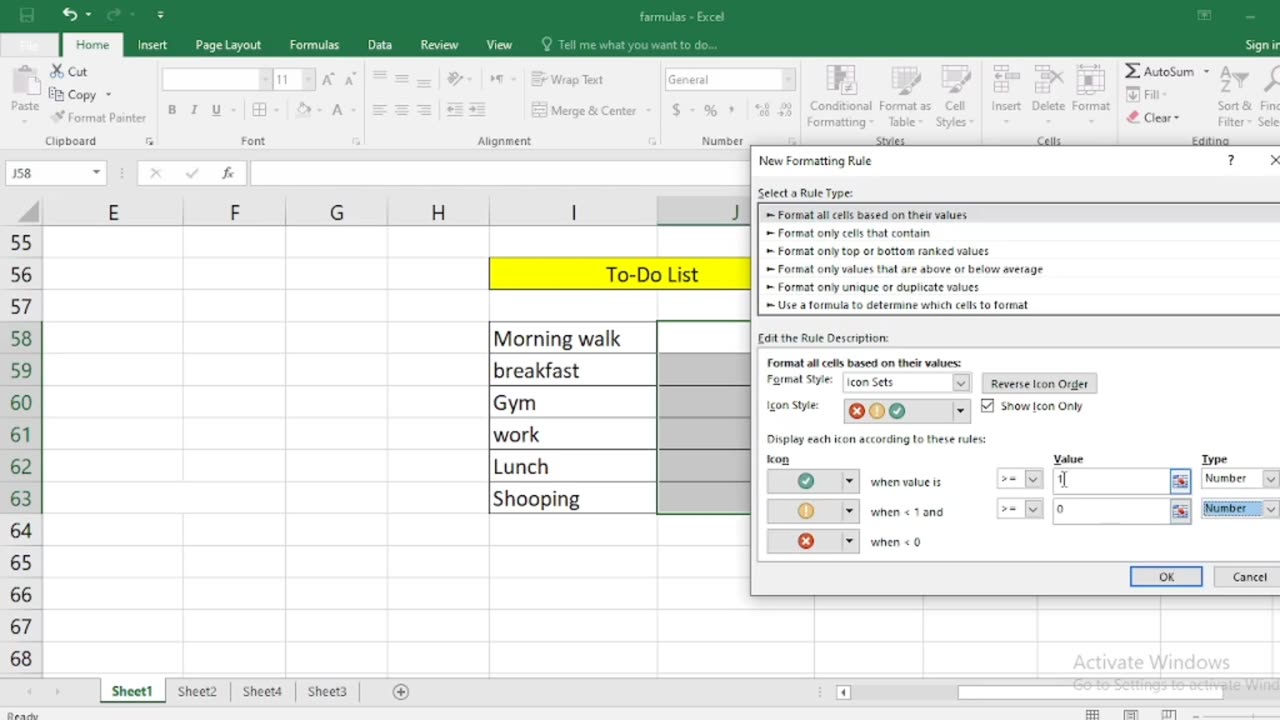
Creating a checklist in Excel is a simple and effective way to keep track of tasks, items, or goals. You can use checkboxes or data validation with drop-down lists to create your checklist. Here's a step-by-step guide for both methods:
Method 1: Using Checkboxes
Open Excel: Launch Microsoft Excel and create a new workbook or open an existing one where you want to create the checklist.
Insert Checkboxes:
a. Click on the cell where you want to place your first checkbox. You can choose any cell in your worksheet.
b. Go to the "Developer" tab. If you don't see this tab, you may need to enable it in Excel's options. To do this, go to "File"Options" "Customize Ribbon" and check "Developer" in the right-hand column.
c. In the "Developer" tab, click on the "Insert" drop-down menu in the "Controls" group.
d. Choose the "Check Box" option under "Form Controls." Your cursor will turn into a crosshair.
e. Click on the cell where you want to insert the checkbox. A checkbox will appear in that cell.
Copy and Paste:
a. Copy the checkbox (Ctrl+C).
b. Paste it (Ctrl+V) into other cells where you want additional checkboxes. Repeat this step for as many checkboxes as you need.
a. Next to each checkbox, type the task or item description.
Customize Checkboxes (optional):
a. To make the checkboxes more visually appealing, right-click on a checkbox and select "Edit Text" to change the label text.
b. You can also resize and format the checkboxes as desired.
Method 2: Using Data Validation with Drop-Down Lists
Open Excel: Launch Microsoft Excel and create a new workbook or open an existing one where you want to create the checklist
Create a List of Checklist Items:
a. In a column (e.g., Column A), list all the items you want in your checklist, one item per cell.
Create a Drop-Down List for Checkboxes:
a. Click on the cell where you want to create the checklist.
b. Go to the "Data" tab.
c. Click on "Data Validation" in the "Data Tools" group.
d. In the "Data Validation" dialog box, go to the "Settings" tab.
e. In the "Allow" dropdown, choose "List."
f. In the "Source" box, type the range of cells containing your checklist items. For example, if your checklist items are in cells A1 to A5, you would enter "=$A$1:$A$5" (without quotes).
g. Check the "In-cell dropdown" option.
h. Click "OK" to create the drop-down list.
Add Checkmarks:
a. Now, in the selected cell, you'll have a drop-down arrow. Click it, and you can select items from your checklist. As you select items, they will appear in the cell.
Repeat for Other Cells:
a. Repeat steps 3-4 for other cells where you want to create checklists.
These are the two methods to create checklists in Excel. Choose the one that suits your needs and preferences. The first method with checkboxes is more visual, while the second method with drop-down lists is useful if you want to save space or restrict choices to predefined options.
-
 5:12:11
Akademiks
7 hours agoDay 1/30. Big U 43 Count Indictment. Ye Interview? YB Home. Yella Beezy Bails out. Durk + Nav drop
64.4K7 -
 4:19:58
SynthTrax & DJ Cheezus Livestreams
1 day agoFriday Night Synthwave 80s 90s Electronica and more DJ MIX Livestream BLACKLIGHT Edition
64.6K5 -
 5:06:26
VapinGamers
6 hours ago $1.50 earned🎮🔥 Fortnite/Farlight 84/COD - Maybe Dubs, Maybe Losses, Always Fun! - !upgrade
16.8K -
 4:03:01
TheNateVibez
6 hours agoGood Times & Friday Vibes✌ - Fraggin💥- ArmyVet🫡
23K2 -
 4:28:12
KataJade
6 hours agoHappy Apex Friday
15.7K -
 LIVE
LIVE
The tooth entertainment
4 hours agoGears Of War Judgment Livestream lets get to 300 followers #GamingOnRumble
294 watching -
 6:49:22
xBuRnTx
8 hours agoHappy Friday Everyone!
19K1 -
 2:34:48
Laura Loomer
7 hours agoEP112: MS-13 EVICTED By President Trump
51K25 -
 2:53:28
Toolman Tim
5 hours agoCommunity Gaming Night!! | Among Us
25K1 -
 2:34:47
GamerGril
5 hours agoMost Dangerous Gril This Side Of The Mississippi
20.9K2