Premium Only Content

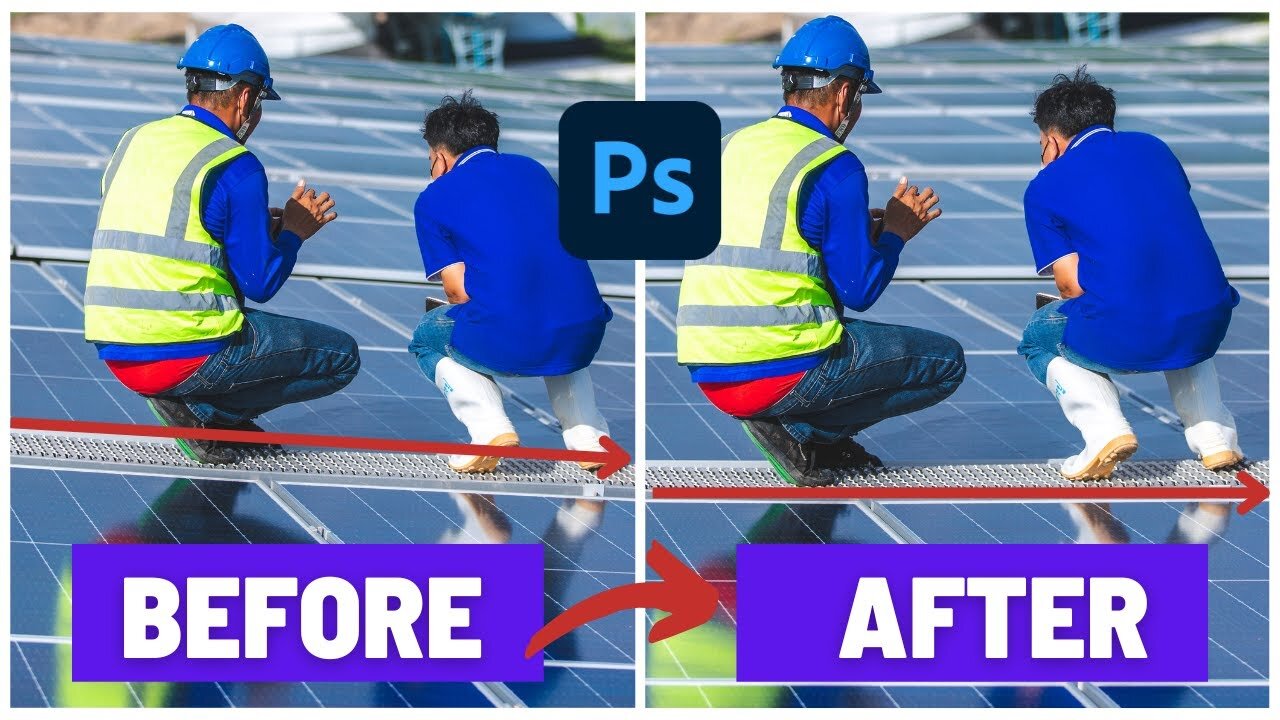
Photoshop Tutorial: How to Straighten Any Image using Perspective Warp and Geometry
In this comprehensive tutorial, we delve into the basics of image correction and manipulation using Adobe Photoshop. We will demonstrate how you can easily straighten out any image that may have been shot at a bad angle, using techniques such as perspective warp and geometry corrections. Here's a breakdown of what to expect:
Timestamps:
00:00 - 00:16: Introduction and overview of the image we'll be straightening
00:16 - 00:36: Explanation of the original, skewed image
00:36 - 01:01: Steps to load the image and navigate to the camera raw filter
01:01 - 01:03: Loading the image into the camera raw filter
01:03 - 01:13: Introduction to geometry corrections in the Camera Raw tool
01:13 - 01:18: Quick auto-correction using the 'A' button
01:18 - 01:25: Introduction to the Guided tool for more flexibility
01:25 - 01:31: The start of drawing guidelines for the Guided tool
01:31 - 01:34: Clicking on the Guided tool
01:34 - 01:37: How the Guided tool cross appears on the image
01:37 - 01:58: Using shift to zoom and draw the guidelines
01:58 - 02:18: Completion of the straightening process and how to deal with transparency on the edges
02:18 - 02:37: Scaling and finalizing the corrected image
02:37 - 02:55: Cross-verifying the image straightening using a brush tool
02:55 - 02:56: Wrapping up and thanking viewers for watching
Tags: #AdobePhotoshop #PhotoshopTutorial #ImageCorrection #PerspectiveWarp #GeometryCorrection
If you found this tutorial useful, don't forget to hit that like button, leave a comment about your favorite Photoshop tricks, and consider subscribing to our channel for more in-depth tutorials! Your support helps us keep making great content.
-
 LIVE
LIVE
Kim Iversen
1 hour ago"Canada's Trump" Is Trudeau’s Worst Nightmare: Is Maxime Bernier the Future of Canada?
1,567 watching -
 DVR
DVR
Bannons War Room
10 days agoWarRoom Live
2.58M436 -
 16:06
16:06
The Rubin Report
8 hours agoProof the Islamist Threat in England Can No Longer Be Ignored | Winston Marshall
34.3K24 -
 2:07:07
Robert Gouveia
5 hours agoFBI Files Coverup! Bondi FURIOUS; SCOTUS Stops Judge; Special Counsel; FBI Does
40.5K32 -
 56:15
56:15
Candace Show Podcast
5 hours agoBREAKING: My FIRST Prison Phone Call With Harvey Weinstein | Candace Ep 153
107K69 -
 LIVE
LIVE
megimu32
1 hour agoON THE SUBJECT: The Epstein List & Disney Channel Original Movies Nostalgia!!
197 watching -
 9:06
9:06
Colion Noir
10 hours agoKid With Gun Shoots & Kills 2 Armed Robbers During Home Invasion
16.9K3 -
 54:28
54:28
LFA TV
1 day agoUnjust Man | TRUMPET DAILY 2.27.25 7PM
19.7K2 -
 20:10
20:10
CartierFamily
7 hours agoAndrew Schulz DESTROYS Charlamagne’s WOKE Meltdown on DOGE & Elon Musk!
36.8K45 -
 1:36:39
Redacted News
5 hours agoBOMBSHELL EPSTEIN SH*T SHOW JUST DROPPED ON WASHINGTON, WHAT IS THIS? | Redacted w Clayton Morris
145K242