Premium Only Content
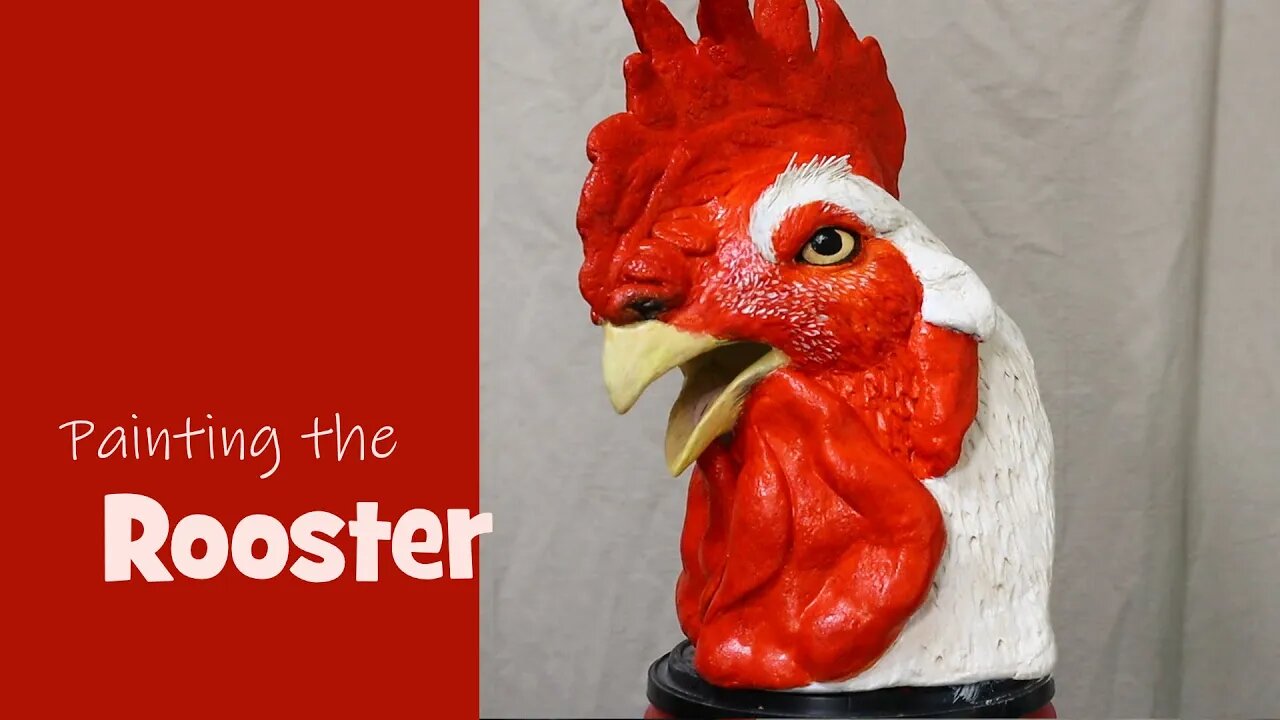
Painting The Rooster
I painted my rooster sculpture today. As you can see in the two previous videos, he started out with a wet clay model that I sculpted with the use of a cardboard pattern. Then I added the plaster cloth shell, and finally the Magic Sculpt epoxy clay. And today he got his bright red comb and wattles and his white feathers, when I put on a coat of acrylic paint.
If you want to use my free pattern and make your own rooster head sculpture, you can find it here: https://www.ultimatepapermache.com/sculpting-a-rooster
The second video in the series, showing how the Magic Sculpt was added: https://youtu.be/abaw9ZYuxTs
Products used in the project:
WED clay: https://amzn.to/31azFXq
Magic Sculpt: https://amzn.to/2BzG8jA
Golden acrylic glazing liquid: https://amzn.to/2CAw0Yz
You could use my air dry clay recipe instead of the epoxy clay: https://youtu.be/YOiovGN-yHA
If you decide to use some epoxy clay for a project of your own, please let us know how it turns out. You can upload a photo on the Daily Sculptors page on my website: https://www.ultimatepapermache.com/daily-sculptors-group-page
-
 34:12
34:12
inspirePlay
1 day ago $5.84 earned🏆 The Grid Championship 2024 – Cass Meyer vs. Kelly Rudney | Epic Battle for Long Drive Glory!
92.6K8 -
 17:50
17:50
BlackDiamondGunsandGear
17 hours ago $3.17 earnedTeach Me How to Build an AR-15
66.4K6 -
 9:11
9:11
Space Ice
1 day agoFatman - Greatest Santa Claus Fighting Hitmen Movie Of Mel Gibson's Career - Best Movie Ever
123K49 -
 42:38
42:38
Brewzle
1 day agoI Spent Too Much Money Bourbon Hunting In Kentucky
83.6K13 -
 1:15:30
World Nomac
1 day agoMY FIRST DAY BACK in Manila Philippines 🇵🇭
65K10 -
 13:19
13:19
Dr David Jockers
1 day ago $12.03 earned5 Dangerous Food Ingredients That Drive Inflammation
83.4K17 -
 1:05:13
FamilyFriendlyGaming
1 day ago $16.00 earnedCat Quest III Episode 8
132K3 -
 10:39
10:39
Cooking with Gruel
2 days agoMastering a Succulent London Broil
84.9K5 -
 22:15
22:15
barstoolsports
1 day agoWhite Elephant Sends Barstool Office into Chaos | VIVA TV
59.9K1 -
 3:30:40
MrNellyGB
22 hours ago🔴LIVE - GRINDING MARVEL RIVALS RANKED! | #RumbleTakeover #RumblePremium
41.2K1