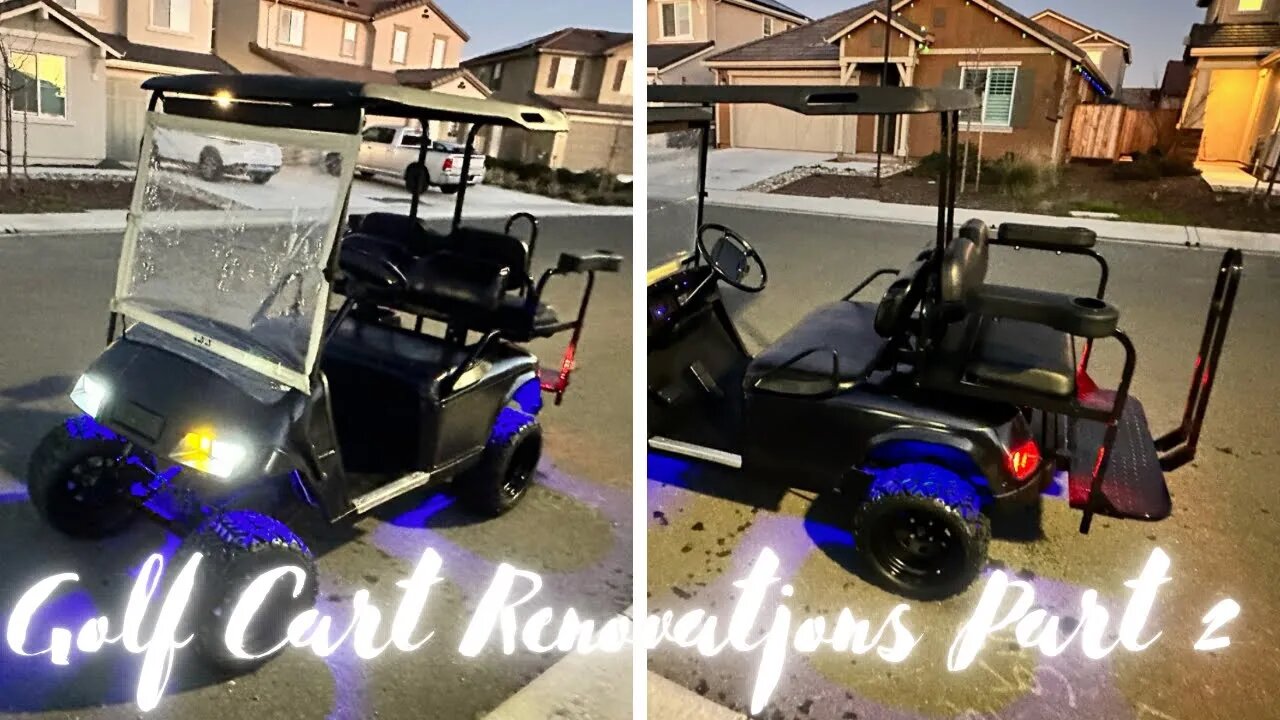
Golf Renovations Part 2 (Windshield, Painting and Back Seat Install)
This is part 2 of our golf cart renovation series. Watch Brandon complete the remaining renovations including painting, adding a windshield and a rear back seat kit. - Sarah
Part 1: Golf Renovations Part 1 (Lift Kit and Headlights Install)
https://youtu.be/rkHgsLidwDU
Vinyl & Fabric Coating Spray Paint: https://a.co/d/azOW5C3
Bondo Body Filler: https://a.co/d/hWTNISp
Spray Gun Kit: https://www.homedepot.com/p/Husky-HVLP-and-Standard-Gravity-Feed-Spray-Gun-Kit-HDK00600SG/203497812
Enamel Auto Paint: https://a.co/d/19PldYz
Watercolor Clear Coat: https://a.co/d/aFg0JWM
Golf Cart Shock Brushing Kit: https://a.co/d/aFg0JWM
Windshield: https://a.co/d/8UgVcDK
Rear Back Seat Kit: https://www.amazon.com/dp/B084MFWNF6?ref=ppx_pop_mob_ap_share
*Not intended for kids or sponsored.*
✨Stay connected with us! ✨
📸 Instagram: https://www.instagram.com/stunningmisadventures/
📌 Pinterest: https://www.pinterest.com/smisadventures/
⭐️ Facebook: https://www.facebook.com/stunningmisadventures1/
SM Posting Schedule:
▷ Wednesday’s: DIY Projects
▷ Saturday’s: Recipes
See ya next time!
Michele, Tori, Sarah & Brandon
DISCLAIMER: Woodworking and the use of power and hand tools can be extremely dangerous. We do not claim to be professionals as we are a family of DIYers. Please realize that you are responsible for understanding the safe use of your tools and techniques. Your safety is your responsibility. We do not accept any responsibility or liability for any injuries, accidents or death that may occur if you attempt to replicate our projects. Stay safe.
The Stunning Fam
-
 2:21:11
Nerdrotic
7 hours ago $11.27 earnedDown the Rabbit Hole with Kurt Metzger | Forbidden Frontier #090
52.2K16 -
 2:41:13
vivafrei
12 hours agoEp. 251: Bogus Social Security Payments? DOGE Lawsduit W's! Maddow Defamation! & MORE! Viva & Barnes
187K230 -
 1:19:23
Josh Pate's College Football Show
5 hours ago $1.70 earnedBig Ten Program Rankings | What Is College Football? | Clemson Rage| Stadiums I Haven’t Experienced
42.6K -
 LIVE
LIVE
Vigilant News Network
10 hours agoBombshell Study Reveals Where the COVID Vaccine Deaths Are Hiding | Media Blackout
2,011 watching -
 1:17:59
Sarah Westall
6 hours agoDOGE: Crime & Hysteria bringing the Critics & the Fearful - Plus new CDC/Ukraine Crime w/ Dr Fleming
26.4K3 -
 45:39
45:39
Survive History
12 hours ago $3.33 earnedCould You Survive in the Shield Wall at the Battle of Hastings?
26.6K5 -
 1:50:28
TheDozenPodcast
11 hours agoViolence, Abuse, Jail, Reform: Michael Maisey
71.4K2 -
 23:01
23:01
Mrgunsngear
1 day ago $4.23 earnedWolfpack Armory AW15 MK5 AR-15 Review 🇺🇸
64.9K12 -
 25:59
25:59
TampaAerialMedia
1 day ago $2.01 earnedUpdate ANNA MARIA ISLAND 2025
38.3K3 -
 59:31
59:31
Squaring The Circle, A Randall Carlson Podcast
13 hours ago#039: How Politics & War, Art & Science Shape Our World; A Cultural Commentary From Randall Carlson
29.9K2