Premium Only Content

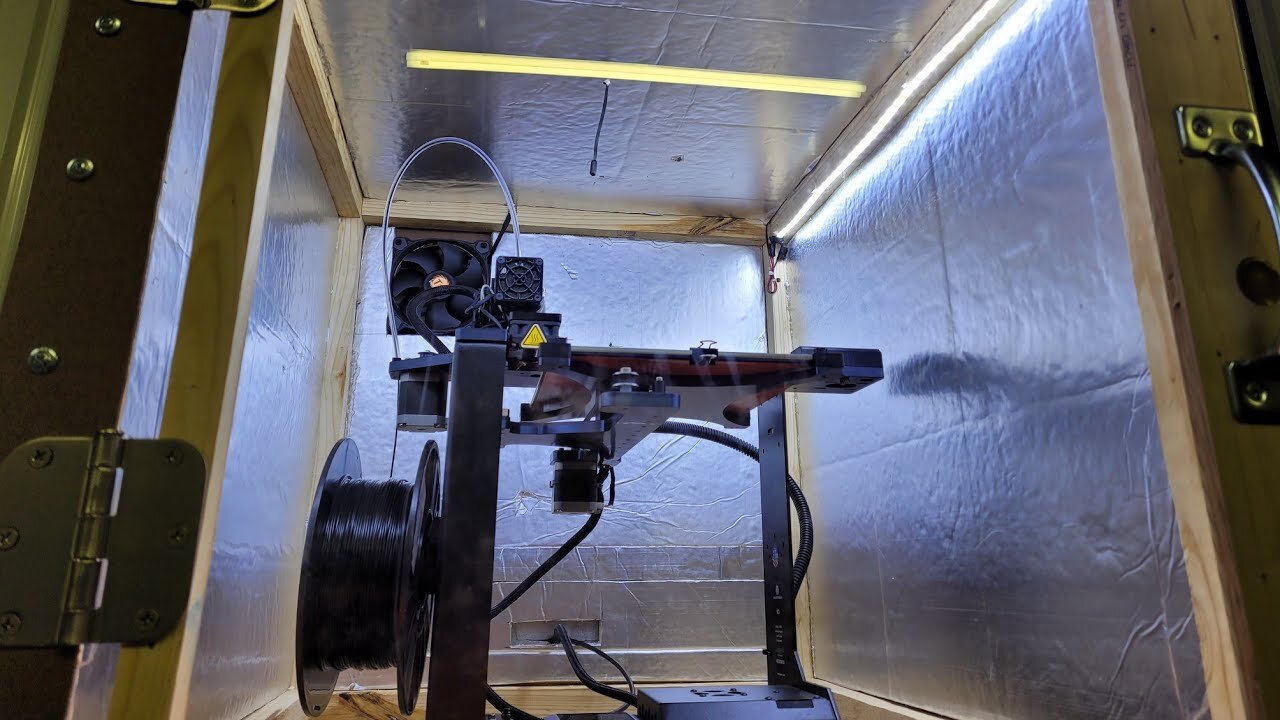
DIY 3D Printer Case ~ An Easy Enclosure to Improve 3D Printing Quality
Here's my easy solution when you have to run a 3D printer in a space that isn't temperature controlled. It's fairly easy to keep a 3D Printer away from drafts or major temperature shifts, but outside in an unheated shop during the winter brings the challenge of maintaining temperature around the print bed to the foreground very quickly.
I think this 3D Printer Enclosure turned out extremely well and I couldn't be more satisfied. Let me know what you think about this enclosure in the comments.
An FDM printer like the one used in this video basically works like a hot glue gun attached to a gantry that slides back and forth with a build platform that moves up and down. This combination of movements allows a very thin bead of melted plastic to be laid down with each pass. This plastic is built up into layers until a 3D Printed part emerges. Large temperature shifts effect the amount of shrinkage that occurs in the plastic during the printing process and excessive shrinkage can cause poor print quality or cause print to detach from the build plate resulting in a completely failed print.
I use a Makergear M3 single extruder printer, I've had it for a few months now and I'm very satisfied. There's a few quirky user interface aspects but it's built like a tank and prints very well.
Some of the specialty components I used in this enclosure are linked to below:
Cooling Fan: https://amzn.to/3quEhSd
LED strip: https://amzn.to/2VLpCEg
12V Power Supply: https://amzn.to/39MOeo4
Thermostat: https://amzn.to/2VH1rXB
Makergear M3 3D Printer: https://amzn.to/2JTUejY
Make sure you follow me on Social Media:
Facebook: https://www.facebook.com/GarageScience
Instagram: @garage_science
-
 10:09:49
Jerry After Dark
19 hours agoHole In One Challenge | Presented by TGL
313K19 -
 3:56:39
Alex Zedra
11 hours agoLIVE! New Game | The Escape: Together
75.8K20 -
 5:01:11
FreshandFit
12 hours agoJoe Budden Arrested For Being A Perv! Tesla Cybertruck Explosion
111K24 -
 2:08:45
Kim Iversen
15 hours agoNew Year, New PSYOP?: The Fort Bragg Connection In The New Years Terror Attacks
89.8K189 -
 1:41:18
Glenn Greenwald
14 hours agoTerror Attacks Exploited To Push Unrelated Narratives; Facing Imminent Firing Squad, Liz Cheney Awarded Presidential Medal | SYSTEM UPDATE #381
124K284 -
 1:00:32
Man in America
16 hours ago🔴 LIVE: Terror Attacks or False Flags? IT DOESN'T ADD UP!!!
108K42 -
 1:02:38
Donald Trump Jr.
18 hours agoNew Year’s Terror, Latest Breaking News with Sebastian Gorka | TRIGGERED Ep.204
229K463 -
 59:59
59:59
The StoneZONE with Roger Stone
13 hours agoAfter Years of Targeting Trump, FBI and DOJ are Unprepared to Stop Terror Attacks | The StoneZONE
84K29 -
 1:26:42
Leonardaisfunny
12 hours ago $6.17 earnedH-1b Visas: Infinity Indians
56.2K29 -
 1:08:33
Josh Pate's College Football Show
16 hours ago $3.35 earnedPlayoff Reaction Special: Ohio State Owns Oregon | Texas Survives | UGA vs Notre Dame Takeaways
48.6K6