Premium Only Content

TLDW #5 - Carving an Aikuchi Tanto Koshirae
**WARNING: This is the longer process version intended for serious students of knifemaking. Watch the overview edit here: https://youtu.be/L8asHTVtyls
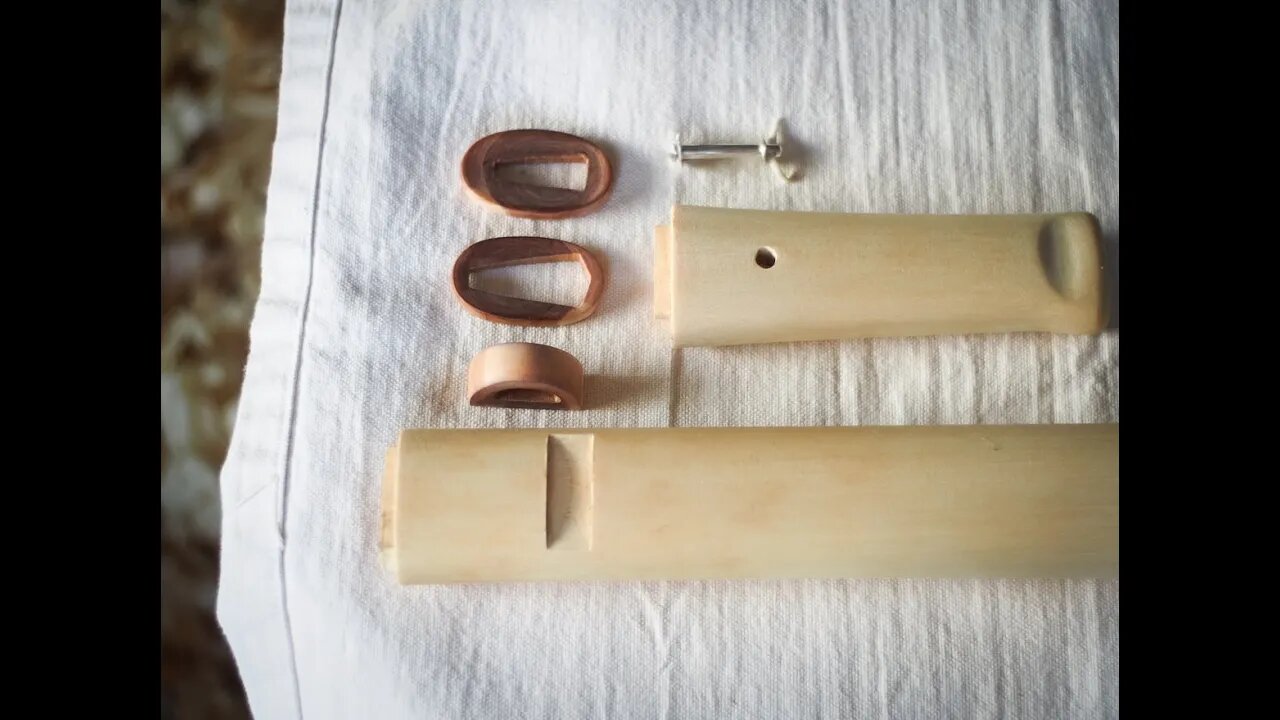
Hand carving a classical tanto style mounting from reclaimed and local natural materials using traditional Japanese woodworking tools.
The wood for the scabbard and handle core is Nootka Cypress, the smaller fittings are Oceanspray ironwood.
A note about the wooden koiguchi: I don't recommend this method with any wood other than Oceanspray ironwood due to its peculiar strength in cross section...wood (or better, horn) grain should run vertically across the opening to add strength to the koiguchi in the correct areas.
The abrasive plant material used for fine sanding/polishing is dried tokusa (polishing grass), known as horsetail in english...the plant cells contain silica and it can be used dried as is or glued to wooden blocks with sokui.
Sokui is rice paste glue, the best tasting rice makes the best glue...using yesterday's rice is the optimal time for mixing and mashing completely before adding any water is recommended...read more about sokui here...
making: http://islandblacksmith.ca/2015/10/making-sokui-rice-paste-glue/
strength testing: http://islandblacksmith.ca/2014/03/sokui-rice-paste-glue-strength-testing/
0:10 #1000 synthetic waterstone
0:30 natural suita stone
Saya (scabbard)
1:20 flattening the blank with kanna (plane)
1:39 carving inside the saya with saya-nomi (scabbard chisel)
2:25 mixing sokui (rice paste glue)
3:15 clamping with a leather strap and wooden wedges
Tsuka (handle)
4:29 carving the mouth of the tsuka with nomi (chisel)
5:53 roughing the corners with nomi
6:31 reducing the block with kanna
7:11 rounding the corners with kanna
7:48 sculpting the shape with kanna
Ki-Fuchi (wooden ferrule)
8:56 sawing the slice
10:01 dishing the face with saya-nomi
Saya
11:08 unwrapping after drying
11:44 tracing the ki-fuchi onto the koiguchi
12:15 reducing the block with kanna
13:12 roughing the corners with nomi
13:43 rounding with kanna
Koiguchi (scabbard mouth)
13:50 tracing the depth with nomi
14:10 outlining the habaki area with kiridashi
14:48 sawing the shoulder
15:38 removing the waste with nomi
16:14 carving the shoulder with nomi
17:13 removing inner waste with nomi
17:31 filing ana to final size
17:54 dishing the face with saya-nomi
18:22 removing outer waste with nomi
Tsuka
19:20 drilling the mekugi-ana with kiri
Kurikata (cord loop)
19:37 polishing with tokusa (horse tail)
20:07 sawing keyway
21:38 removing waste with nomi
Kojiri (tip of scabbard)
23:34 rounding with nomi
24:31 polishing with tokusa
Assembly
25:04 making sokui (rice paste glue)
29:12 finished work
Lacquering
https://youtu.be/09S76DSbbI8
____
See the whole process of making this tanto: http://islandblacksmith.ca/process/making-aikuchi-tanto-kuro-urushi-koshirae/
-
 49:27
49:27
The Connect: With Johnny Mitchell
1 day ago $1.30 earnedThe Truth About Mayo Zambada & The Fall Of The Sinaloa Drug Cartel- Mexico's Last Criminal EMPIRE
5.79K6 -
 4:09:15
PeculiarPineTreePlays Minecraft Livestreams
5 hours ago $4.67 earnedTNT Blast Chamber Progress! - Shenanigang SMP Pancake Edition Ep46 - Minecraft Live Stream
42.2K1 -
 LIVE
LIVE
Tundra Tactical
3 hours agoWhats The Deal With Suppressors?? Are They Protected By The Second Amendment?
734 watching -
 4:03:38
Sgt Wilky Plays
4 hours agoHave some brewskis and playing some games
15.6K2 -
![🔵 GOW RAGNAROK [VALHALLA DLC] *SPOILERS* 🏹⚔ 🛡 - RUMBLE PREMIUM EXCLUSIVE](https://1a-1791.com/video/fww1/2b/s8/1/w/S/q/v/wSqvy.0kob-small--GOW-RAGNAROK-VALHALLA-DLC-.jpg) 4:20:09
4:20:09
Fragniac
7 hours ago🔵 GOW RAGNAROK [VALHALLA DLC] *SPOILERS* 🏹⚔ 🛡 - RUMBLE PREMIUM EXCLUSIVE
30.9K -
 15:09
15:09
Exploring With Nug
13 hours ago $10.12 earnedSad Discovery Found Floating In The Water While Searching the Lake!
43.8K18 -
 LIVE
LIVE
DLDAfterDark
1 hour agoDLD Live! Welcome To The Armory! A Discussion of Guns Gear & Equip.
263 watching -
 2:54:21
Barry Cunningham
7 hours agoBREAKING NEWS: THE ATTACK ON ELON MUSK AND TESLA DEFINES THE DEMOCRAT PARTY!
46.5K41 -
 35:39
35:39
pewculture
20 hours ago $2.59 earnedThe Pew Culture Podcast #15 - Rango
38.8K1 -
 31:05
31:05
MYLUNCHBREAK CHANNEL PAGE
15 hours agoA.I. Chat GPT Destroys History
69.9K68