Premium Only Content

Connecting My Tiny Home Floor Halves And Cutting Floor Boards
I have learned a lot about tiny house construction in the last months and I am back at building my tiny house on wheels.
I am first sealing up the floor joists with insulation all the way to the top. I is a good thing I am doing this on video so that people can catch my mistakes and help out on the way. I would probably not have caught that in time.
I am using some rolls of fiberglass insulation that I had left over from my RV repair to fill in the outer edges of the tiny home floor all the way around the outer perimeter. This will create a nicely selaed off area under the floor.
Due to shifting of the trailer frame from rain I do not trust my level or square right now. Even though on the weekend my friends and I leveled off the trailer and squared the floor and the trailer, things seem off again.
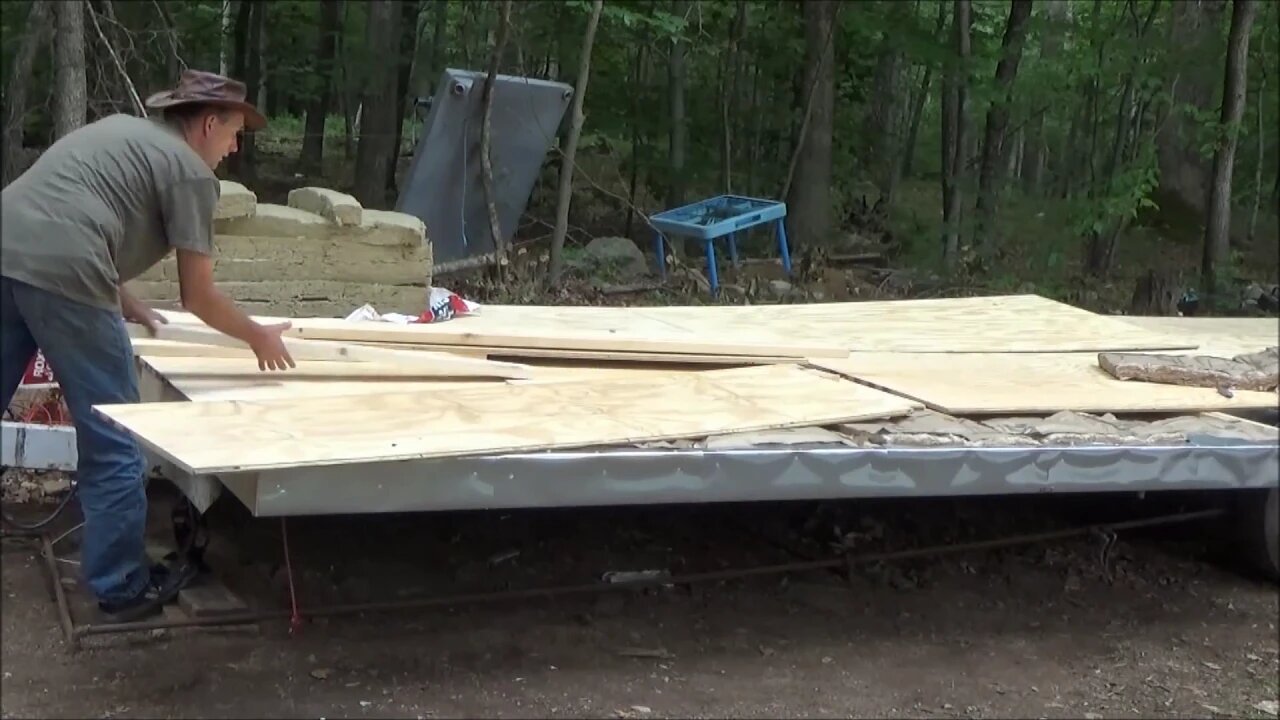
For that reason right now I am only cutting the floor boards to fit and just dry fitting them into place for now.
To rip a 4 x 8 sheet of plywood in half neatly along the 8 foot length I used a board as a circular saw guide so I could get a perfect straight cut. I measured the saw base between the outside edge and the saw blade. It is exactly one inch. So I made markings on my board where I want my cut to be and also one inch away from the cut where my guide board will be clamped. For the first cut I only have to draw a line one time along the length of my plywood. This was so I could check my guide board to see if it was straight. I laid the board along the straight line on my plywood to see if the guide board was straight. It is.
Then I clamped the guide board in place and simply cut a perfectly straight line with my circular saw.
I pulled apart the two halves of my floor so that I could get some liquid nails in there before screwing them together. The tiny home builders book I have been reading actually suggests making your floor frame in three parts but I went with two equal halves.
I used some C clamps to secure the two halves in place while I screwed the them together. I lifted the insulation up out of the way in order to get some screws down lower in the floor as well.
This is the first half of the work I did on Thursday. The rest will follow soon.
Follow my daily progress on the path to self sufficiency on my off grid solar homestead.
https://www.youtube.com/user/techman2015/playlists?view=50&shelf_id=10&sort=dd
Please donate to help keep The Off Grid Project going: https://www.paypal.com/cgi-bin/webscr?cmd=_s-xclick&hosted_button_id=3TQSWXLLRZ6HW
Join The Off Grid Project and The Do It Yourself World forum and share your ideas, tips and projects.
http://www.thediyworld.com/forum
The Off Grid Project is presented by The Do It Yourself World.
http://www.TheDIYworld.com
Experiments and projects in off grid living, alternate energy, survival, hiking and more.
-
 13:57
13:57
TimcastIRL
19 hours agoTrump NUKES IRS After DOGE Investigation, OVER 9000 Employees To Be FIRED
92.5K161 -
 13:35
13:35
Russell Brand
12 hours agoPFIZER JUST MADE THEIR NEXT MOVE AND EXPERTS ARE TERRIFIED
113K222 -
 1:15:57
Victor Davis Hanson Show
22 hours agoOver Here, Over There: the Russo-Japanese War and Trumpian Peace Policy
52.1K31 -
 23:55
23:55
MYLUNCHBREAK CHANNEL PAGE
1 day agoThe Nephilim Are Here
82.9K68 -
 1:00:58
Break The Cycle w/ Joshua Smith
9 hours ago $1.45 earnedBreak The Cycle Ep. 247: Funny Guys w/ Robbie "The Fire" Bernstein
22.5K1 -
 41:26
41:26
TheTapeLibrary
1 day ago $9.40 earnedThe Disturbing Horrors of the Trans-Allegheny Lunatic Asylum
54.7K5 -
 10:07
10:07
Tundra Tactical
10 hours ago $6.31 earnedTRUMP'S HUGE GUN RIGHTS MOVE!
36.6K7 -
 1:53:23
Mally_Mouse
10 hours agoSaturday Shenanigans!! - Crowd Control - Content Warning
27.2K1 -
 17:24
17:24
Exploring With Nug
15 hours ago $3.58 earnedScuba Diving on Underwater Cars Searching For Missing Man!
40.1K1 -
 3:06:12
Jewels Jones Live ®
2 days agoWASTE, FRAUD & ABUSE | A Political Rendezvous - Ep. 110
93K29