Premium Only Content

Building An End Table With Storage Underneath Hinged Lid
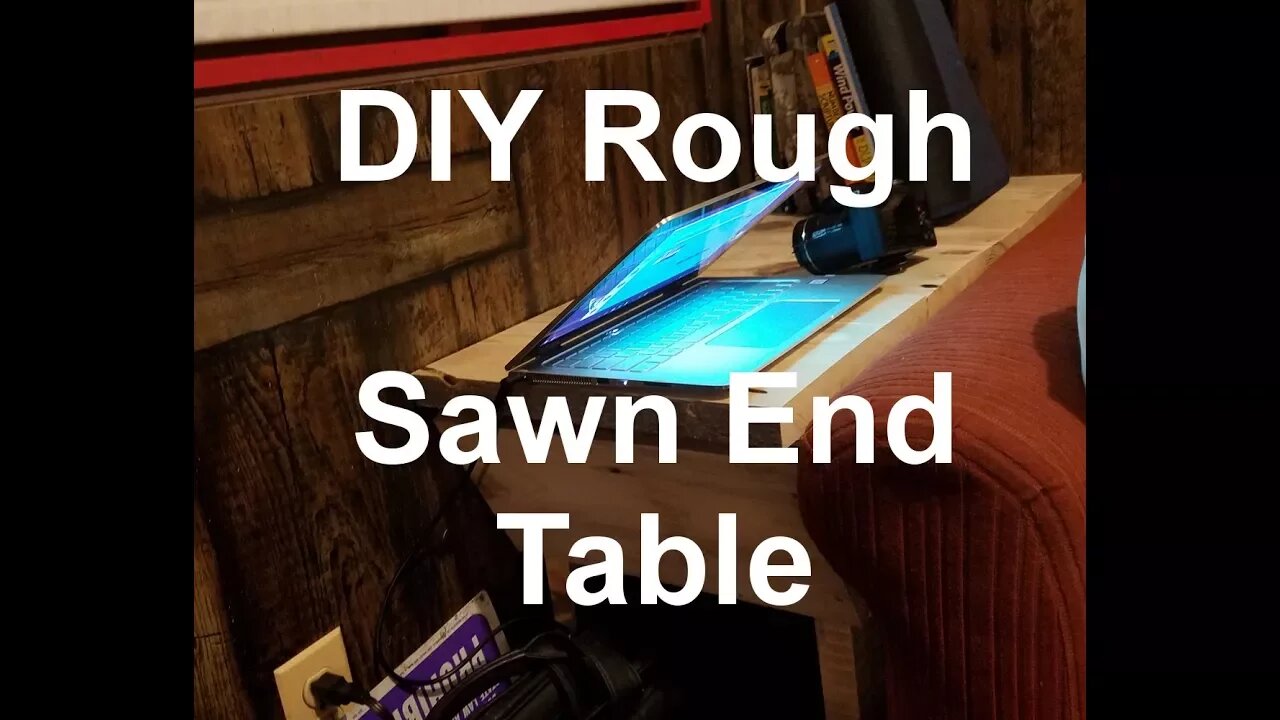
Since we are moving into the tiny house with no storage I am building an end table with an open top lid and storage inside using reclaimed lumber.
I have some very nice, heavy lumber that I got from the local lumber mill. This was cast off lumber which all had flaws of some kind. It was destined to be used as fire wood.
This one huge plank is a true 2x12 and is quite long. I wanted to make a table out of it since I first saw it.
The tiny house has no storage so we must come up with something. All my odds and ends are floating all over the kitchen counter right now and this is not acceptable.
So I have been planning to make an end table with storage inside, under the lid. On top I will make a book shelf because we also have no place for books.
This end table is being made entirely off the grid using the power of the sun. My solar panels feed the wood shop with all the power I need.
I first cut the table top pieces and then tried to plane them but they are too warped and uneven. It will take too long and cut off too much wood to plane them down properly.
So I used the belt sander to smooth out the top pieces.
Next I cut out the pieces that will make the box underneath for storage. For a bit of design I cut the front end on an angle.
I sanded these down as well but left a bit of the rough cut saw marks and some of the color from again.
This wood has old worm holes which also add to its character.
I used screws to hold it all together and then screwed two of the top pieces on. I was going to get all fancy and screw the top boards down from inside but realized it would take up some space inside the storage area so I just went from the top. I counter sunk them and will later plug up the holes with sawdust and glue.
I took a 2 x 5 piece of rough lumber and cut it to size for the legs. Then I ripped them in half length wise on the table saw.
The legs are very rough cut and have a sort of ribbed pattern in them. This is sort of cool and gives some design to them.
By now it was starting to get dark outside so I had to hurry it up some.
I fastened the legs in place using screws and counter sunk them a bit.
I used some scrap wood strips and nailed them into place to hold the bottom of the cabinet in place.
The bottom of the storage cabinet was two strips of 6 inch wide by 1/4 inch thick lumber. I cut the pieces to fit around the table legs. The legs run all the way up inside the cabinet to the top. This gives more space for screws and more strength.
The cabinet will have a book shelf on top so it must be sturdy.
By now it was full dark outside so I had to call it a day. Tomorrow I will finish sanding the rough edges and give it a coat of linseed oil if I can find some.
I brought the entire end table into the tiny house to see how it fits. I love how it makes the place look somehow more finished. It fits perfectly next to the couch.
Now I have a place to put my morning coffee :)
We got a gift in the mail containing a pair of cute winter baby boots. Thank you very much.
We cant wait for the baby to arrive. She should be here any day now.
Thanks for watching. Please Subscribe & follow my daily videos.
Troy
http://www.thedoityourselfworld.com
http://www.theoffgridproject.com
Check out our other channels:
Off Grid Homesteading With Melanie: https://www.youtube.com/channel/UCFRwlShDuXP5WXdtXV15rAQ
The Do It Yourself World Electronics: https://www.youtube.com/channel/UCMIqpFAOBkppGkgrSC11p6Q
TR Tech Tactical & Survival: https://www.youtube.com/channel/UChPdsvwahC2wh8lvWs6ud4g
Note: Copying this video, in part or in full, is a violation of copyright unless the user has express permission from the owner. Violation of this copyright will be pursued to the fullest extent of the law.
-
 16:39
16:39
The Do It Yourself World
7 years agoThruNite Neutron 2C 1100 Lumen USB Chargeable LED Light
32 -
 2:54:02
TimcastIRL
4 hours agoLiberal Media CAUGHT In BOGUS LEAK, Trump DID NOT Fire Mike Waltz, HE PROMOTED HIM | Timcast IRL
157K87 -
 LIVE
LIVE
MyronGainesX
11 hours ago $2.15 earnedSam Seder Embarrasses Ethan Klein, The Truth On MLK's Murder, And Trump's First 100 Days In Review
2,985 watching -
 1:09:38
Man in America
7 hours agoEXPOSED: How Militaries Worldwide Are Engineering DEPOPULATION w/ Todd Callender
24.7K13 -
 LIVE
LIVE
SpartakusLIVE
6 hours agoNEW Update, NEW Weapons, NEW META?!? || Quads in VERDANSK
140 watching -
 LIVE
LIVE
Jokeuhl Gaming and Chat
3 hours agoEmpyrion - Galactic Survival Long Range Jump Aquired
195 watching -
 4:42:30
Right Side Broadcasting Network
1 day agoLIVE REPLAY: President Trump Gives Commencement Address at University of Alabama - 5/1/25
136K18 -
 16:58
16:58
T-SPLY
10 hours agoDems’ Bad News: El Salvador Rejects Abrego, Democrats Fume!
60.9K52 -
 18:56
18:56
Nick Shirley
5 hours ago $1.42 earnedAsking People About Trump’s First 100 Days… How are Americans Feeling?
16.2K23 -
 LIVE
LIVE
NellieBean
4 hours ago🔴 LIVE - COD and Thunder!
104 watching