Premium Only Content

A Journey through Consciousness - RPG Maker MV - YanFly Picture Common Event Plugin in use! - Part 3
Doing flashy designs towards the wanted outcome :3
This is a demo of the full interface I want to make, an interface that will be available during the Personal Battle System's function, so player can look for information throughout the turn-based battle.
No voice, just action, so one can listen to their favorite music, or whatever ^^
Sorry if I was slow at times, I was also watching an LCS stream for Leak of Legends, a Dead by Daylight stream, also farming Arknights materials in the meantime, since i don't mind multitasking XD
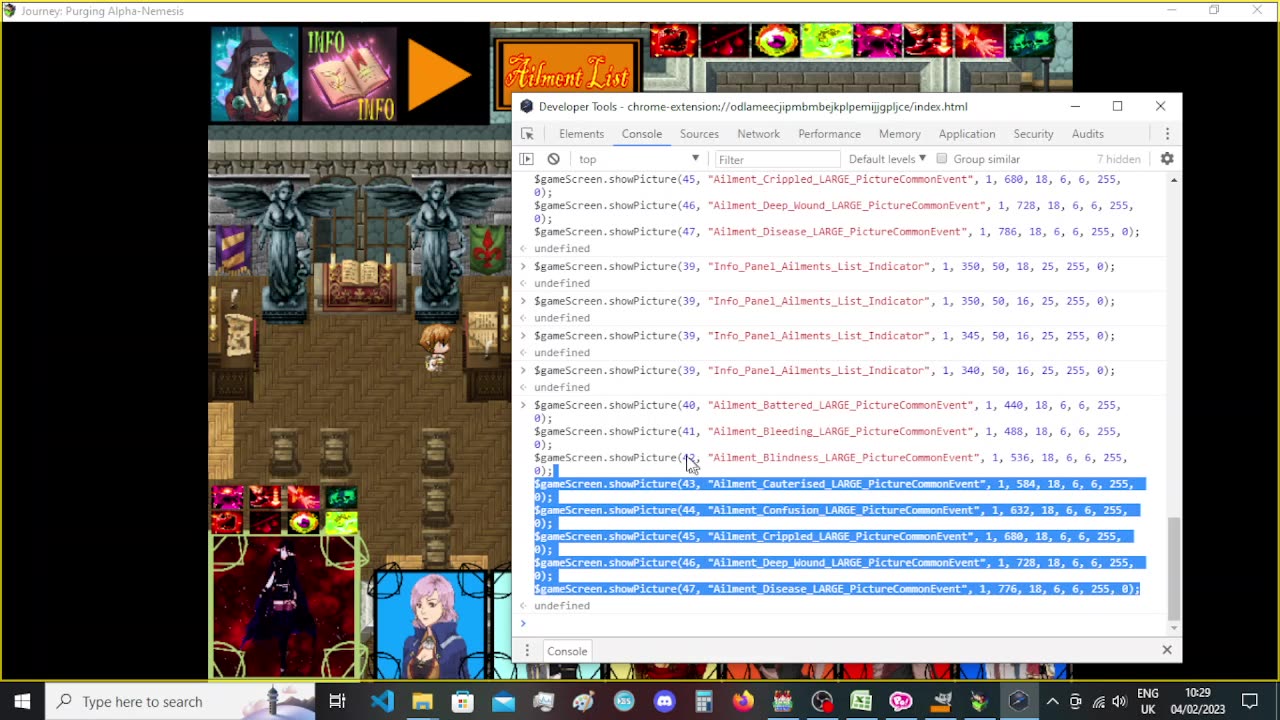
00:00:00 - changing the parameters in the Plugin since the new Tab picture will be displayed. This means that the Common Events associated to the current pictures had to be changed, and 1 Common Event slot had to be moved 1 ID higher.
00:08:00 - starting work on the art part, in Manga Maker CompiPo!
+++ 00:10:13 - creating the Tabs (pictures for Ailment, Positive Effect, Hex and Curse lists);
+++ 00:12:12 for Positive Effects,
+++ 00:13:46 for Hex Part 1,
+++ 00:16:11 for Hex Part 2,
+++ 00:17:20 for Curse Part 1,
+++ 00:17:40 for Curse Part 2.
00:18:55 - exporting the created pictures to actual .png files, then deleting the typical "_000" Manga Maker CompiPo! naming procedure. Exporting takes a while for each, since they were going to be exported specifically in the game's Images folder, which has +4k pictures XD
00:22:10 - adding the 6 pictures in Gimp and adjusting their resolution so as to remove any transparent pixels.
00:37:18 - after this step was done, exporting the pictures and replacing the initial ones.
00:45:26 - preparing to add the new pictures as the Tab, which will require the other pictures to be moved rightwards later on. Also, picture ID change is necessary as well as Common Event ID adjust.
00:48:25 - realigning the 3 columns of Ailments.
00:53:44 - initial TESTING of the Ailments and they work ^^
00:59:10 - starting the work that took me 2 or 3 hours, a part of it, including the corrections were done off recordings, since it got tedious, and despite feeling tired I kept on. (preparation only here).
01:06:26 - preparing to load all the Positive Effect pictures in Gimp to adjust their resolution as well, so as to not have 1 single transparent pixel.
01:08:09 - in ComiPo! I had to save the Positive Effect "comic" as a new one, so that I could make the pictures larger. Only after this could I do the next step in Gimp (This step could've been skipped, however, bigger pictures are better, since the clickable images have to be scaled down a lot, so it's much better if they are bigger initially!)
01:24:46 - before loading the pictures in Gimp I moved them to an empty folder, so that exporting doesn't take so much time to read the large Images folder of the project. And this each time. +1 Neurons for me XD
01:41:40 - deleting the older Positive Effects pictures so as to paste the ones with the desired resolution. After this, I changed the picture names in the Scripts of the Common Event that places the pictures. Since Ailments, Positive Effects, Curses and Hexes will make use of the same picture IDs, the scripts didn't need any other parameter change. Except the picture's name, obviously. Because one needs to see Ailments at the corresponding Tab, and Positive Effects when skipping to the next Tab (for now). See next video (Part 4) for the much wanted result ^^
01:51:10 - first attempt at aranging the code for the tab swapping, something which I eventually changed completely, and had to correct several times (outside of this recording and the next).
Softwares used:
RPG Maker MV
Manga Maker ComiPo!
Gimp
-
 29:50
29:50
The Finance Hub
13 hours ago $0.18 earnedBREAKING: TULSI GABBARD JUST DROPPED A MAJOR BOMBSHELL!!!
3036 -
 11:32
11:32
ariellescarcella
14 hours ago"Being A Lady Boy Is Exciting!" (This Dude Has A Kid)
1281 -
 1:03:33
The Dan Bongino Show
1 day agoSunday Special with Mike Benz, Michael Knowles, Rep. Tim Burchett and Rep. Andy Harris - 02/23/25
318K1.06K -
 1:36:21
Sarah Westall
11 hours agoViolence Erupting in the Panama Canal, Identifying Enemy Infiltration, Psyops Ongoing w/ Michael Yon
83K46 -
 1:56:25
Nerdrotic
13 hours ago $17.86 earnedThe Red Pyramid's Hidden Secrets | Forbidden Frontier #091
64K14 -
 2:08:53
vivafrei
22 hours agoEp. 252: Liberals DISQUALIFY Candidate from Race! DOGE Wins & Loses; Rumble Sues BRAZIL! & MORE!
153K260 -
 1:15:12
Josh Pate's College Football Show
12 hours ago $22.65 earnedCFB’s Top 12 Programs | TV Executives & Our Sport | USC Changes Coming | Early Championship Picks
97.8K3 -
 LIVE
LIVE
Vigilant News Network
16 hours agoUK Government BUSTED in Secret Plot to Extract Your Data | Media Blackout
1,525 watching -
 1:03:32
Winston Marshall
3 days ago"War On Children!" The DEMISE Of The West Starts With Schools - Katharine Birbalsingh
127K68 -
 48:02
48:02
Survive History
19 hours ago $9.24 earnedCould You Survive as a Sharpshooter in the Napoleonic Wars?
77.1K3