Premium Only Content

Replacing a Worn Gear Shift Knob, Part 3
Let's finish off this new gear shift knob and install it.
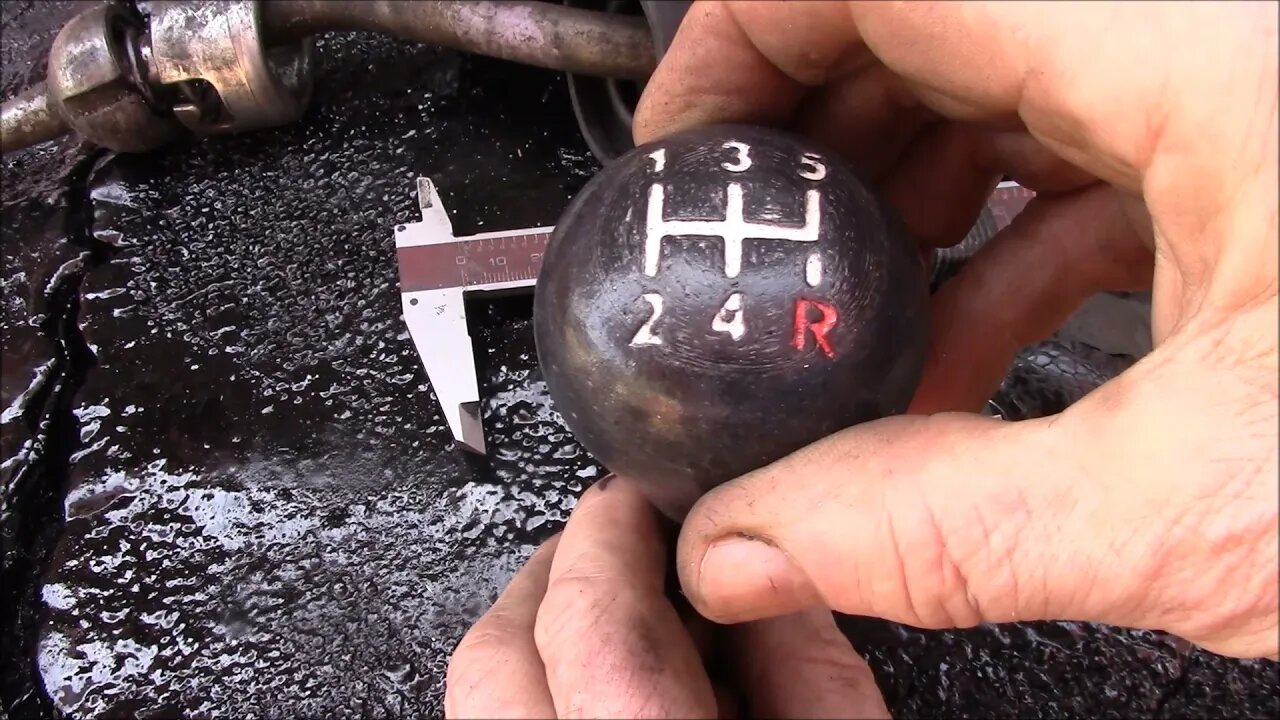
After inserting the threaded shift lever extension, I chucked the knob up in the lathe and used a series of Scotch Brite pads to clean up and smooth out the surface finish. I didn't get it perfectly smooth as I wanted to make this knob look like it's been used for decades. Surface was cleaned with soap and water to remove the sanding residue. Then a spray on clear coat was applied and allowed to dry. If desired, a permanent ink felt pen can be used to color in parts of the shift pattern, I made the "R" red like the factory shift knob.
Then, to install the knob, first screw the threaded end of the insert down tight on the shifter. Then apply some adhesive, such as super glue, epoxy or even construction adhesive, to the outside of the tube and then press the knob down in the desired orientation. This way, the gear shift pattern will be oriented the way you like it.
I really like the feel of this gear shift knob in the hand. It's a very pleasing shape, the rounded top is nice for shifting say from 2-3 or 4-5. Likewise, you can wrap a finger or two under the top to pull back in the shift pattern.
If interested in this shift knob, we can supply the threaded insert if you want to print your own:
https://www.4crawler.com/4x4/ForSale/BodyLiftKit.shtml#ManualTransmissions
Or we can 3D print the knob and you can finish it yourself or we can supply a fully finished, ready to install knob, drop a comment or message us for details.
Subscribe for more content like this
Comment, rate, share & click the bell icon
And as always, thanks for watching
-
 LIVE
LIVE
Mally_Mouse
56 minutes agoLet's Hang!! -- P.O.Box opening! & Stardew Valley pt. 20!
305 watching -
 LIVE
LIVE
The Amber May Show
2 hours agoDeep Dive On The California Fires | Gulf of 'Merica | Alan Sanders
207 watching -
 5:32
5:32
Rethinking the Dollar
6 hours agoHolding 0.001 Bitcoin Could Make You a Millionaire – Here’s Why You’re the Elite
11.5K6 -
 14:23
14:23
Degenerate Jay
8 hours ago $0.21 earnedThe Arkham Batman Is Alive - The Suicide Squad Game Is Dead
8.77K -
 1:06:50
PMG
20 hours ago $0.61 earned"Never trust a government that leads you into the apocalypse"
31.3K4 -
 1:05:15
In The Litter Box w/ Jewels & Catturd
23 hours agoExternal Revenue Service | In the Litter Box w/ Jewels & Catturd – Ep. 720 – 1/15/2025
60.7K25 -
 5:55:09
Benny Johnson
10 hours ago🚨Confirmation Hearings LIVE Right NOW | Pam Bondi, Rubio, John Ratcliffe & More| Deep State PANIC
211K382 -
 6:04:07
Barry Cunningham
1 day agoWATCH LIVE: Pam Bondi Attorney General Confirmation Hearing For w/ Nancy Mace Interview
39.9K22 -
 6:15:44
Robert Gouveia
12 hours agoPam Bondi Confirmation Hearing LIVE! Trump's Nominee to FIX Corrupt DOJ as Attorney General
72.6K30 -
 1:57:41
The Quartering
6 hours agoTrump Just FREED Hostages, Pam Bondi Hearing, TikTok To SHUTDOWN, Bill Burr Gets Woke, LA Fires
64.6K44