Premium Only Content
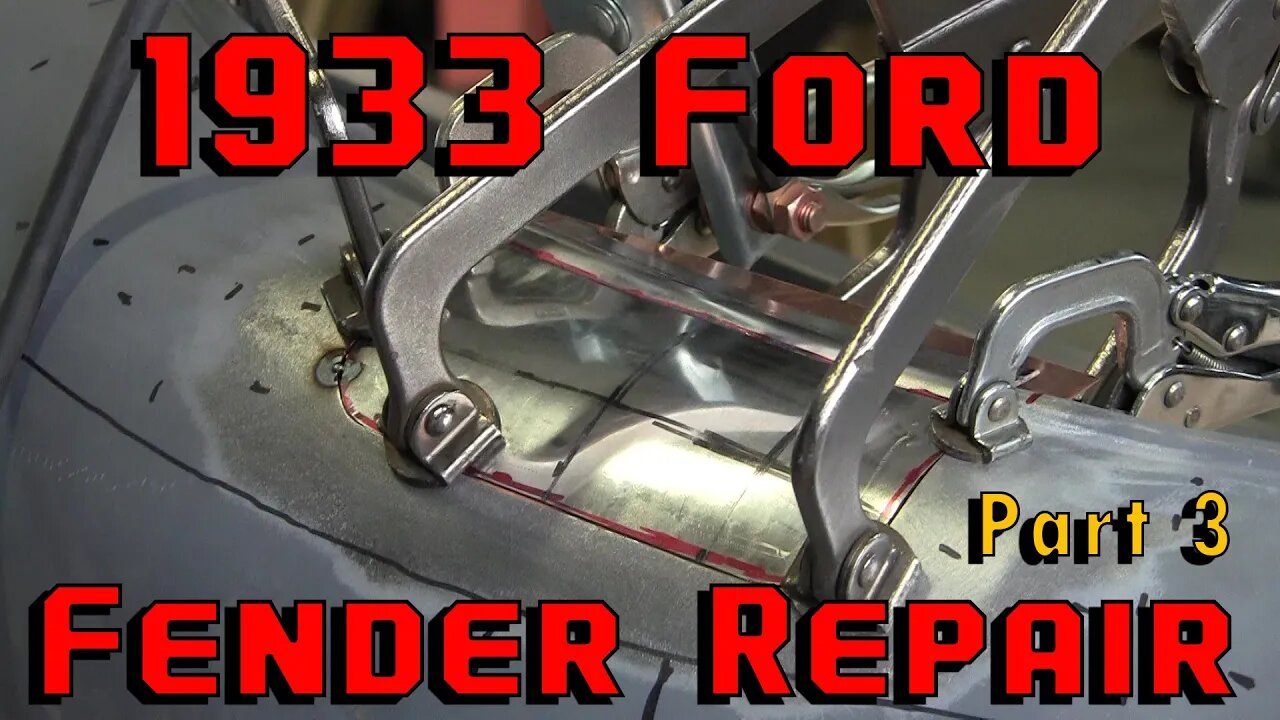
33 Ford Fender (Part 3) The Patch Panel
https://www.proshaper.com
Our Amazon Storefront:
https://www.amazon.com/shop/proshaper
33 Ford Fender (Part 3) The Patch Panel
This video has it all! Now that the Ford fender wire has been repaired, it's time to create the patch panel. Now when we weld the patch panel in, we want to make sure that the fender matches the other fender. To do this Wray fabricates a bar that fits perfectly inside the good fender and then bolt it into the fender we are fixing. This ensures that when we weld, it won't shrink back into itself.
The thickness of the steel is 19 gauge. Wray cuts out a piece about a half inch larger all around the flexible shape pattern to give him a little cheat room. Wray created another Gauge going across the fender to make sure it flows correctly from front to back and left to right.
Using all the information we have Wray slowly massages the patch panel with his hands to give it a slight radius. To make sure the crown is correct, Wray uses our ProShaper Mallet and a leather beater bag to add area to the center of the panel.
Wray cleans up the panel while adding a little more area using our English wheels, both large and small. Now that the panel matches the gauges, Wray uses the tipping wheel to add the bead down at the bottom.
Once this is all complete Wray slowly grinds away the excess material allowing for a tight fit. He finishes it up by tacking that patch panel to the fender and that's it for this video.
The video on Friday will so how we metal finish the weld, fix any dents and by the end it should look perfect!
Email: Wray@Proshaper.com
Website: https://www.proshaper.com
Facebook: https://www.facebook.com/ProShaper/
Instagram: https://www.instagram.com/proshaper/
Twitter: https://twitter.com/ProshaperM
Linkedin: https://www.linkedin.com/company/pros...
-
 4:10
4:10
PerpetualHealthCo
18 hours agoFDA Bans Red Dye No.3
4.13K1 -
 59:57
59:57
Trumpet Daily
20 hours ago $3.73 earnedRemembering Herbert W. Armstrong - Trumpet Daily | Jan. 16, 2025
6.91K12 -
 26:07
26:07
The Lou Holtz Show
14 hours agoThe Lou Holtz Show S 2 Ep 1 | Tony Rice on Championship Leadership and Notre Dame Legacy #podcast
14.3K -
 53:37
53:37
Weberz Way
14 hours agoGOODBYE JOE, TRUMPS CABINET, LA FIRES, & KEEP TIKTOK
8.48K -
 3:07:17
Alex Zedra
11 hours agoLIVE! New Game | Exorcism!??
36K4 -
 6:00:06
SpartakusLIVE
14 hours agoThe Conqueror of Corona || Delta Force LATER
86.8K3 -
 2:17:30
barstoolsports
16 hours ago$250k Winner Revealed With Final Votes And Reunion | Surviving Barstool S4 Finale
136K9 -
 2:05:49
Kim Iversen
14 hours agoTikTok Ban BACKFIRES: Millions Flee To New App Showing The REAL China
123K192 -
 1:35:12
Glenn Greenwald
16 hours agoCNN And Jake Tapper In Deep Trouble In Defamation Lawsuit: With Jonathan Turley; TikTok Ban, Trump's China Policy, And More With Arnaud Bertrand | SYSTEM UPDATE SHOW #390
116K87 -
 12:24
12:24
Dan Bongino Show Clips
17 hours agoPresident Trump Full Interview - 01/16/25
139K308