Premium Only Content
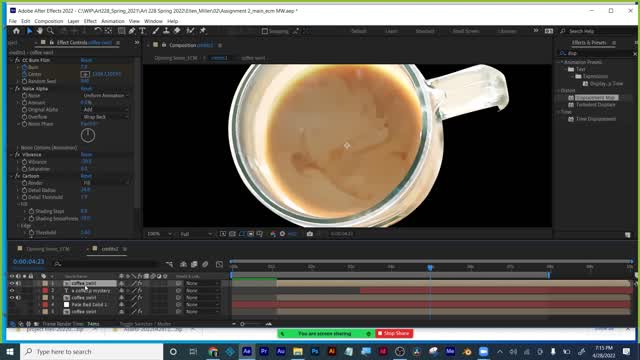
Adobe Premiere and Video Editing Part 1 for Beginners Plus LabTime 04292022
Week 13 Adobe Premiere Video Editing Lecture A
Beginner workflow
Video editing very easy to learn, people will assume you know how to edit video if you know motion design- that is why it is part of this course
Basics of video editing:
Gather all of your footage
Use only best takes and strongest pieces
Use only the parts you need, trim out the unwanted sections and extra frames
What you take out is as important as what you keep in- how much does your story need, and when is it just too much
Come in on a good frame and go out on a good frame
Assemble your cuts in the timeline in the order you want to tell your story the way you want it told- not always told in order it was shot. Some movies are told out of order or backwards
STarting from scratch- hit New Project button
Import footage:
Double click in empty spot in project panel- like in AE
Go file - import - file
Click and drag into the project panel, like in AE
The 4 panels:
Project panel- just like AE this is where you store all of your footage, music, audio files, and motion design and photos
Timeline- where you assemble your clips, just like in AE
Tools for editing keep vertical by timeline
Be in the EDITING workspace
2 monitors at top- Source and Program
Source- video clip before any effects put on it in timeline, the way it came out of the camera
Program monitor- end result. What the viewer will see, all post production work applied, shows spot the playhead is at in timeline. This is just like the composition window in after effects- the movie screen the audience will see when final project is rendered
Audio levels bar
Check footage to see if it was all shot the same
The bare bones of editing recap
Scrub, watch clip, choose where to come in and where to go out on, In and out frames
Grab left and right edge , drag, just like changing layers in AE (Selection Arrow TOOL)
This is the beginner approach to editing, change beginning and end of each clip, now we will move on to a more professional workflow
B. Professional workflow
Pacing and rhythm are crucial in video editing.LIke pauses while we speak. Viewer needs time to absorb things
Watch 2 witch clips
Discuss 2 stories
Camera motion, vs POV style
Now we will begin our professional editing workflow
Project panel- Thumbnail vs list view- storyboarding
Double click on video clip in project panel to open it in the Source MOnitor above project panel
Source monitor
Playhead for scrubbing- in timeline (story) vs source monitor (where you are in the clip selected)
Arrow keys on keyboard explained shortcuts
Getting down to the exact frame is the professional way to edit
I & O in & ut, explain, show buttons as well (every clip has one)
Dark grey viewer won’t see, light grey, will see- like render area in AE (head & tail)
Preview resolution- how to lower it for slower computers
Always shoot more than you need, gives you more choices as an editor, best to leave a few extra seconds at start and end of what you film for transitions if you want to add them in.
Hover over source monitor- click and drag (hand icon) AV grab, just V just A
Drag to timeline from Source monitor
My workflow- seqs, duplicate seqs. Labeling, bins etc.
Blue boxes, layers, add/deleting (up & down arrows depend on this)
Scene detection right click, frame hold
2 sides to a cut, CMND K CNTRL K at playhead (or razor tool)
Moving to another layer
Multi track move tool.
Eye icon hide, mute, solo audio
Multi layer, eye hidden for hiding things, multicam shoot or motion graphics
-
 56:15
56:15
Candace Show Podcast
5 hours agoBREAKING: My FIRST Prison Phone Call With Harvey Weinstein | Candace Ep 153
107K66 -
 LIVE
LIVE
megimu32
1 hour agoON THE SUBJECT: The Epstein List & Disney Channel Original Movies Nostalgia!!
185 watching -
 9:06
9:06
Colion Noir
10 hours agoKid With Gun Shoots & Kills 2 Armed Robbers During Home Invasion
16.9K3 -
 54:28
54:28
LFA TV
1 day agoUnjust Man | TRUMPET DAILY 2.27.25 7PM
19.7K2 -
 DVR
DVR
CatfishedOnline
6 hours ago $1.19 earnedGoing Live With Allen Weekly Recap
21.8K -
 20:10
20:10
CartierFamily
7 hours agoAndrew Schulz DESTROYS Charlamagne’s WOKE Meltdown on DOGE & Elon Musk!
36.8K45 -
 1:36:39
Redacted News
5 hours agoBOMBSHELL EPSTEIN SH*T SHOW JUST DROPPED ON WASHINGTON, WHAT IS THIS? | Redacted w Clayton Morris
145K238 -
 2:03:31
Revenge of the Cis
6 hours agoEpisode 1453: Fat & Fit
48.6K8 -
 2:38:12
The White House
7 hours agoPresident Trump Holds a Press Conference with Prime Minister Keir Starmer of the United Kingdom
160K60 -
 1:01:04
In The Litter Box w/ Jewels & Catturd
1 day agoDrain the Swamp! | In the Litter Box w/ Jewels & Catturd – Ep. 751 – 2/27/2025
91.7K35