-
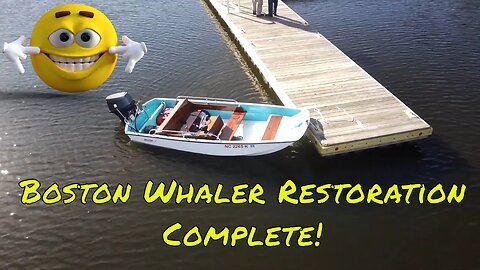
Restoration Complete! Final Boat Cruise for the Year - Boston Whaler 13 Restoration Part 21
Jose's Extreme DIYRestoration complete! Here's the final video in the Boston Whaler 13 restoration series. have some great drone aerial views of the final boat cruise of the year in this little whaler. There's also shots of the sea trials we did to work out the bugs and get some tweaks in. This Boston Whaler was a lot of work to restore but worth the effort. We had a blast even when we were cruising the lake tweaking the engine. All the video was taken on Shearon Harris Lake in NC. Here's a link to the entire playlist: https://bit.ly/2J0AeMs You can also read the written articles here: https://extremediy.org/whaler-13-restoration/ Not all are published but I'll be adding more as time allows. The aerial view with the drone was challenging but fun to do. I'll have at least once video up in the future of me learning to fly a drone. The learning was done with an Eachine E58 drone which is much less expensive and replacement parts are cheap and readily available. I didn't crash that one too bad but did have some spectacular collisions! The aerial sequences were all shot with a Ximi X8SE 2020 drone and included a few "follow me" shots that worked out great (link below). One plus, I didn't drown the drone! Affiliate Links: Fimi X8SE 2020 Quadcopter: https://amzn.to/3kRZmSu Eachine E58 Drone: https://amzn.to/2UOQSkA Non Affiliate Links: Jamestown Distributors: https://www.jamestowndistributors.com/ Totalboat: http://www.totalboat.com/ 0:00 Introduction 0:33 Sea Trials 1:07 Engine Height 1:43 Introduction Aerial 2:26 Aerial Videography 8:00 Thanks and Ending #BostonWhalerRestoration #SeaTrials #FimiX8SE53 views -
How to Install a Sierra Teleflex Safe-T QC Steering System - Boston Whaler Restoration Part 20
Jose's Extreme DIYIn this video, I cover how to install a Sierra/Teleflex Safe-T QC Steering system on my Boston Whaler 13 Restoration. This is a complete installation from Helm to engine. I'll have some videos of the test runs on the water soon! Here's are affiliate link the parts I used in this video: Sierra Teleflex System: https://amzn.to/36QACXr Steering Wheel: https://amzn.to/34HqZYG Similar 85mm Hole Saw: https://amzn.to/34DFRXW In this video I mentioned that I would provide some History on Teleflex ownership. To the best of what I've been able to find, here it goes! Teleflex - Started in 1943, (Spitfire Radio controls, later focused on medical technology Teleflex Divested "Teleflex Marine" Business in 2011, Sold to HIG Capital 2013 Teleflex Marine changes name to "Seastar Solutions" 2014 Seastar solutions sold to American Securities LLC 2017 American Securities sells Seastar Solutions to Dometic Inc 2019 Dometic Groups changes name of "Seastar Solution" to Dometic Marine And technically that's where it stands now. Although one interesting fact is that Sierra International, who makes quality and dependable marine engine parts is part of the Seastar Dometic group. I could not find any information regarding that! 0:00 Introduction 0:22 Installing the Helm 6:00 Installing the Helm Bracket 7:00 Helm Bracket Torque 110-146 Inch Pounds 8:10 Helm Torque Specs 75-110 Ft Pounds 10:24 Installing the Wheel 11:12 Wheel Torque 240-430 inch Pounds 12:45 Installing the Teleflex Cable 13:40 Greasing the Teleflex Steering Rod 15:30 Installing the Cable to the Helm 17:20 Connecting Steering Rod to Engine 18:08 Wrapup #TeleflexSteering #BostonWhaler #Sierra37 views -
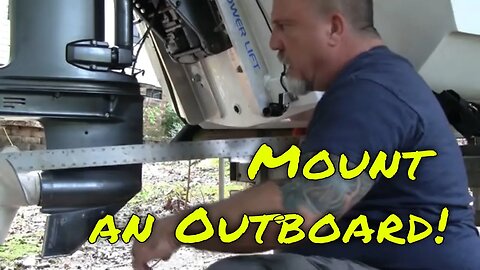
How to Mount an Outboard - Set Height Correctly and Rig - Boston Whaler 13 Restoration Part 19
Jose's Extreme DIYIn this video I'll be mounting a Yamaha Outboard and CMC Jack Plate / Riser Plate. I'll cover the correct Outboard mounting height (relative to the cavitation plate) as well as rigging the Outboard. I'm getting close to finishing this Boston Whaler 13 Restoration. Should have it in the water soon! How to mount an outboard, set height and rig correctly. Here are a few affiliate links to product I used in Mounting this Outboard Motor: CMC Jack Plates: https://amzn.to/30d9cHi 0:00 Intro 1:10 Explanation of Transom Bolt Holes 3:33 Drilling the Transom 6:50 Raising the Engine Height 8:13 Correct Mounting Height 10:16 Routing Yamaha 703 Controller Cables 12:26 Connecting Power Cables to Yamaha Outboard 15:08 Connecting Controller Cabling 16:40 Connecting Throttle and Shift Cables 20:42 Mounting Outboard Remote Controller 21:46 Starting and Testing the Outboard Motor #outboardmotor #JackPlate #OutboardHeight #MountingOutboar #RiggingOutboard #YamahaOutboard #BostonWhalerRestoration32 views -
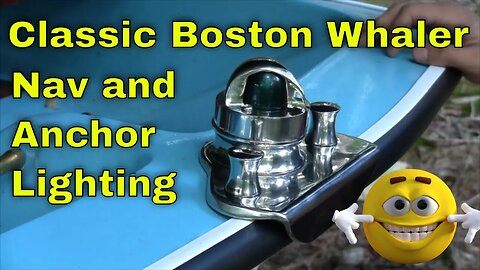
Boat Navigation Light and Anchor Light LED Mods and Wiring - Boston Whaler Restoration - Part 18
Jose's Extreme DIYWatch how I modified the Bow and Anchor light for this Whaler 13 restoration. The navigation light is a stainless reproduction that came with a terrible led, I found a perfect replacement socket and led for it! I used a Perko anchor light and modified it to fit the traditional Whaler stern light fittings. I also used SAE 12v connectors for the anchor light which are much cleaner and waterproof than the traditional terminal strip. Here are some affiliate links to parts I used in this video: Bow Light: https://amzn.to/3jrppzL Stern Light Stanchion Mount: https://amzn.to/2D8aACC SAE Power Socket Sidewall Port: https://amzn.to/3gFVbHw SAE Extension Cable: https://amzn.to/3b9AZg2 Replacement Socket Nav Light: https://amzn.to/3hGWqay Nav Light LED Bulb: https://amzn.to/3lv3SIs LED Stern Light Replacement: https://amzn.to/32BCNuf Non-Affiliate Links: Stern Light (33") https://bit.ly/2YNwzX415 views -
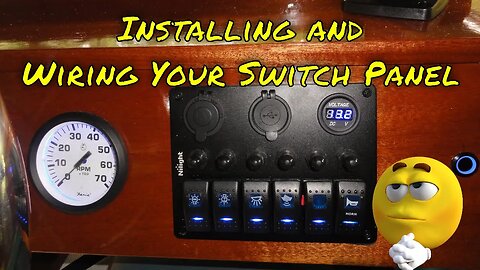
How to Install and Wire a Boat Switch Panel - Boston Whaler Restoration - Part 17
Jose's Extreme DIYWatch how to install and wire a switch panel on this classic Boston Whaler 13 Restoration. As part of this, I also install a Faria tachometer and a relay to power the entire helm with a push of a button. I did this while the wood was still on the bench, making it easier to cut out the necessary holes. I use IP67 Waterproof connectors to wire in the lights and bullet connectors for the main power to the console. Below are Affiliate Links to items I used in this video: Switch Panel: https://amzn.to/3aRUSIa Ratcheting Crimp Tool: https://amzn.to/31qRocR Closed Barrel Crimp Tool: https://amzn.to/3jmm6Kn Dorman Relay https://amzn.to/2FMkECC Mini Horn: https://amzn.to/3hD1a1f Push Button Switch: https://amzn.to/32kX2MD Expandable Sleeve: https://amzn.to/32A0Iun Terminal Blocks: https://amzn.to/3knL1Nx Crimp Connectors: https://amzn.to/2CSaHlE Bullet Connectors: https://amzn.to/31qgF6R Link to Amphenol ATM Series IP67 Connectors: https://bit.ly/31tuZf317 views -
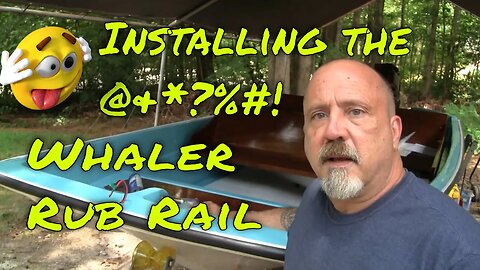
Installing the Rub Rail and Decals - Boston Whaler Restoration Part 16
Jose's Extreme DIYHere's a video on how to install the rub rail on a Boston Whaler boat restoration. I also apply the official Boston Whaler decals in the appropriate locations. There was at least one mistake made along the way and I cover how to avoid making the same mistake when installing a boat rub rail. These whalers used a 3 part rub rail system. I opted to use only two of the parts which gives me the look and protection I was looking for. I used a heat gun to help with radiusing the vinyl rail. Two thing about using the heat gun, use the lowest setting if possible to not deform or damage the rail and use gloves! Parts List (affiliate Links) GE Silicone: https://amzn.to/3gpE2SY 10x1" 316 SS Screws https://amzn.to/2D5363w Rigid Drill Set: https://amzn.to/2D9ZVHy Heat Gun (similiar to the one I used) https://amzn.to/33hXwW0 Husky Mini Clamps https://amzn.to/3gzDXMV NON Affiliate Links: Decals: http://www.magicbrushsign.com (Authorized Boston Whaler Decal Source) Rub Rail: https://www.integritymarinecorp.com/ Parts R1078 and F87866 views -
Installing the Mahogany Super Sport Interior - Boston Whaler Restoration Part 15
Jose's Extreme DIYHow to Install a Classic Boston Whaler 13 Mahogany Interior. In this episode, I'll be installing the Super Sport Mahogany Interior that Bob Latourelle made for me. All of the Mahogany has been varnished and is ready for the install. I did run into a small hitch with the storage compartment and had to trim it a bit to get it to fit correctly. I think this is mostly because of the interior hull for this year model, the interior is probably for later model year Boston Whaler 13's. In any event, this DIY boat restoration is coming together fast at this point so expect a few videos in the near future on finishing it! You can read the written version of this video here: https://extremediy.org/installing-the-boston-whaler-interior-restoration-part-15/ Here are links to some affiliate links for items that you might consider in your Boat Interior Installation: Simpson Marine Screws: https://amzn.to/3sruLjq SS Countersunk Washers: https://amzn.to/3lRFT6L GE Silicone: https://amzn.to/3chU2Hc 3m 4200: https://amzn.to/3d4u0WZ #BostonWhalerRestoration #BostonWhalerInterior18 views -
Priming & Rolling NOT Tipping Topside Paint on Hull ! - Boston Whaler 13 Restoration - Part 14
Jose's Extreme DIYWatch how I finish coat hull by priming & rolling and NOT tipping Topside Paint. Yep, I just rolled it on! Two coats of TotalBoat two part epoxy primer and 4 coats of Interlux Perfection two part polyurethane. I was able to work around the weather (too hot and humid) for a finished product that I think is close too if not professional looking! Kudos to Russel Brown's book, Rolling Perfection who writes extensively about this technique. You can read the written version of this article here: https://bit.ly/36kHavJ Here is a list of items I used in this phase of my Boston Whaler Restoration: TotalBoat TotalProtect https://amzn.to/2NELUU0 Interlux Perfection: https://amzn.to/31vta1x Ridgid Random Orbital Sander https://amzn.to/3fBIOwP 320 Paper for Sander https://amzn.to/31tJYpp Arroworthy Foam Roller https://tinyurl.com/y7xpwjsh Wooster T1Z Roller Cover: https://amzn.to/2YKzGzn Highlights of the video if you want to skip ahead: I'm lucky I caught a mistake at 17:05. Russel Brown's Technique, that's at 10:05 The modified final technique I used go to 19:33 #InterluxPerfection #RussellBrown #TwoPartPolyurethane21 views -
How to Fair and Prep the Hull with Epoxy Primer - Boston Whaler Restoration - part 13
Jose's Extreme DIYThe next step in the Boston Whaler Restoration is to fair and sand the hull to prepare it for it's final finish paint. I also use a first coat of Totalboat Epoxy Barrier coat to highlight the defects and fair and sand those to provide the smoothest surface possible for the final finish coats of Interlux Perfection. One interesting note on where there was missing foam and soft spots. After some discussion with knowledgeable friends, we've concluded that the most likely cause was running the boat at speed with a compromised hull. The water entering the hull under those conditions would act like a power washer, eroding the foam. Regarding the PC-11 vs Marine-Tex here are affiliate links to the two there is a SIGNIFICANT price difference! You can read the written version of this video here: https://bit.ly/2QluIUO Marine Tex 14 oz. https://amzn.to/3hbY0BK PC-11 Marine Epoxy https://amzn.to/3hcCigQ Affiliate links to other products used in this video: Flexible Long Board https://amzn.to/3f6ruih Ridgid Random Orbital Sander https://amzn.to/3fBIOwP Fairing Compound: https://amzn.to/2XKsiSZ Total Protect Barrier Primer https://amzn.to/3f8Ih4k29 views -
Hull Restoration and Damage Repair - Boston Whaler Restoration - part 12
Jose's Extreme DIYIn this video I deal with and do a hull restoration and damage repair to the outside port side chine that had major damage on this Boston Whaler 13. One of the side chines was completely compromised and I needed to do a comprehensive hull repair. You could see that it had been repaired before but in the state it was in, there had to have been major water intrusion. Ironically enough, there's no evidence of water in the hull (weight) but there are major voids (foam) and soft spots in the areas where the water would have come in. I suspect that when operated at speed, water came in through the void with great force and basically power washed the foam out! Here is a link to the written version of this video: https://bit.ly/3fCKHYO Here are some affiliate links to the materials I used: 1.5 oz Fiberglass Mat https://amzn.to/2yUCNLg TotalBoat 5:1 Slow Epoxy: https://amzn.to/2wV9Vla Milled Glass: https://amzn.to/3bTYuZw Finned Roller: https://amzn.to/2MhqZ8S Ridgid Random Orbital Sander https://amzn.to/3fBIOwP Wen Polisher Sander: https://amzn.to/39Yd0zH41 views