-
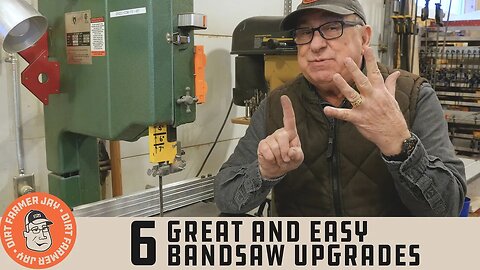
6 Great and Easy Bandsaw Upgrades
DDirtFarmerJayBandsaws are great tools and they can be made even better with these 6 simple enhancements that cost very little to nothing! #bandsaw #woodworkingtools #woodworking Buy your DFJ T-Shirt, Cap, or Coffee Mug at https://www.dirtfarmerjay.com/shop I love my 16” (41 cm) bandsaw. It’s older but keeps on working well. The more I use it, the more it unlocks its secrets. As good as the tool is straight from the manufacturer, there are 6 things I’ve done to enhance its performance or to make it easier or more accurate to use. Better Drive Belt. I got rid of the standard v-belt that came with the machine and replaced it with a link belt. It’s stronger, quieter, and offers as much or more traction on the pulleys as the standard belt does. Get them from: https://www.harborfreight.com/vibration-free-link-belt-43771.html?_br_psugg_q=link+belt https://www.woodcraft.com/products/4-foot-of-1-2-link-belt Stronger Wheel Tension Spring. When you adjust the tension of the blade, the wheel or crank isn’t directly attached to the top wheel hub shaft. Instead, it compresses a heavy-duty spring that then lifts the top wheel, increasing the distance between the top and bottom blade wheels to create tension on the blade. The spring has a bit of give to allow the blade to run smoother. The stock spring on many machines is “wimpy” and won’t allow you to get the amount of tension you need on the blade. This is an easy fix with the affordable stronger springs on the market. Here are a few: https://www.leevalley.com/en-us/shop/tools/power-tool-accessories/56055-cobra-coil-tensioning-spring?item=86N5001 https://carterproducts.com/band-saw-products/band-saw-tension/cobra-coiltm Saw Tension Crank. My saw is a 16” model, and because of that, fast release and set tension lever handles are not available for it. The tension handle was on top of the saw above the top wheel. It was difficult to reach and was at an angle that actually hurt my wrist. Frankly, there was too much temptation to leave the blade tensioned between uses. That’s not good for the saw or the blade. I installed a Big Horn Tension Crank - what a difference! While not as speedy or convenient as a swing lever would be, this is a MASSIVE improvement over what came stock with the machine. The thread on the shaft of the crank fit into the wheel lift block perfectly and now I faithfully release the tension on the machine at day’s end and set it to go back to work the next time around. To learn more, visit: https://www.bighorncorp.com/big-horn-14330-band-saw-tension-crank To see the basic steps to modify and install the Big Horn Tension Crank, watch our episode: COMING SOON! If you have a 14” model and it doesn’t have a fast set and release handle for blade tension, you should get one. You’ll get to work faster with the correct blade tension, but with tension off when the saw is not in use. Here’s an example of one of these 14” Bandsaw Tension and Release Levers: https://carterproducts.com/band-saw-products/band-saw-tension/quick-releaser Olson® Cool Block Blade Guides. My saw came equipped with round rod guides of hardened steel that pressed on both sides of the blade. It works, but not as well as Cool Block Guide. As the name says, they run cooler and are semi-slippery. They come in various sizes and are very reasonably priced: https://www.olsonsaw.net/shop/zona-hand-tools/lubricants/cool-blocks-band-saw-blade-guides/ Urethane Tires. Your saw’s blade doesn’t run directly on the metal wheels inside the covers. Instead, there is a “tire”, comprised of a rubbery material, that is stretched around the wheel and smoothed in place to get as consistent thickness around the wheels as possible. Many saws, like mine, have rubber tires, which dry out and crack pretty quickly. I upgraded to urethane tires, which will last much longer and run smoother. They take a special technique to get them installed. You can see how I installed them here: https://youtu.be/om6Q8zZBKjs You can get these tires at Sulphur Grove Tools: https://sgtool.com/product-category/urethane-band-saw-tires/ Guide Height Markings. I got tired of estimating how high the guide bottom was above the saw table or having to have the actual piece of stock to set the guide height to allow the stock to pass under it. Michael Fortune, an ongoing contributor to the magazine “FineWoodworking” had the perfect solution shown in a recent article. Although not mentioned, it’s there in some of the photos that accompany the article. Using 3 of my “1-2-3” blocks, I placed various combinations under the guide and then marked a line and number for each distance off the table from 1 to 7 inches. This cost me nothing, but it sure is handy! Now I can instantly set the desired heights and estimate ½ inches as well. Cool! JUST DO IT YOURSELF! Instagram: https://www.instagram.com/dirtfarmerj Facebook: https://www.facebook.com/dirtfarmerjay68 views
